ASSEMBLY
90.700.100
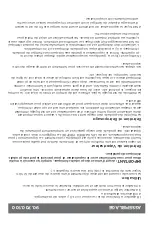
1. Check inside tank for any foreign objects.
2. Install gun clips using screws.
3. Attach hose to the discharge port of the diaphragm pump using plastic
clamp provided.
4. Install drain cap and washer. Install tank lid tether.
Operation
Operating power is obtained directly from a 12V DC source. Be sure to connect the
red to the positiove (+) source and attach the black to the negative (-) source.
IMPORTANT
:
Before spraying chemicals, fill the tank half full of plain water to
allow familirization with the sprayer and to prevent waste of expensive chemicals.
Sprayer Maintenance
A Sprayer is a carefully designed and built machine that should provide many years
of reliable service of properly cared for, the main rule in caring for any sprayer is:
KEEP IT CLEAN. Neglect costs dollars in repairs, wasted spray material and premature
replcaement of the sprayer.
Cleaning & Storage
Most spray materials are highly corrosive. The most important aspect of long
depndable service from the sprayer is a thorough cleaning immediately following
each use. In addition, the residue of one type of chemical could cuase an undesirable
effect when a different chemical is used for a different purpose.
The most effective cleaning method is to pump several rinses of clean water through
the tank, pump, hoses, boom, spray gun, etc. A neutralizing agent as a solution of
Nutra-Sol, a detergent or household ammonia as recommended by the chemical
manufacturer can assist in removal of a persistant chemical. When the system is
thoroughly cleaned drain the tank, suction line, pump, hoses, etc.
The following steps should be followed for the maintenance and storage of your
sprayer:
1. Wash and flush out sprayer after completion of each phase of your program. Flush
out sprayer when chaning chemicals if there is a possibility of the chemicals being
incompatible. Use of a detergent is advisable if the chemical manufacturer does not
make specific cleaning recommendations. Flush system completely, including nozzles.
Never use metal objects to open cloged nozzles.
2. Clean sprayer thoroughly before storing at the end of the spraying season.
Permanent type antifreeze added to the final rinse will leave a rust inhibiting film
in parts of the sprayer.
Summary of Contents for AGRI EASE 90.700.100
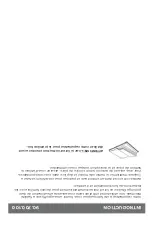
Page 1: ...90 700 100 Spot Sprayer Operations Parts Manual Purchase Date Dealer Model No Serial No...
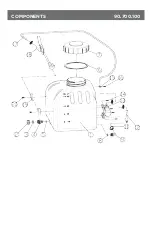
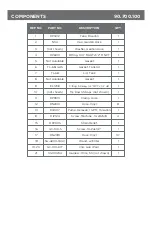
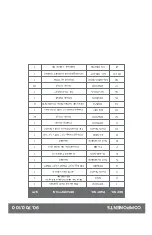
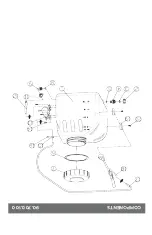
Page 4: ...COMPONENTS 90 700 100...
Page 6: ......
Page 8: ...COMPONENTS 90 700 100...
Page 12: ......


