background image

14

GB

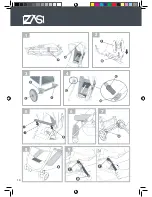
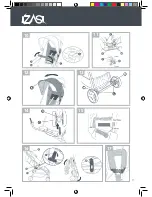
ASSEMBLING YOUR STROLLER

OPENING THE STROLLER

Unlock the fold latch A.

Grab the parent’s handle B and pull upward until the 

stroller opens fully with an audible click. Make sure the 

stroller locks in the open position.

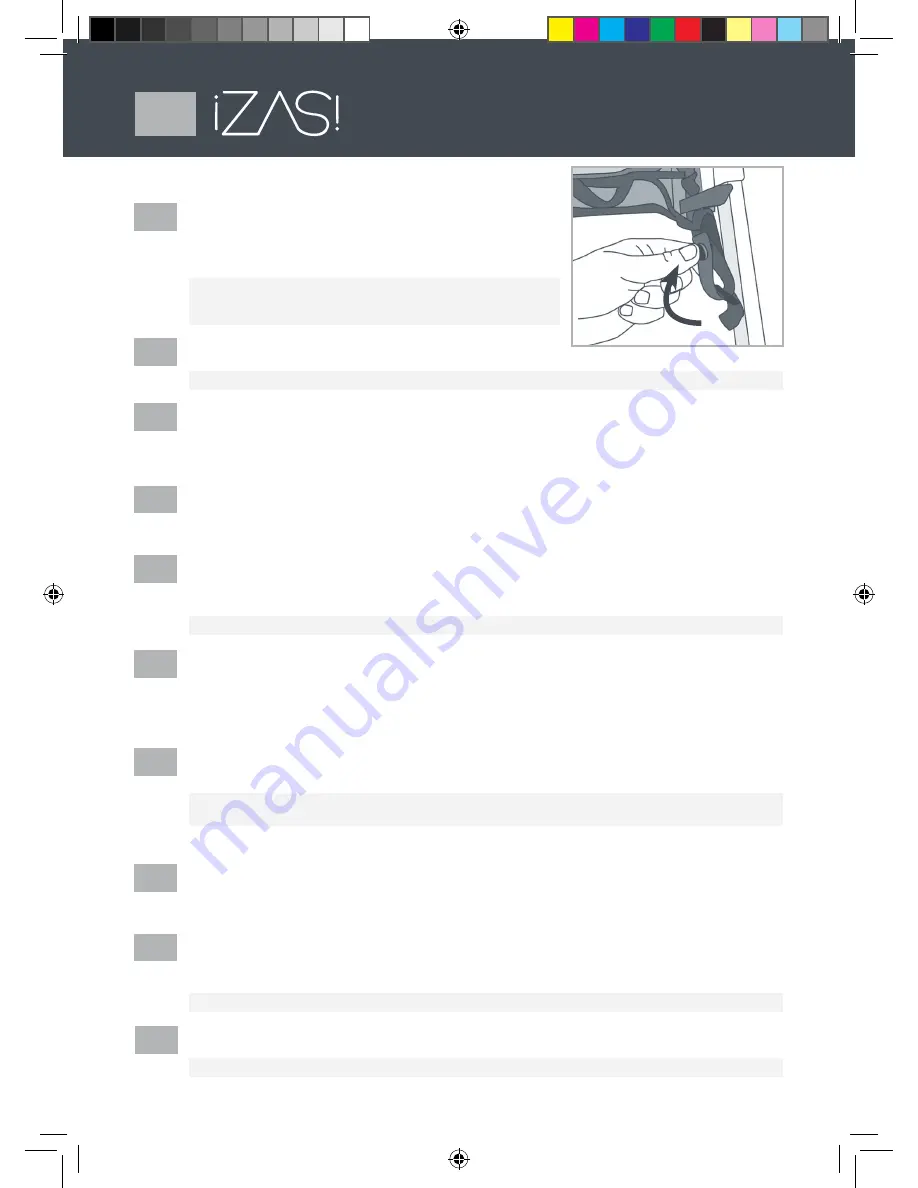
WARNING Fasten the safety strap, under the folding 

device, before use. Lift and shake the stroller to make 

sure it is locked completely.

FRONT WHEELS ASSEMBLY

Front wheel assembly C into the front frame leg D until it locks into place with an audible click. 

CAUTION To remove swivel wheels, press locking tab and slide the wheel off the leg.

REAR WHEELS ASSEMBLY

Install the rear wheels E on the rear axle assembly F.

Make sure each wheel locks into position with an audible click. Pull the rear wheels to make 

sure they are locked securely. 

* Not available on all models.

ATTACHING THE CANOPY

Install a canopy pivot G into each canopy mount H until it locks into place. Pull upward on the 

canopy to make sure it is securely installed.

Fasten the velcro located on both sides.

ATTACHING THE GUARDRAIL

Install the child’s tray I onto the tray mounts J.

Make sure the tray locks into position with audible clicks. Pull on the child’s tray to make sure 

it is locked into place.

CAUTION Pull on each side of the tray to make sure it is completely attached.
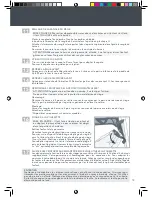
LEG REST ADJUSTMENT

1. Pull up the leg rest to horizontal position.

2. Pull adjust tab forward to release leg rest to lower position.

USING YOUR STROLLER

USING THE BRAKES

Step on the rear brake levers A to lock the rear wheels on the stroller.

To release the brakes, lift up on the brake levers.

CAUTION Always engage the brakes on the side of handle when parking the stroller.

Push the stroller forward to ensure that the brakes are properly engaged. 

* Not available on all models.

USING THE SWIVELS WHEELS

Some models feature swivel locks that improve handling over rough ground.

To keep wheels from swiveling, pull up on the swivel lock levers B.

Push down the swivel locks to restore the swivel action.

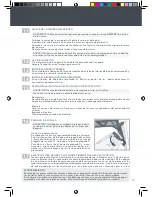
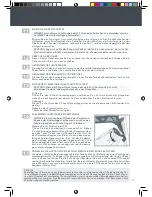
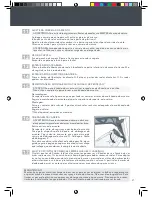
USING THE RECLINING BACKREST

To recline seat, press the strap release button on the adjuster C and allow seat to recline.

To raise the seat, hold the D-ring D, then press the release button and slide the adjuster C 

toward the seat.

WARNING To avoid serious injury, DO NOT raise or recline seat with child in stroller.
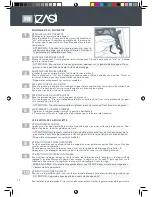
USING THE GUARDRAIL

To open the guardrail E, pull a locking tab F on either side of the guardrail.

CAUTION You can open the guardrail from either side.

To remove the guardrail E, pull both tabs and remove the guardrail from the stroller.

1

2

3

4

5

7

6

8

10

9

Summary of Contents for ZAS

Page 1: ...INSTRUCCIONES GEBRAUCHSANWEISUNG INSTRUÇÕES INSTRUCTIONS INSTRUCTIONS ISTRUZIONI ...

Page 2: ... pronto como el niño se pueda sentar por sí mismo ADVERTENCIA Usar siempre el sistema de retención ADVERTENCIA Este producto no es adecuado para correr o patinar No utilice nunca accesorios que no hayan sido aprobados por BE COOL Este cochecito sólo puede ser usado por un niño La masa máxima permitida de la cestilla portaobjetos nunca puede superar lo indicado en la cestilla 4 kg Tenga cuidado al ...

Page 3: ... COOL This pushchair may only be used by one child at the same time The maximum load carried in the basket must never exceed the limit indicated on the basket 4 kg Take care when going down escalators as the rear safety catch may come undone COMPLIES WITH EUROPEAN SAFETY REGULATIONS EN 1888 2012 The parking device shall be engaged when placing and removing the children Any load attached to the han...

Page 4: ... Überprüfen Sie ob die Befestigungsvorrichtungen der Babywanne oderdes Sitzes vor ihrem Gebrauch richtig aktiviert sind HINWEIS Dieses Produkt ist weder zum Laufen noch zum Surfen geeignet Verwenden Sie nie von BE COOL nicht genehmigte Zubehörteile Dieser Buggy darf nur von einem Kind benutzt werden Das maximal zugelassene Gewicht des Tragekorbs für Gegenstände darf nie das dort angegebene Gewicht...

Page 5: ...nacelle ou du siège sont correctement enclenchés avant usage AVERTISSEMENT N utilisez pas ce produit lorsque vous faites du jogging ou des promenades en rollers N utilisez jamais des accessoires non approuvés par BE COOL Cette poussette peut uniquement être utilisée par un seul enfant à la fois Le contenu du panier porte objets ne doit jamais dépasser le poids maximal indiqué 4 kg Lorsque vous emp...

Page 6: ... assento estão corretamente ativados antes de usar os mesmos ADVERTÊNCIA Este produto não é adequado para correr ou patinar Não utilize nunca acessórios que não tenham sido aprovados pela BE COOL Este carrinho só pode ser utilizado por uma criança A massa máxima permitida da cesta porta objetos nunca pode superar o indicado na mesma 4 kg Cuidado ao descer escadas mecânicas pois poderá desbloquear ...

Page 7: ...ano correttamente attivati prima dell uso ATTENZIONE Questo prodotto non è adatto per la corsa o il pattinaggio Non utilizzare mai accessori che non siano stati approvati da BE COOL Questo passeggino può essere usato da un solo bambino alla volta Il peso massimo consentito per il cestino portaoggetti non può mai superare quello windicato sul cestino stesso 4 kg Fare attenzione se si scendono scale...

Page 8: ...8 ...

Page 9: ... Waist Belt 9 Crotch Belt 10 Brake Lever 11 Footrest 12 Basket 13 Swivel Lock Lever 14 Recline Strap 1 Lenker 2 Haube 3 Klappverschluss 4 Haubenhalter 5 Schutzpolster 6 Schutzbügel 7 Gurtbefestigung 8 Hüftgurt 9 Schrittgurt 10 Bremshebel 11 Fußstütze 12 Korb 13 Dreharretierungshebel 14 Neigungsgurt 1 Guiador 2 Capota 3 Fecho de dobragem 4 Suporte da capota 5 Acolchoado de proteção 6 Barra de prote...

Page 10: ...10 10 1 4 3 5 8 9 7 6 2 ...

Page 11: ...11 10 13 12 14 16 17 15 11 ...

Page 12: ...ltar los frenos levante las palancas de freno ATENCIÓN Ponga siempre el freno del lateral del mango cuando aparque la silla de paseo Empuje la silla hacia delante para asegurarse de que el freno está correctamente colocado No disponible en todos los modelos USO DE LAS RUEDAS GIRATORIAS Algunos modelos cuentan con bloqueos de ruedas giratorias que facilitan su manejo sobre terrenos irregulares Para...

Page 13: ...eje que el niño se deslice o se levante No use nunca las correas que estén rotas o desgastadas USO DE LA CAPOTA Tire del gancho de la capota K hacia delante para extender la capota Empuje la capota hacia el mango para cerrarla EXTRAER LA RUEDA TRASERA Pulse el botón de liberación de la rueda L localizado en la parte inferior de la palanca de freno M y a continuación saque la rueda del eje EXTRAER ...

Page 14: ...it is locked into place CAUTION Pull on each side of the tray to make sure it is completely attached LEG REST ADJUSTMENT 1 Pull up the leg rest to horizontal position 2 Pull adjust tab forward to release leg rest to lower position USING YOUR STROLLER USING THE BRAKES Step on the rear brake levers A to lock the rear wheels on the stroller To release the brakes lift up on the brake levers CAUTION Al...

Page 15: ...ropriate locations in the seat cushion Fasten the velcro Not available on all models FOLDING THE STROLLER WARNING Care must be taken when folding or un folding stroller to prevent finger injury in hinge areas Take the child out of the seat Unfasten the safety strap under the seat Pull the seat fold lock P inward while pulling upward on the in seat fold strap Q Lock the fold latch R To unfold the s...

Page 16: ...m Spieltablett um seine richtige Anbringung sicherzustellen ACHTUNGZiehenSieanjederSeitedesTabletts umsicherzustellen dassesvollständiginstalliertist EINSTELLEN DER BEINSTÜTZE 1 Heben Sie die Beinstütze bis in die waagerechte Position 2 Ziehen Sie die Einstelllasche nach vorne um die Beinstütze erneut herunterzusenken GEBRAUCH DES KINDERWAGENS VERWENDUNG DER BREMSEN Treten Sie auf die Hebel der Hi...

Page 17: ...en oder verschlissen sind GEBRAUCH DER HAUBE Ziehen Sie den Haken der Haube K nach vorne um die Haube aufzumachen Schieben Sie die Haube zum Griff hin um sie zu schließen ABNEHMEN DES HINTERRADES Drücken Sie auf den sich auf der Unterseite des Bremshebels befindenden Entriegelungsknopf M des Rades L und ziehen Sie anschließend das Rad von der Achse ab ABNEHMEN DES DREHBAREN VORDERRADES Drücken Sie...

Page 18: ...du plateau pour s assurer qu il est bien mis en place AJUSTEMENT DU REPOSE JAMBES 1 Relever le repose jambes jusqu à la position horizontale 2 Poussez vers l avant la languette d ajustement pour le baisser de nouveau UTILISATION DE LA POUSSETTE UTILISATION DES FREINS Appuyer sur les pédales de frein arrière A pour bloquer les roues arrière de la poussette Pour libérer les freins lever les pédales ...

Page 19: ...AGE MONTAGE DE LA PROTECTION MATELASSÉE ATTENTION Si la protection est fendue ou cassée il ne faut pas l utiliser Ne pas utiliser la poussette sans la protection matelassée du siège Démontage Détacher le harnais à 5 points et retirer toutes les sangles par la partie matelassée du siège Tenir la partie matelassée par la partie supérieure et enlever le velcro Montage Passer les sangles du harnais à ...

Page 20: ...ÇÃO Puxe em cada um dos lados da bandeja para comprovar se está totalmente instalada AJUSTE DO APOIO DE PERNAS 1 Levantar o apoio de pernas até à posição horizontal 2 Puxar a pestana de ajuste para a frente para o voltar a baixar USO DA CADEIRA DE PASSEIO USO DOS TRAVÕES Pise as alavancas de travagem traseiras A para bloquear as rodas traseiras da cadeira de passeio Para soltar os travões levantes...

Page 21: ...AGEM DO ACOLCHOADO DE PROTEÇÃO ATENÇÃO Se o acolchoado do assento estiver rasgado ou danificado não o utilize Não utilize a cadeira de passeio sem o acolchoado do assento Desmontagem Desaperte o arnês de 5 pontos e puxe por todas as correias através do acolchoado do assento Segure o acolchoado do assento pela parte superior e desaperte a do velcro Montagem Passe as correias do arnês de 5 pontos at...

Page 22: ...hi per assicurarsi che sia ben montato ATTENZIONE Tirare ciascun lato del vassoio per assicurarsi che sia perfettamente montato REGOLAZIONE DEL POGGIAPIEDI 1 Portare il poggiapiedi in posizione orizzontale 2 Tirare in avanti la leva di regolazione per abbassarlo di nuovo USO DEL PASSEGGINO USO DEI FRENI Abbassare le leve del freno posteriori A per bloccare le ruote posteriori del passeggino Per ri...

Page 23: ...NTAGGIO DELL IMBOTTITURA PROTETTIVA ATTENZIONE Se l imbottitura della seduta è strappata o rotta non utilizzarla Non utilizzare il passeggino senza l imbottitura della seduta Smontaggio Sganciare l imbottitura a 5 punti e tirare tutte le cinture attraverso l imbottitura della seduta Afferrare l imbottitura della seduta nella parte superiore e sganciare il velcro Montaggio Far passare le cinture de...

Page 24: ...BYNURSE S A Empresa perteneciente el Grupo Jané Mercaders 34 Pol Ind Riera de Caldes 08184 Palau Solità i Plegamans Barcelona Tel centralita 34 93 703 18 00 www babybecool es info babybecool es IM 1895 00 ...

Reviews: