background image

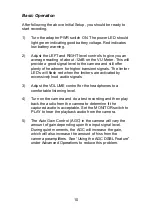
Basic Operation 


After following the above Initial Setup, you should be ready to 
start recording. 


1) 

Turn the adapter PWR switch ON. The power LED should 
light green indicating good battery voltage. Red indicates 
low battery warning. 

 
2) 

Adjust the LEFT and RIGHT level controls to give you an 
average reading


of about -12dB on the VU Meter. This will 

provide a good signal level to the camera and still offer 
plenty of headroom for higher transient signals. The limiter 
LED’s will flash red when the limiters are activated by 
excessively loud audio signals 

 
3) 

Adjust the VOLUME control for the headphones to a 
comfortable listening level. 

 
4) 

Turn on the camera and do a test recording and then play 
back the audio from the camera to determine if the 
captured audio is acceptable. Set the MONITOR switch to 
PLAY to hear the playback audio from the camera. 

 
5) 

The Auto Gain Control (AGC) in the camera will vary the 
amount of gain depending upon the input signal level. 
During quiet moments, the AGC will increase the gain, 
which will also increase the amount of hiss from the 
camera preamplifiers. See “Using the AGC DSBL Feature” 
under Advanced Operations to reduce this problem. 


10

Summary of Contents for DXA-SLR PRO

Page 1: ...SLR PRO Professional XLR Adapter for DSLR Cameras This operating manual explains the adapter function settings and how to use the adapter to record audio into the camera BeachTek Inc 2012 Operating Ma...

Page 2: ......

Page 3: ...o adapter for DSLR cameras available today This adapter is packed with features to enable you to record professional audio directly to your camera x Before using this high quality device please read t...

Page 4: ...wide variety of audio devices including wireless systems mixers sound boards and professional condenser microphones that require 48 volt phantom power to operate The inputs are transformer balanced f...

Page 5: ...re it is acceptable DO NOT activate phantom power for dynamic microphones condenser microphones that do not operate on phantom power wireless receivers mixing boards or any unbalanced device as it may...

Page 6: ...s Before You Begin 1 Supplied Accessories 1 Quick Setup Guide 2 Adapter Connectors and Controls 4 Setup Guide 7 Basic Operation 10 Advanced Operation 12 Features 13 Specifications 14 Warranty Informat...

Page 7: ...playback on the camera to ensure that the audio is captured as expected Most cameras do not have a headphone jack to monitor what is being recorded 3 Please read and understand the use of the AGC DSB...

Page 8: ...9 Set the LIN MIC PH switches to x MIC for self powered microphones or wireless systems x PH for microphones that require phantom power x LIN for mixers x DO NOT activate phantom power when attaching...

Page 9: ...the VU Meter The LIMITER LEDs should flash red when activated by the audio signals 15 Plug your headphones into the PHONE jack on the adapter and adjust the VOLUME control to a comfortable level Ensur...

Page 10: ...w battery voltage MONITOR Switch Selects headphone monitoring from either the microphones during recording or playback audio from the camera AGC DSBL Switch Disables the Auto Gain Control feature in t...

Page 11: ...Selects either 12 or 48 volt phantom power for condenser microphones that require phantom power to operate LEFT and RIGHT Controls Individual adjustment controls to adjust output levels on each chann...

Page 12: ...nced XLR inputs attach to professional microphones or other audio gear such as wireless systems or mixers and sound boards OUT Output jack for connection to the camera MONITOR IN Input jack for connec...

Page 13: ...e underside of the camera Carefully turn the adapter mounting knob on the front panel to the right to screw the adapter squarely into the camera Snug the adapter to the camera but do not over tighten...

Page 14: ...may cause damage to both the adapter and connecting device 3 Set the 12V 48V switch to either 12 or 48 volt power for condenser microphones that require phantom power to operate Many microphones will...

Page 15: ...es you should normally set the switch to S for stereo to keep each channel separated 8 Set the AGC DSBL switch to the left so that it is deactivated 9 Set the LEFT and RIGHT level controls fully count...

Page 16: ...d when the limiters are activated by excessively loud audio signals 3 Adjust the VOLUME control for the headphones to a comfortable listening level 4 Turn on the camera and do a test recording and the...

Page 17: ...nt thing to remember when recording audio is to set the audio levels correctly as explained in this manual Setting the levels too low will give you a poor signal to noise ratio and lead to poor result...

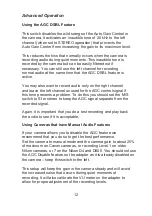
Page 18: ...tone presents a problem To do this you should set the M S switch to S for stereo to keep the AGC signal separate from the recorded signal Again it is important that you do a test recording and play ba...

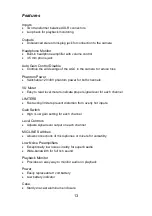
Page 19: ...y to read level meters indicate proper signal level for each channel LIMTERS x Fast acting limiters prevent distortion from overly hot inputs Gain Switch x High Low gain setting for each channel Level...

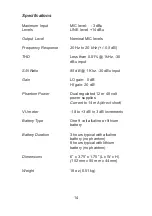
Page 20: ...put Gain LO gain 0 dB HI gain 20 dB Phantom Power Dual regulated 12 or 48 volt power supplies Current to 14 mA direct short VU meter 18 to 3 dB in 3 dB increments Battery Type One 9 volt alkaline or l...

Page 21: ...not cover damage resulting from accident alteration misuse or abuse The device must be sent to our service center at your expense Should you require service please contact us first before returning t...

Page 22: ......

Page 23: ......

Page 24: ...Contact Information Address BeachTek Inc 480 Osprey Avenue Kelowna British Columbia Canada V1Y 5A5 Phone 778 478 9872 Email info beachtek com Website www beachtek com...

Reviews: