background image


www.beast-tek.com

        Parasite Build Guide


Page 1


Parasite V1.2 

BUILD GUIDE 

www.beast-tek.com 


Summary of Contents for Parasite V1.2

Page 1: ...www beast tek com Parasite Build Guide Page 1 Parasite V1 2 BUILD GUIDE www beast tek com ...

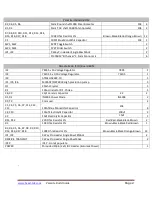
Page 2: ...lator 79L05 1 IC3 ATMEGA328P PU 1 IC1 IC5 IC6 MCP602 MCP6022 High precision op amp 3 Q1 20mhz Crystal 1 R1 100uH Inductor R F Choke 1 C8 C9 22pf Ceramic Capacitor 22 2 D1 D2 IN4004 Power Diode IN4004 2 RX TX 3mm Led 2 C1 C4 C5 C6 C7 C11 C12 C13 100nf Blue Monolithic Capacitor 104 8 C2 C10 100uf Electrolytic Capacitor 100uf 2 C3 10uf Electrolytic Capacitor 10uf 1 R11 R12 220 Ohm Resistor 1 Red Red ...

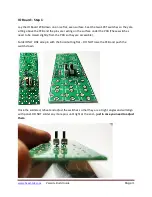
Page 3: ... on the surface under the PCB These switches need to be raised slightly from the PCB so they are accessible Solder ONLY ONE side pin with the board sitting flat DO NOT raise the PCB and push the switch down Once the soldered reheat and adjust the switches so that they are at right angles and will align with panel DO NOT solder any more pins until right at the end just in case you need to adjust th...

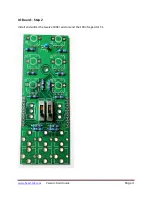
Page 4: ...www beast tek com Parasite Build Guide Page 4 IO Board Step 2 Install and solder the twelve 100K resistors and the 100nf capacitor C1 ...

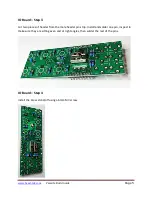
Page 5: ...rd Step 3 Cut two pieces of header from the male header pin strip Install and solder one pin inspect to make sure they are sitting even and at right angles then solder the rest of the pins IO Board Step 4 Install the brass stand off using a 6mm M3 screw ...

Page 6: ...www beast tek com Parasite Build Guide Page 6 IO Board Step 5 Seat the potentiometers SPDT switches and jacks carefully on the PCB Do NOT solder yet ...

Page 7: ...www beast tek com Parasite Build Guide Page 7 IO Board Step 6 Carefully slide the panel over the components Place the nuts onto the SPDT switches and finger tighten ...

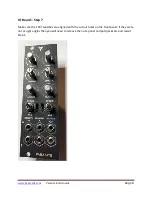
Page 8: ...uild Guide Page 8 IO Board Step 7 Make sure the 1P4T switches are aligned with the cut out holes on the front panel If they were not at right angles then you will need to remove the nuts panel and pots jacks etc and revisit Step 1 ...

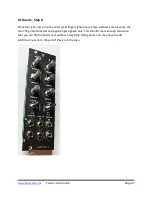
Page 9: ...outer jacks finger tighten only Place washers and nuts onto the two T18 potentiometers and again finger tighten only This should create enough tension so that you can flip the board over without everything falling apart You may have to add additional nuts on to the pots if this is not the case ...

Page 10: ...d Step 9 Flip the module over gently and solder one pin of each jack pot and switch Flip the module on its side and make sure everything is sitting flush and neatly If something is misaligned you can reheat the single pin and make adjustments as necessary ...

Page 11: ...e attention to the 1P4T switches you don t want to solder the single pin holding it in until last heating that pin will make the switch fall out and you will need to go back to step 1 Slowly and carefully solder the pins of the 1P4T switches they are sitting flush with the bottom of the PCB so make sure you get a good solid solder joint ...

Page 12: ...www beast tek com Parasite Build Guide Page 12 IO Board Step 11 Once everything is soldered flip the board back over and tighten all of the nuts past finger tight and then install all of the knobs ...

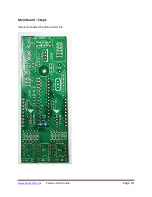
Page 13: ...www beast tek com Parasite Build Guide Page 13 Main Board Step 1 Install and solder the 10K resistor R2 ...

Page 14: ...www beast tek com Parasite Build Guide Page 14 Main Board Step 2 Install and solder the two 220R resistors R11 and R12 ...

Page 15: ...www beast tek com Parasite Build Guide Page 15 Main Board Step 3 Install and solder the twelve 100K resistors R3 R4 R5 R6 R7 R8 R9 R10 R14 R16 R17 and R18 ...

Page 16: ...www beast tek com Parasite Build Guide Page 16 Main Board Step 4 Cut the IC socket strips to the appropriate sizes Install and solder them ...

Page 17: ...www beast tek com Parasite Build Guide Page 17 Main Board Step 5 Install and solder the 20mhz crystal Q1 ...

Page 18: ...www beast tek com Parasite Build Guide Page 18 Main Board Step 6 Install and solder the two 1N4004 power diodes D1 and D2 along with the 100uh inductor R1 ...

Page 19: ...www beast tek com Parasite Build Guide Page 19 Main Board Step 7 Install and solder the two 22pf capacitors C8 and C9 ...

Page 20: ...www beast tek com Parasite Build Guide Page 20 Main Board Step 8 Install and solder the eight 100nf capacitors C1 C4 C5 C6 C7 C11 C12 and C13 ...

Page 21: ...www beast tek com Parasite Build Guide Page 21 Main Board Step 9 Cut two three pin pieces from the male header strip Install and solder into TRANSMIT and RECEIVE ...

Page 22: ...www beast tek com Parasite Build Guide Page 22 Main Board Step 10 Install and solder the power header ...

Page 23: ...beast tek com Parasite Build Guide Page 23 Main Board Step 11 Install and solder the two LEDs RX and TX The picture below shows the orientation the anode is the longer pin and the cathode is the shorter pin ...

Page 24: ...www beast tek com Parasite Build Guide Page 24 Main Board Step 12 Install and solder the two 100uf capacitors C2 and C10 along with the 10uf capacitor C3 ...

Page 25: ...com Parasite Build Guide Page 25 Main Board Step 13 Install and solder the 7805 voltage regulator IC2 and the 7905 voltage regulator IC4 Pay close attention to the orientation on the silkscreen and the picture below ...

Page 26: ...www beast tek com Parasite Build Guide Page 26 Main Board Step 14 Cut two nine pin pieces of female header socket from the female header strip Install and solder into place ...

Page 27: ...www beast tek com Parasite Build Guide Page 27 Main Board Step 15 Install the three MCP602 op amps IC1 IC5 and IC6 ...

Page 28: ...ll the ATMEGA328P CPU into IC3 socket After a final check of all work for shorts missing or poor solder joints etc next join the boards together and secure with the 6mm M3 screw Please refer to the user guide for instructions on connecting your Parasite to its Amoeba host ...

Reviews: