1/2019
Installation, Operation, and
Maintenance Instructions
www.beaumontmanufacturing.com
Model LC10 Maintenance Cont.
Pilot Change
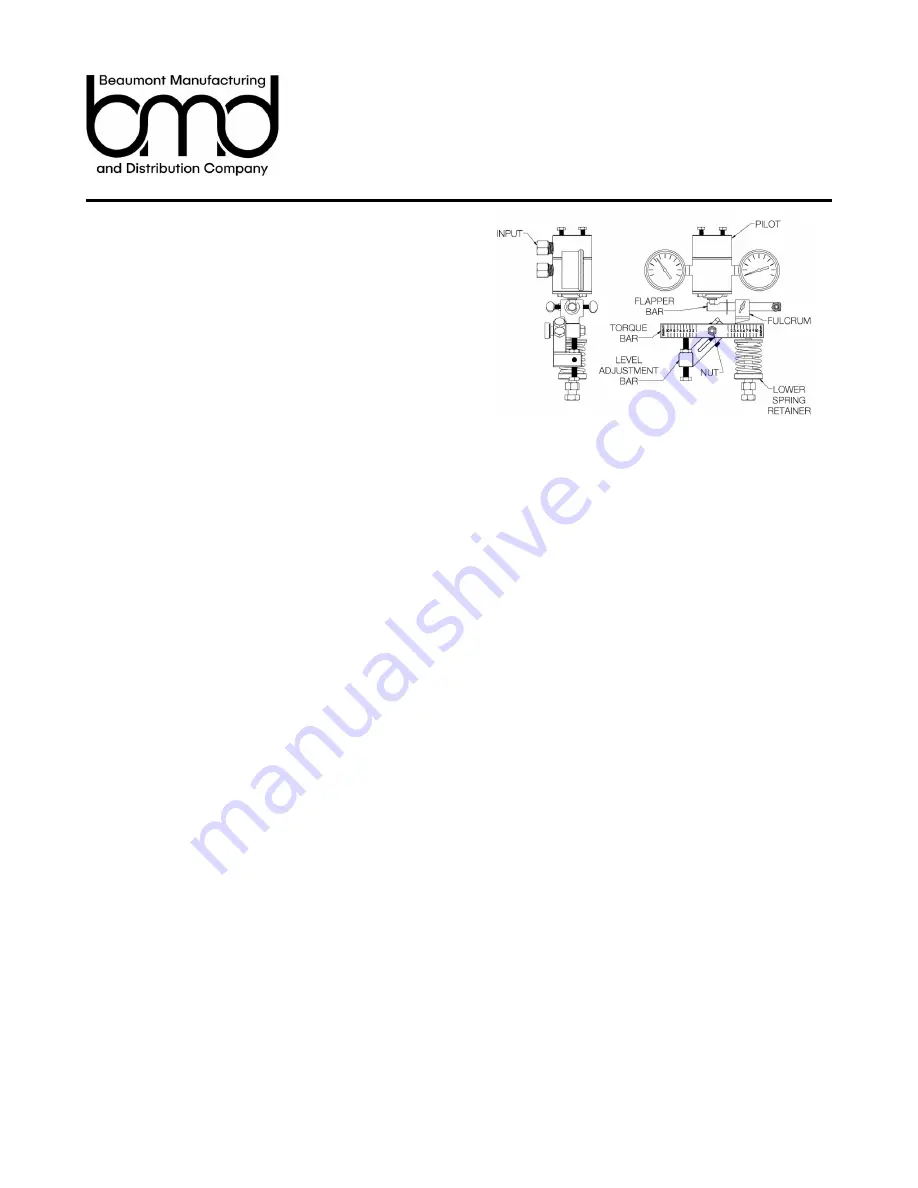
Standard Case (See figure 13)
To remove the Pilot, first turn the Lower Spring Retainer all the way to
the bottom to relieve the tension on the Spring. Next, unscrew the two
screws located on top of the Case. Push down the Torque Bar on the
Spring side as far as it will go. This will allow the Pilot to be removed.
Put in the new Pilot, and replace the upper screws to hold it to the top
of the Case. Make sure that the Flapper Bar is positioned so that the
Pilot Pin rests in the slot. The Pilot Pin should be able to move freely
in the slot without binding as the Flapper Bar moves up and down .
Sealed Case (See Figure 14)
To remove the Pilot, first turn the Lower Spring Retainer all the way to
the bottom to relieve the tension on the Spring. Next, unbolt the Pilot
Plate that covers the front of the Pilot. Push down the Torque Bar on
the Spring side as far as it will go. This will allow the Pilot to be
removed. Remove the Gasket behind the Pilot. To reassemble replace
the Pilot Gasket with a new one and put in the new Pilot. Put the Pilot
Plate back on and reinstall the pilot plate screws. Make sure that the
Flapper Bar is positioned so that the Pilot Pin rests in the slot. The
Pilot Pin should be able to move freely in the slot without binding as
the Flapper Bar moves up and down .
Pilot Repair (See Figure 15)
Remove the two screws holding together the Pilot to expose the
components within. When replacing the components, the Gasket
needs to be checked so that the orientation of the cutouts match the
holes on the Body. Reassemble and test the Pilot with a supply line to
check for leaks before installing back into the Case. Mount the Pilot
back into the Case with the two screws and make sure the Flapper
Bar is positioned correctly on the Pilot Pin.
Figure 13
Figure 15
Figure 14

