background image

21

FR - GB

60

NL - IT

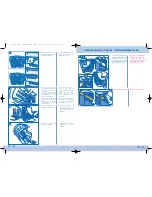
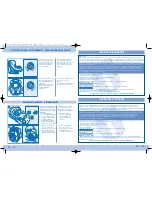
CERTIFICATO DI GARANZIA

Gentile Cliente,

Grazie per aver scelto uno dei nostri prodotti. Speriamo che ne sia completamente soddisfatto. Questo certificato indica

che il suo prodotto è stato costruito secondo normative di qualità specifiche e che è stato sottoposto a numerosi controlli

nelle diverse fasi di lavorazione. Se, nonostante tutti i nostri sforzi, doveste riscontrare unʼanomalia durante il periodo

di validità della garanzia, ci impegneremo a rispettare le condizioni del presente certificato.

CERTIFICATO DI GARANZIA: vi garantiamo che questo prodotto è conforme alle esigenze di sicurezza definite dalla

regolamentazione in vigore e che non presenta alcun difetto di ideazione e fabbricazione, al momento dellʼacquisto presso il

rivenditore. Se dopo lʼacquisto, entro un periodo di 24 mesi, questo prodotto dovesse presentare un difetto durante il

normale utilizzo definito dalle avvertenze dʼuso, ci impegniamo a ripararlo o a sostituirlo (per maggiori informazioni sulle

modalità di applicazione della garanzia, consultare il rivenditore o il nostro sito internet),salvo nei casi seguenti:

. utilizzo e destinazione diversi da quelli previsti nelle istruzioni d’uso,
. installazione non conforme alle istruzioni,
. riparazione effettuata da persona o rivenditore non autorizzato,
. mancanza dello scontrino d’acquisto,
. mancanza di manutenzione del prodotto,
. sostituzione di parti sottoposte ad usura (ruote, parti sottoposte ad attrito ...) durante il normale utilizzo.

Qual è la decorrenza?

La data d’acquisto del prodotto.

Per quanto tempo?

24 mesi consecutivi e non trasferibili ad altra persona: l’unico beneficiario è colui che ha effettuato l’acquisto.

Cosa si deve fare?

Dopo l’acquisto, dovete conservare lo scontrino riportante la data d’acquisto del prodotto. Nel caso si verifichi un problema,
il prodotto deve essere restituito al rivenditore presso cui è stato effettuato l’acquisto. I prodotti inviati direttamente al produttore
non godranno di alcuna garanzia.

Garanzia conforme alla Direttiva Europea n° 1999/44/CE del 25 Maggio 1999.

GARANTIEBEWIJS

Geachte klant,

Wij danken u voor het vertrouwen dat u in ons stelt bij het kiezen van een van onze producten en hopen dat ze u volledig tevreden

zullen stellen. Dit product is vervaardigt volgens diverse kwaliteitsnormen die van toepassing zijn voor dit product. Tevens is het

product onderworpen aan diverse controles tijdens de verschillende fabricage etappes. Indien er, ondanks al onze inspanningen,

gedurende de garantieperiode een afwijking/onregelmatigheid zich voordoet, verplichten wij ons ertoe de garantievoorwaarden

te respecteren.

GARANTIEBEWIJS : Garantiebewijs: Wij garanderen u dat dit product voldoet aan de veiligheidsvoorwaarden zoals

omschreven in het reglement van kracht, dat het product geen enkele fout of fabricagefout vertoont op het moment van

aankoop door de detailhandelaar. Indien er zich na aankoop van het product, gedurende de garantieperiode van 24

maanden, het product een fout vertoont, bij normaal gebruik zoals omschreven in de gebruiksaanwijzing, verplichten wij ons

ertoe het product te repareren of te vervangen (voor bijkomende informatie betreft de toepassing van de

garantievoorwaarden adviseren wij contact op te nemen met uw detailhandelaar of onze website te raadplegen) De

volgende gevallen zijn uitgesloten voor garantie:

- bij gebruik en doel anders dan voorzien in de gebruiksaanwijzing,
- bij een plaatsing welke niet overeenkomstig is met de gebruiksaanwijzing,
- herstellingen uitgevoerd door een niet erkend persoon of door een niet officieel erkende verkoper,
- indien het aankoopbewijs niet getoond kan worden,
- indien het product slecht onderhouden is,
- vervanging van onderdelen die bij een normaal gebruik aan slijtage onderhevig zijn (wielen, draaiende en bewegende

delen..….enz..)

Vanaf wanneer ?

Vanaf de aankoopdatum van het product.

Voor welke periode ?

24 opeenvolgende niet overdraagbare maanden. De eerste aankoper is de enige begunstigde van deze garantie.

Wat moet u doen ?

Bij aankoop van het product dient het aankoopbewijs zorgvuldig bewaard te worden. De aankoopdatum moet duidelijk zichtbaar
zijn op het aankoopbewijs. Indien het product een gebrek vertoont dient het teruggebracht te worden bij de detailhandelaar waar
het product aangekocht is. Producten die rechtstreeks naar de fabrikant teruggezonden worden komen niet in aanmerking voor
garantie.

Deze garantie is overeenkomstig met de Europese richtlijnen N° 1999/44/CE van 25 mei 1999.

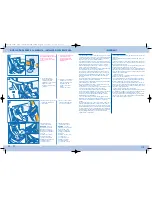
Avant démontage, veillez

à bien noter la manière

dont les différentes parties sont

montées sur le siège afin

de tout remonter correctement.

1 - Détendre les bretelles

et déverrouiller la boucle

du harnais, puis mettez

le siège en position

allongée.

Before dismantling, note

carefully where all the various

parts are on the child seat

so that everything can be

reassembled properly.

1 - Loosen the shoulder straps

and release the harness

buckle, and then put

the seat in the reclined

position.

2 - Passez à travers la coque

les plaques dʼaccrochage

des sangles abdominales

du harnais (à droite

et à gauche sous lʼassise).

2 - Pass the catch plates

for the harness waist straps

through the seat shell

(on the right and on the left

under the seat of the car

seat).

DEHOUSSAGE - REMOVING THE SEAT COVER

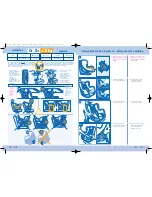
• Tournez le bouton gris

vers la droite pour redresser

le siège.

• Tournez le bouton gris vers la

gauche pour incliner le siège.

• Turn the grey button to the

right to move the seat into

upright position.

• Turn the grey button to the

left to recline the seat

• Pour rapprocher les côtés

tournez le bouton noir

vers la gauche.

• Pour écarter les côtés

tournez le bouton noir vers

la droite.

• To bring the sides in, turn the

black button to the left.

• To move the sides apart, turn

the black button to the right.

REGLAGE DE L’ASSISE - ADJUSTING THE SEATING

0527937 ISEOS NEO+ 7L.qxd:0527xxx ISEOS TT.qxd  26/01/09  16:48  Page 41

Summary of Contents for ISEOS

Page 1: ...et reglement N 16 van de CEE ONU norm of gelijkwaardig Deze autostoel mag nooit in een voertuig geplaatst worden in de positie tegen de rijrichting in indien de zitplaats voorzien is van een airbag NO...

Page 2: ...lac Center 08208 Sabadell Barcelona ESPA A DOREL PORTUGAL Parque Industrial da Varziela Rua n 1 Arvore 4480 109 Vila do Conde PORTUGAL DOREL JUVENILE SWITZERLAND S A Chemin de la Colice 4 1023 CRISSIE...

Page 3: ...a garant a nos comprometemos a respectar las condiciones de la garant a LAS SIGUIENTES CONDICIONES Certificado de garant a Nosotros le garantizamos que este producto es conforme a las exigencias de se...

Page 4: ...inclinaison 18 Grands prot ge harnais 19 Bride sangle GR0 1 Manual de instrucciones 2 Lateral 3 Pasaje del cintur n GR1 4 Vestidura 5 Protege arn s 6 Gancho de sujeci n del arn s 7 Regulador del arn s...

Page 5: ...la silla Girar la rueda gris hacia la izquierda para reclinar la silla Tournez le bouton gris vers la droite pour redresser le si ge Tournez le bouton gris vers la gauche pour incliner le si ge Para...

Page 6: ...or future reference there is a storage pocket specifically provided on the child seat UNIVERSAL SYSTEM WITH A 3 POINT SEAT BELT Approved model ECE R44 04 For GROUP 0 infants less than 13 kg the seat m...

Page 7: ...he occupant of the car seat in the case of impact are properly secured Never place heavy objects on the rear parcel shelf to avoid the danger of projectiles in the event of an accident The rigid parts...

Page 8: ...CORRECTE DU SI GE CHECK THAT THE CHILD SEAT IS PROPERLY INSTALLED This device should be used only on approved vehicles equipped with 3 point static inertia reel seat belts that are approved in accord...

Page 9: ...r seat voir page 12 9 FR GB 72 ES PT Gr 1 9 18 kg B C D IMPORTANT Avant l installation du si ge nous vous conseillons de relever le loquet afin de ne pas abimer la banquette de votre v hicule V rifier...

Page 10: ...correcta Este dispositivo se puede usar en los veh culos aprobados equipados con cinturones de seguridad de 3 puntos est ticos con enrolladores homologados conforme al reglamento CEE N 16 ONU o de una...

Page 11: ...eira 10 Colocar nuevamente los tirantes en la plaqueta 10 Prender os cintos na placa Voltar a colocar a forra verificando que esta fica bem presa nos ganchos 11 Tensar los tirantes esti randolos con f...

Page 12: ...GRANDS PETITS PROTEGES HARNAIS 3 Retirar el manual de instrucciones del bolsillo 3 Retirar as instru es do bolso SELON VERSION SELON VERSION REGLAGE EN HAUTEUR ET INSTALLATION DES GRANDS PETITS PROTE...

Page 13: ...Installez les grands prot ge harnais uniquement lorsque vous utilisez la position B C et D 6 meses 6 mois months A B 1 Utilisez les grands prot ges harnais sous la protection plastique situ e sous l...

Page 14: ...lder straps 6 A partir de l avant du si ge tirez sur les bretelles pour les extraire des protections Remettez le si ge en position assise 6 Pull on the straps from the front of the seat to remove them...

Page 15: ...sur la sangle de r glage 11 Draw the safety straps tight by pulling the adjustment clip firmly 12 Remettre la pochette de la notice en cachant la plaque d accrochage derri re pli de la pochette en hau...

Page 16: ...Rear seats 9 to18 kg The child seat must be placed on the rear seat of the vehicle or exceptionally on the front seat depending on the current legislation in the country of use Le si ge doit tre plac...

Page 17: ...do para os autom veis aprovados e equipados com cintos 3 pontos est ticos com retractor homologados e conforme o regulamento CEE n 16 ONU ou outra norma equivalente 17 FR GB 64 ES PT INSTALLATION FACE...

Page 18: ...nca coloque objectos pesados no tablier de tr s para evitar as projec es em caso de acidente Os elementos r gidos e de pl stico de um dispositivo de reten o de crian a devem estar situados e instalado...

Page 19: ...insufl vel air bag frontal Para o grupo 0 crian as com menos de 13 Kg a cadeira dever ser colocada de costas para a estrada em posi o semi deitada nos assentos traseiros ou dianteiro do ve culo Para...

Page 20: ...ACING THE CHILD IN THE CAR SEAT 7 Accrochez les bretelles du harnais et le prot ge boucle sur leurs supports 7 Fasten the harness shoulder straps and the buckle cover to their hooks POUR RETIRER L ENF...

Page 21: ...moment van aankoop door de detailhandelaar Indien er zich na aankoop van het product gedurende de garantieperiode van 24 maanden het product een fout vertoont bij normaal gebruik zoals omschreven in...

Page 22: ...e Non lavare a secco Non asciugare in asciugatrice Non stirare ACCESSOIRES ACCESSORI Badstof zomerhoes Fodera spugna Zonnedakje Pagodina ACCESSOIRES ACCESSORIES Entretien Confection Avant nettoyage co...

Page 23: ...site web hors les cas d exclusion suivants utilisation et destination autres que celles pr vues dans la notice d utilisation installation non conforme la notice r paration effectu e par une personne o...

Page 24: ...ntgrendelen COME TOGLIERE IL BAMBINO 6 Premete il dispositivo di regolazione tirando le cinture afferrare le cinture e non le protezioni Premete il pulsante rosso della fibbia per sganciare le cinture...

Page 25: ...e t weder Vorsicht noch das Einhalten derStra enverkehrsordnung aus Nachdem Sie Ihr Kind im Sitz angeschnallt haben vergewissern Sie sich dass der Fahrzeuggurt korrekt gespannt ist indem Sie an ihm zi...

Page 26: ...de autogordel om hem op te spannen 4 Riprendete la cintura dall altro lato del seggiolino e agganciatela alla fibbia Poi tirate la cintura con decisione PLAATSING MET DE RIJRICHTING MEE INSTALLAZIONE...

Page 27: ...adattare le cinture alla taglia del vostro bambino regolandone le bretelle pagine 49 52 Installare le protezioni per cinture grandi unicamente quando si utilizzano le posizioni B C e D pagina 49 2 Ze...

Page 28: ...ikt worden in auto s welke voorzien zijn van 3 punts veiligheidsgordels met oprol systeem goedgekeurd en conform aan het reglement CEE N 16 ONU of een andere gelijkwaardige norm Questo dispositivo uti...

Page 29: ...11 Tendete le cinture con decisione tirando la cinghia di regolazione 12 Plaats het opbergvakje van de gebruiksaanwijzing weer op zijn plaats met de vouw van het vakje naar boven gericht Alvorens uw...

Page 30: ...te la cinghia delle protezioni per cinture nelle fessure corrispondenti 8 Haal het riempje van de veiligheidsgordelbeschermer door de spleten 8 Fate passare la cinghia delle protezioni per cinture nel...

Page 31: ...llazione delle protezioni per cinture piccole effettuare la stessa manipolazione 6 mois months A B 1 Benutzen Sie die grossen Gurtschutzpolster die sich in einer Plastikverpackung unter dem Sitzteil z...

Page 32: ...n Gurtstraffer l sen damit der Gurt hinter der R ckenlehne m glichst lang ist Die Gurtbefestigungsplatte von den Schultergurten losl sen 6 Ziehen Sie von vorne an den Schultergurten des Autositzes dam...

Page 33: ...gsplatte befestigen einf deln 11 Die Schultergurte vorne straff anziehen 12 Das Aufbewahrungsfach der Gebrauchsanweisung mit dem Knick nach oben wieder anbringen und dabei die Gurtbefestigungsplatte h...

Page 34: ...hne Aufrollautomatik ausger stet sind Einbaurichtung Pl tze Gruppe 1 vorw rts gerichtet R ckbank 9 bis 18 kg SCHIEBEN SIE DEN BEIFAHRERSITZ NACH VORNE DAMIT SICH DAS KIND NICHT DARAN STO EN KANN Aus S...

Page 35: ...leine veiligheidsgordelbeschermers zie pag 49 E necessario adattare le cinture alla taglia del vostro bambino regolandone le bretelle pagine 49 52 La posizione pi bassa delle cinghie delle cinture A d...

Page 36: ...ri omologati conformemente al regolamento CEE N 16 ONU o ad una norma equivalente BELANGRIJK IMPORTANTE Gr 0 13kg Voor de veiligheid en het comfort van het kind dient de passagierssto el zo ver mogeli...

Page 37: ...olo non si incastrino sotto il sedile o all interno della portiera dell autoveicolo Non modificare mai la costruzione o i materiali del seggiolino e della cintura senza aver consultato il produttore N...

Page 38: ...vati da B b Confort L utilizzo di altri accessori pu rivelarsi pericoloso Vi consigliamo di leggere attentamente le avvertenze per l uso e di maneggiare il vostro prodotto prima dell utilizzo Conserva...

Page 39: ...53 56 Installazione del bambino nel seggiolino auto pagine 56 57 Regolazione della seduta Pagina 58 Sfoderabilit pagine 58 59 Accessori pagina 59 GARANZIA pagina 60 INHOUD SOMMARIO GEBRUIKSAANWIJZING...

Page 40: ...el vorgelegt werden kann wenn das Produkt nicht entsprechend gewartet und gepflegt wurde Tauschen aller sich abn tzenden Teile R der reibende Teile bei normalem Gebrauch Ab wann Ab Kaufdatum des Produ...

Reviews: