Chapter 4: Configuration
137
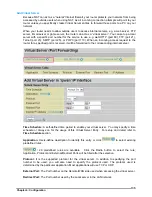
Internal IP Address:
The private IP in the LAN network, which will be providing the virtual server
application.
List all existing PCs connecting to the network. You may assign a PC
with IP address and MAC from this list.
Example:
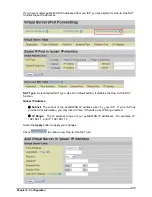
If you like to remote accessing your Router through the Web/HTTP at all time, you would need to
enable port number 80 (Web/HTTP) and map to Router’s IP Address. Then all incoming HTTP
requests from you (Remote side) will be forwarded to the Router with IP address of 192.168.1.254.
Since port number 80 has already been predefined, next to the
Application
click
Helper.
A list of
predefined rules window will pop and select
HTTP_Sever
.
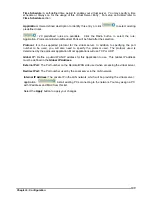
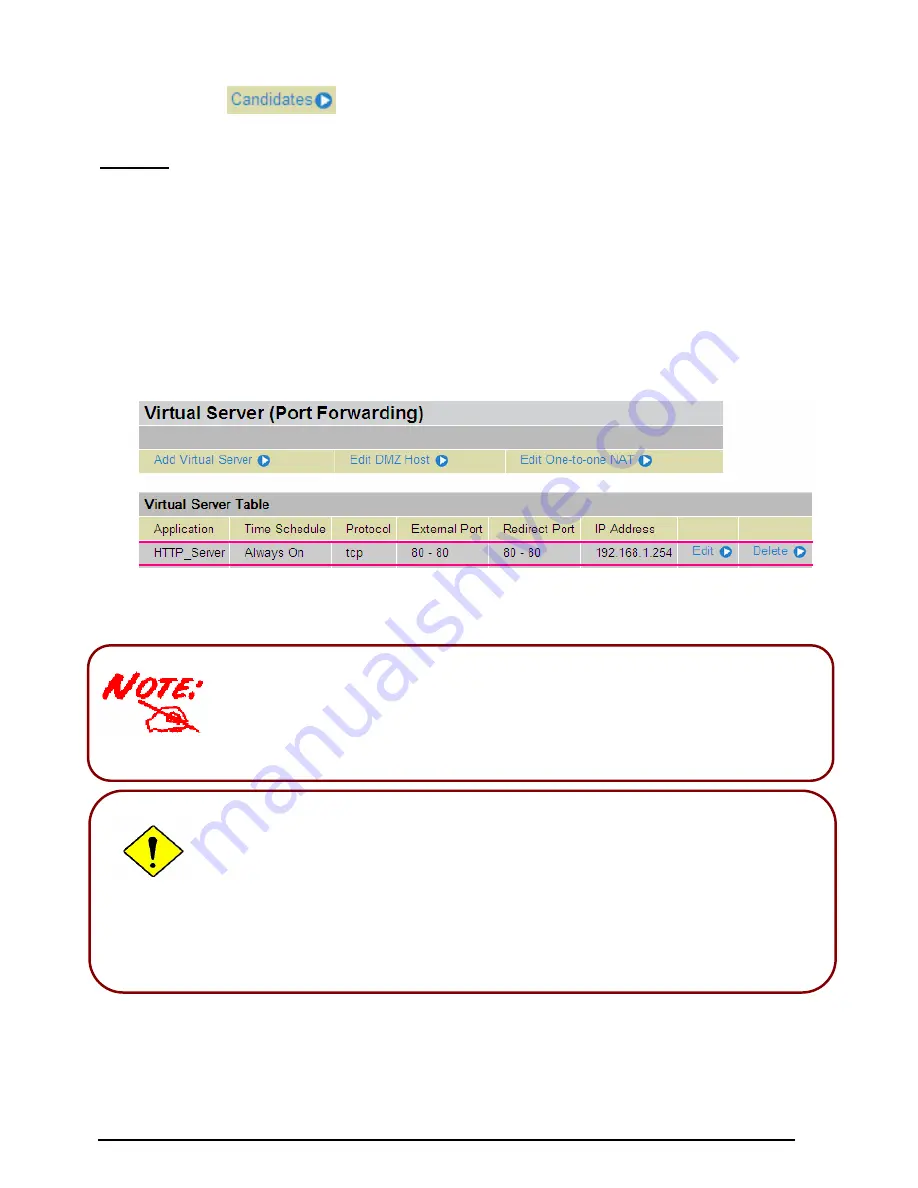
Application:
HTTP_Sever
Time Schedule:
Always On
Protocol:
tcp
External Port:
80-80
Redirect Port:
80-80
IP Address:
192.168.1.254
Edit:
Click it to edit this virtual server application.
Delete:
Click it to delete this virtual server application.
If you have disabled the NAT option in the WAN-ISP section, the Virtual Server
function will hence be invalid.
If the DHCP server option is enabled, you have to be very careful in assigning the IP
addresses of the virtual servers in order to avoid conflicts. The easiest way of
configuring Virtual Servers is to manually assign static IP address to each virtual
server PC, with an address that does not fall into the range of IP addresses that are
to be issued by the DHCP server. You can configure the virtual server IP address
manually, but it must still be in the same subnet as the router.
Attention
Using port forwarding does have security implications, as outside users will be able to
connect to PCs on your network. For this reason you are advised to use specific
Virtual Server entries just for the ports your application requires, instead of using
DMZ. As doing so will result in all connections from the WAN attempt to access to
your public IP of the DMZ PC specified.


