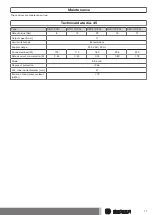
Setting the limit positions using the programming unit
Setting the limit positions
There are
4
ways to set the limit positions:
•
Lower point to upper point without stops
•
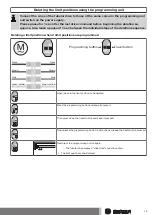
Lower point to upper stop
•
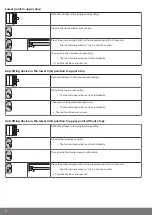
Anti-lifting device in the lower limit position to upper stop
•
Anti-lifting device in the lower limit position to upper point without stops
The limit position becomes fixed after the tubular drive has turned off
automatically
in the desired position three times.
If the tubular drive switches off prematurely while opening or closing, due to an obstruc-
tion, the obstruction can be cleared by reversing a short way and removing the obstruc-
tion. The desired limit position can be set by opening/closing again.
Attention
The switch is not suitable for continuous operation and has only been designed for start-
up.
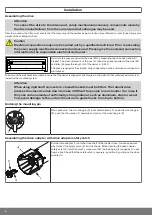
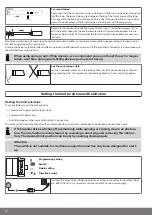
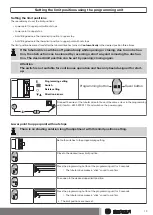
Programming setting
Switch
Delete setting
Direction arrows
Programming button
Travel button
Connect the wires of the tubular drive to those of the same colour in the programming
unit (Item No. 4935 200 011 0) and switch on the power supply.
Lower point to upper point without stops
There is no shading solution length adjustment with this limit position setting.
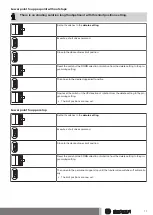
Set both switches to the programming setting.
Close to the desired lower limit position.
Press the programming button of the programming unit for 3 seconds.
▻
The tubular drive makes a “click” sound to confirm.
Then open to the desired upper limit position.
Press the programming button of the programming unit for 3 seconds.
▻
The tubular drive makes a “click” sound to confirm.
►
The limit positions are now set.
13
Summary of Contents for R12 17C PR+
Page 21: ...Declaration of conformity 21 ...
Page 22: ...22 ...
Page 23: ...23 ...
Page 24: ...2010 300 326 0e 11 07 2016 ...

