51
860
76
D
B
-en/
03
35
5.0
00
32
English
⋅
en
Repairs and extensions
Bar break and clasp break
In the case of non-precious metal and precious
metal, grind the break points of the two parts to be
joined and, prepared in this way with a double-V butt
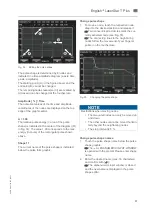
joint, place on the model (Fig. 48). Then tack the
joint as described in "Completing bridges" and weld
with welding wire. After tacking and welding the
deepest layer on one side, the opposite side should
also be welded with a layer - after grinding if
necessary - in order to counteract stress. Prepa-
ration can also be carried out as a single-V butt joint
only with thin parts or it can be dispensed with it
altogether (e.g. clasps).
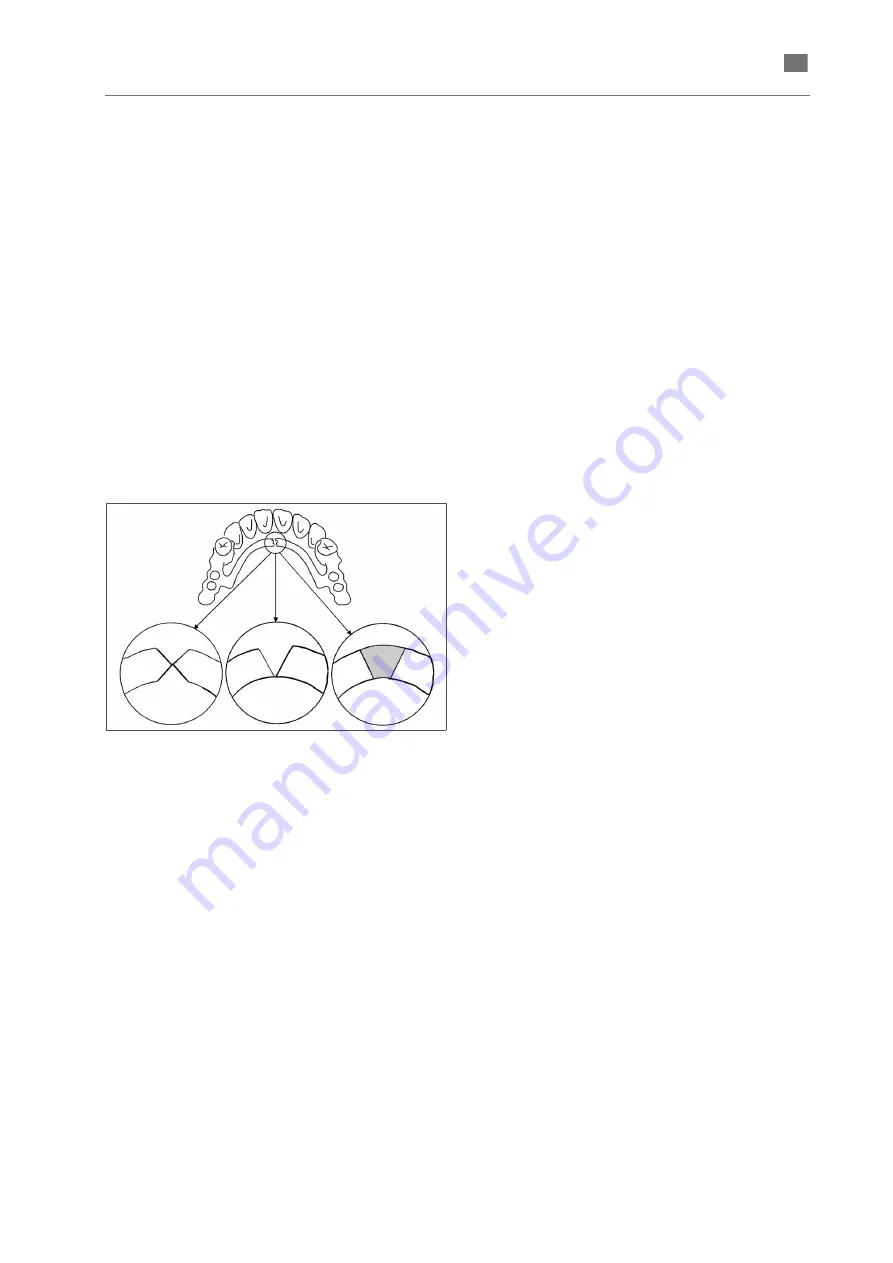
In the case of larger distances- for example,
sublingual bar break - cut out the break point
spaciously and insert and weld a trapezoidal
adapter.
Fig. 48
Repairing sublingual bar break
Filling defects, cavities, cracks, etc.
Expand all defects by means of grinding and fill with
welding wire of the appropriate alloy layer by layer
from the deepest point to the surface with a slight
overcontour. After that rework the weld by grinding.
Building up contact points
(build-up welding)
Material is built up in layers using welding wire of the
same alloy, letting the wire drip from the tip to build
it up spot by spot. Finally the built-up material can be
reworked and smoothed at the same time.
Welding bar sleeve with partial denture
The bar sleeves are frequently so thin that they melt
thoroughly at an excessively high energy level due
to the laser welding pulse and are joined to the bar.
This welding work is carried out more successfully
on the plaster model.
Fill the silicone mould for the duplicate model with
plaster again, position the precious-metal bar
sleeve on it as specified and put on the partial
denture. After the first fixing by means of opposite
spot welds the object can be taken off the model.
The bar sleeve can now be welded at a low energy
level while adding welding wire of the same alloy
without welding the sleeve to the metal bar. Insulate
the bar and rider beforehand with graphite paste or
Vaseline.
Extending crown border
Tapering edges are all too easily melted away with
the laser beam. Therefore, always allow wire as filler
metal to drip at a low energy level. It is helpful to
grind the edges down to a minimum wall thickness
of approx. 0.5 mm beforehand.
A part that has been shaped appropriately through
grinding, casting or bending is to be bevelled slightly
at the edge to form a single-V butt joint and tack on
the model at a low energy level. After that fill the
seam with welding wire layer by layer at the same
low energy level as described in the previous
sections.
The best method is to weld on a cast adapter.

