3.0 Safety
The UNITEST Wallscanner has been manufactured and test-
ed to comply with the safety regulations and left our works
in a safe condition. To maintain this condition, the user must
observe the safety instructions contained in this Instruction
Manual.
Before each measurement make sure that the UNITEST
Wallscanner are undamaged.
Protect the instrument from prolonged exposure to direct
sunlight.
Before any drilling and mounting operations discon-
nect all voltages!
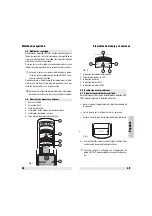
3.0 Controls and Connections
1. Sensor
2. LC-Display
3. Activation Switch „ON MODE“
4. Mode Switch
5. Battery Door
20
Safety / Controls and Connections
1. Calibration Ready Indicator
2. LCD Display Bars
3. Reset Indicator
4. Low Battery Indication
5. AC Voltage Indicator
4.0 Operation
4.1 Preparation and safety measures
Before the UNITEST Wallscanner is ready for use, one 9-volt
battery must be installed.
"
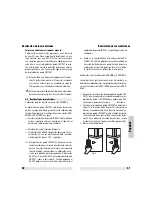
Slide open the battery door (5)
"
Connect the battery to the battery clip and insert the bat-
tery into the UNITEST Wallscanner
"
Replace the battery door (see figure 3)
With normal use, one 9-volt battery should last ap-
proximately two years.
Prior to working with the UNITEST Wallscanner we rec-
ommend the establishment of a test wall. Such a test
wall can be constructed in accordance with the follow-
ing example:
Fix a roof batten of 5 cm width and a metal pipe (e.g.
1/2 '' pipe) onto a flake board (presspahn) at a distance
of approx. 25 cm. This constuction is superstructured
by a conventional gypsum wallboard. Now, you may
exercise the location of various materials at different
21
Operation
English
ON / MODE
Fig. 1
Fig. 2
Fig. 3
Summary of Contents for UNITEST Wallscanner
Page 9: ...16 ...


