44
XD80USB
Quick Start Guide
45
Other important information
1. Register
online.
Please register your new
MUSIC Group equipment right after you purchase it by
visiting behringer. com. Registering your purchase using
our simple online form helps us to process your repair
claims more quickly and effi ciently. Also, read the terms
and conditions of our warranty, if applicable.
2. Malfunction.
Should your MUSIC Group
Authorized Reseller not be located in your vicinity, you
may contact the MUSIC Group Authorized Fulfi ller for
your country listed under “Support” at behringer. com.
Should your country not be listed, please check if your
problem can be dealt with by our “Online Support” which
may also be found under “Support” at behringer. com.
Alternatively, please submit an online warranty claim at
behringer. com BEFORE returning the product.
3. Power
Connections.
Before plugging the
unit into a power socket, please make sure you are using
the correct mains voltage for your particular model.
Faulty fuses must be replaced with fuses of the same
type and rating without exception.
1. Registro
online.
Le recomendamos que
registre su nuevo aparato MUSIC Group justo después de
su compra accediendo a la página web behringer. com.
El registro de su compra a través de nuestro sencillo
sistema online nos ayudará a resolver cualquier
incidencia que se presente a la mayor brevedad posible.
Además, aproveche para leer los términos y condiciones de
nuestra garantía, si es aplicable en su caso.
2. Averías.
En el caso de que no exista un distribuidor
MUSIC Group en las inmediaciones, puede ponerse en
contacto con el distribuidor MUSIC Group de su país,
que encontrará dentro del apartado “Support” de nuestra
página web behringer. com. En caso de que su país no
aparezca en ese listado, acceda a la sección “Online Support”
(que también encontrará dentro del apartado “Support” de
nuestra página web) y compruebe si su problema aparece
descrito y solucionado allí. De forma alternativa, envíenos a
través de la página web una solicitud online de soporte en
periodo de garantía ANTES de devolvernos el aparato.
3. Conexiones de corriente.
Antes de enchufar
este aparato a una salida de corriente, asegúrese de que dicha
salida sea del voltaje adecuado para su modelo concreto.
En caso de que deba sustituir un fusible quemado, deberá
hacerlo por otro de idénticas especifi caciones, sin excepción.
1. Enregistrez-vous en ligne.
Prenez le
temps d’enregistrer votre produit MUSIC Group aussi vite
que possible sur le site Internet behringer. com. Le fait
d’enregistrer le produit en ligne nous permet de gérer
les réparations plus rapidement et plus effi cacement.
Prenez également le temps de lire les termes et conditions
de notre garantie.
2. Dysfonctionnement.
Si vous n’avez pas de
revendeur MUSIC Group près de chez vous, contactez le
distributeur MUSIC Group de votre pays : consultez la liste
des distributeurs de votre pays dans la page “Support” de
notre site Internet behringer. com. Si votre pays n’est pas
dans la liste, essayez de résoudre votre problème avec
notre “aide en ligne” que vous trouverez également dans
la section “Support” du site behringer. com. Vous pouvez
également nous faire parvenir directement votre demande
de réparation sous garantie par Internet sur le site
behringer. com AVANT de nous renvoyer le produit.
3. Raccordement au secteur.
Avant de relier
cet équipement au secteur, assurez-vous que la tension
secteur de votre région soit compatible avec l’appareil.
Veillez à remplacer les fusibles uniquement par des
modèles exactement de même taille et de même valeur
électrique — sans aucune exception.
1. Online
registrieren.
Bitte registrieren Sie Ihr
neues MUSIC Group-Gerät direkt nach dem Kauf auf der
Website behringer. com. Wenn Sie Ihren Kauf mit unserem
einfachen online Formular registrieren, können wir Ihre
Reparaturansprüche schneller und effi zienter bearbeiten.
Lesen Sie bitte auch unsere Garantiebedingungen,
falls zutreff end.
2. Funktionsfehler.
Sollte sich kein MUSIC Group
Händler in Ihrer Nähe befi nden, können Sie den
MUSIC Group Vertrieb Ihres Landes kontaktieren,
der auf behringer. com unter „Support“ aufgeführt ist.
Sollte Ihr Land nicht aufgelistet sein, prüfen Sie bitte,
ob Ihr Problem von unserem „Online Support“ gelöst
werden kann, den Sie ebenfalls auf behringer. com unter
„Support“ fi nden. Alternativ reichen Sie bitte Ihren
Garantieanspruch online auf behringer. com ein, BEVOR Sie
das Produkt zurücksenden.
3. Stromanschluss.
Bevor Sie das Gerät an
eine Netzsteckdose anschließen, prüfen Sie bitte, ob Sie
die korrekte Netzspannung für Ihr spezielles Modell
verwenden. Fehlerhafte Sicherungen müssen ausnahmslos
durch Sicherungen des gleichen Typs und Nennwerts
ersetzt werden.
1. Registre-se
online.
Por favor, registre seu
novo equipamento MUSIC Group logo após a compra
visitando o site behringer. com Registrar sua compra
usando nosso simples formulário online nos ajuda a
processar seus pedidos de reparos com maior rapidez e
efi ciência. Além disso, leia nossos termos e condições de
garantia, caso seja necessário.
2. Funcionamento
Defeituoso.
Caso seu fornecedor MUSIC Group não esteja localizado
nas proximidades, você pode contatar um distribuidor
MUSIC Group para o seu país listado abaixo de “Suporte”
em behringer. com. Se seu país não estiver na lista,
favor checar se seu problema pode ser resolvido com o
nosso “Suporte Online” que também pode ser achado
abaixo de “Suporte”em behringer. com. Alternativamente,
favor enviar uma solicitação de garantia online em
behringer. com ANTES da devolução do produto.
3. Ligações.
Antes de ligar a unidade à tomada,
assegure-se de que está a utilizar a voltagem correcta para
o modelo em questão. Os fusíveis com defeito terão de
ser substituídos, sem qualquer excepção, por fusíveis do
mesmo tipo e corrente nominal.
Important information
Aspectos importantes
Informations importantes
Weitere wichtige
Informationen
Outras Informações
Importantes
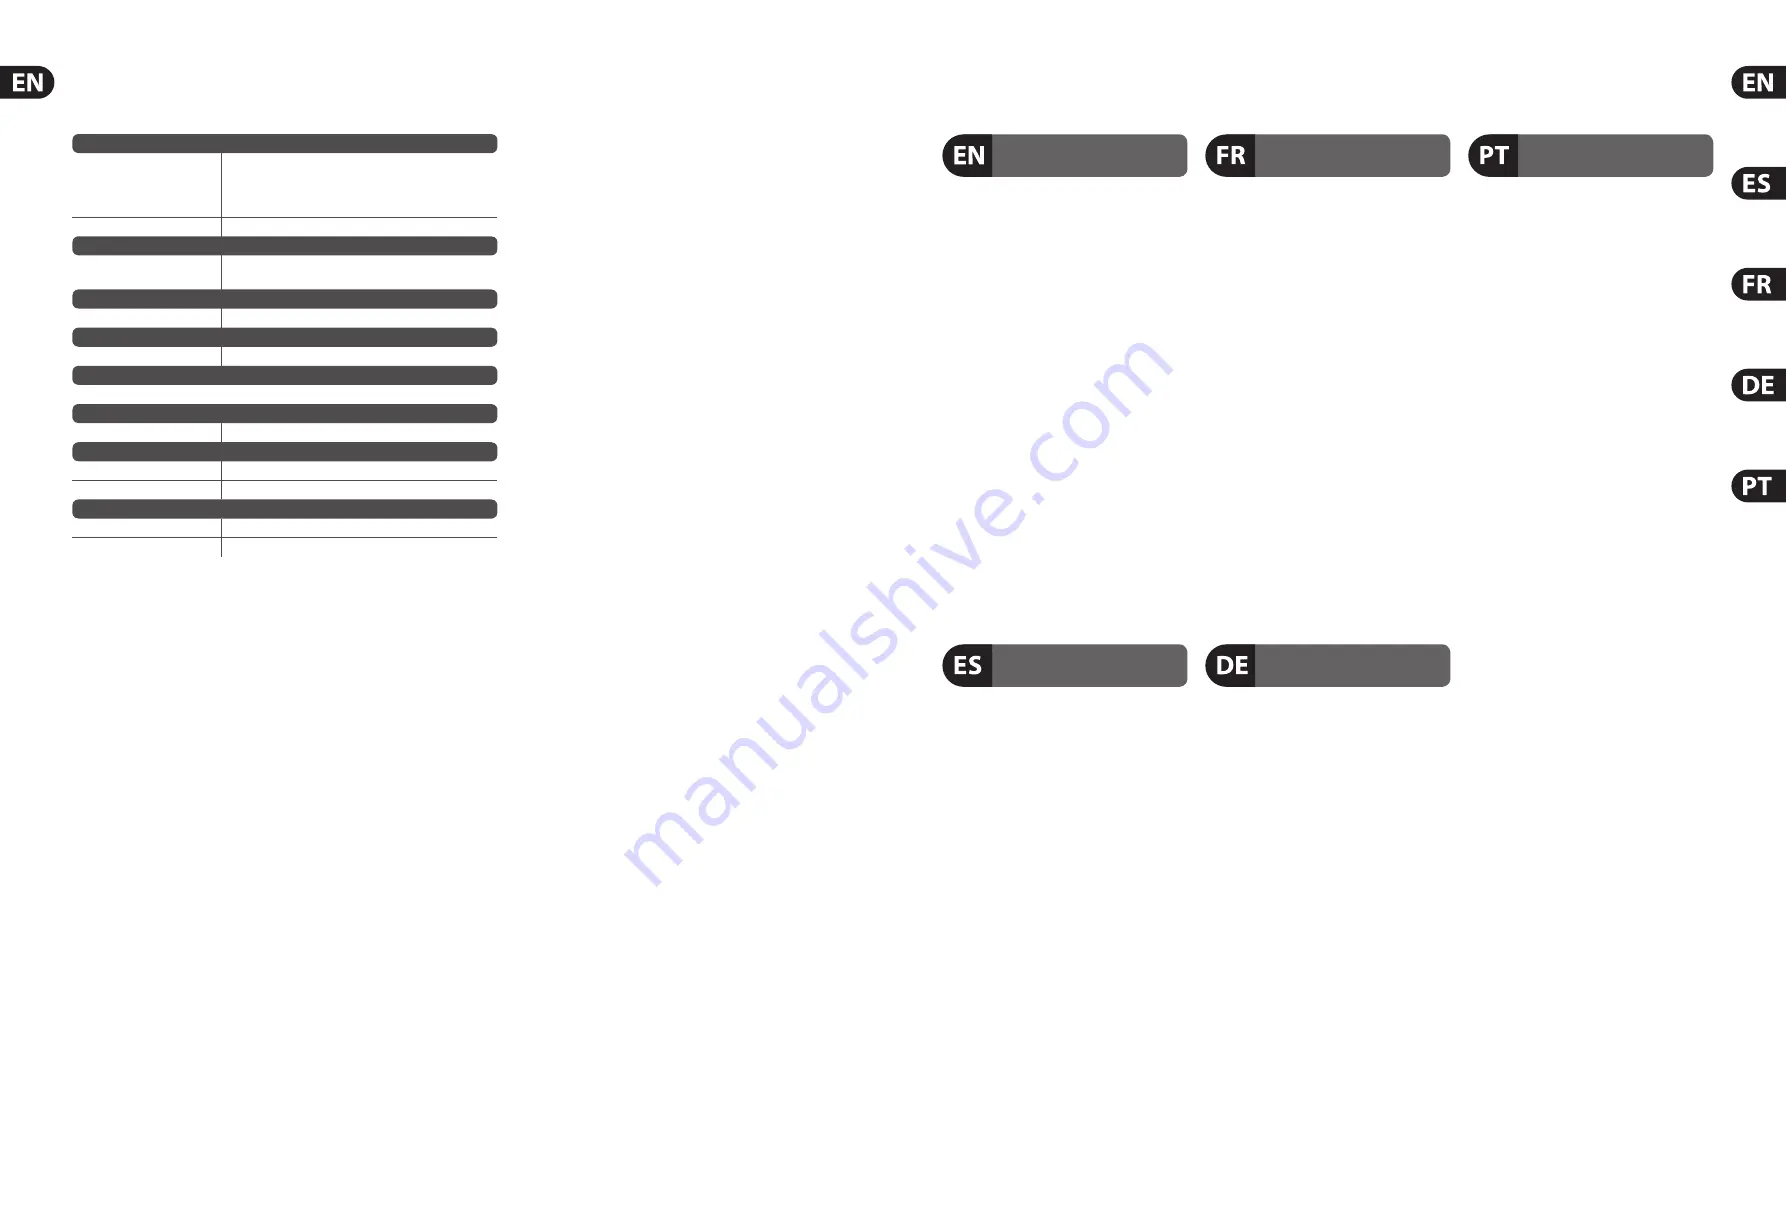
Specifi cations
Input
Type
1 x TRS (Drum Pad Inputs)
1 x TRS (Cymbal Pad Inputs)
1 x 1⁄8" stereo (Aux Input)
1 x Multi-Pin trigger connection
Frequency response
20 Hz – 20 kHz
Output
Type
1 x 1⁄8" stereo (Phones)
2 x ¼" TRS (Line Out)
MIDI I/O
Type
5-pin DIN; 1 in, 1 out
Computer Bus Connectivity
Type
USB MIDI, Type-B
Polyphony
64
Display
Type
Backlit LCD
Power Supply
Voltage
9 V
Power Consumption
4.5 W
Dimensions
Dimensions
840 x 580 x 330 mm
Weight
16.79 kg
Summary of Contents for XD80USB
Page 25: ...We Hear You...


