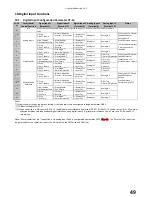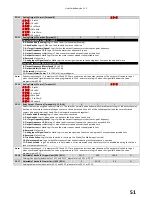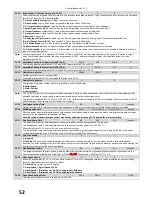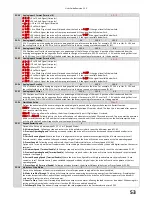
User Guide Revision 1.12
40
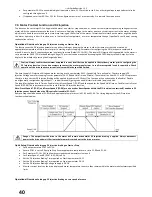
Set parameter P9-32 to an available digital input value. Note, P1-13 must be set to 0. Any other digital inputs required must also be
configured through menu 9.
If required, set either P2-15 or P2-18 = 9 to configure output relay 1 or output relay 2 to indicate fire mode active.
7.9.
Motor Pre-Heat Function and DC Injection
The drive can be set to inject DC voltage into the motor on a start or stop condition, or can be set to maintain magnetising voltage across the
motor whilst the speed reference to the drive is set to zero. Applying voltage to the motor creates a circulating current in the motor windings
which in turn heats the motor and prevent moisture forming on the surface of the motor. Formation of moisture on the motor might be due to
the motor operating in humid conditions or in low ambient temperature, or motor temperature change (specifically cool down) causing
condensation to form.
Operational Overview:
Setting up DC Injection braking on Start or Stop
The function uses the DC Injection parameters on either starting or stopping the motor in order to create a current and maintain an
appropriate temperature within the motor prior to starting or post stopping. Parameters for configuring the DC Injection are contained in
menu 6. Access to level 6 requires advanced level security access (Default P1-14=201). The level of DC Injection Voltage applied to the motor is
set in parameter P6-18 (DC Injection Braking Voltage). The current can be monitored by changing the OLED display to show Amps (cycle the
display to show Amps by pressing the Navigate button).
Caution: Always confirm the maximum acceptable current level that can be applied to the stationary motor prior to configuring the
DC Injection function. It may be necessary to contact the motor manufacturer to confirm acceptable levels for operation. Check
operation of the drive to ensure current levels are within the specified limited.
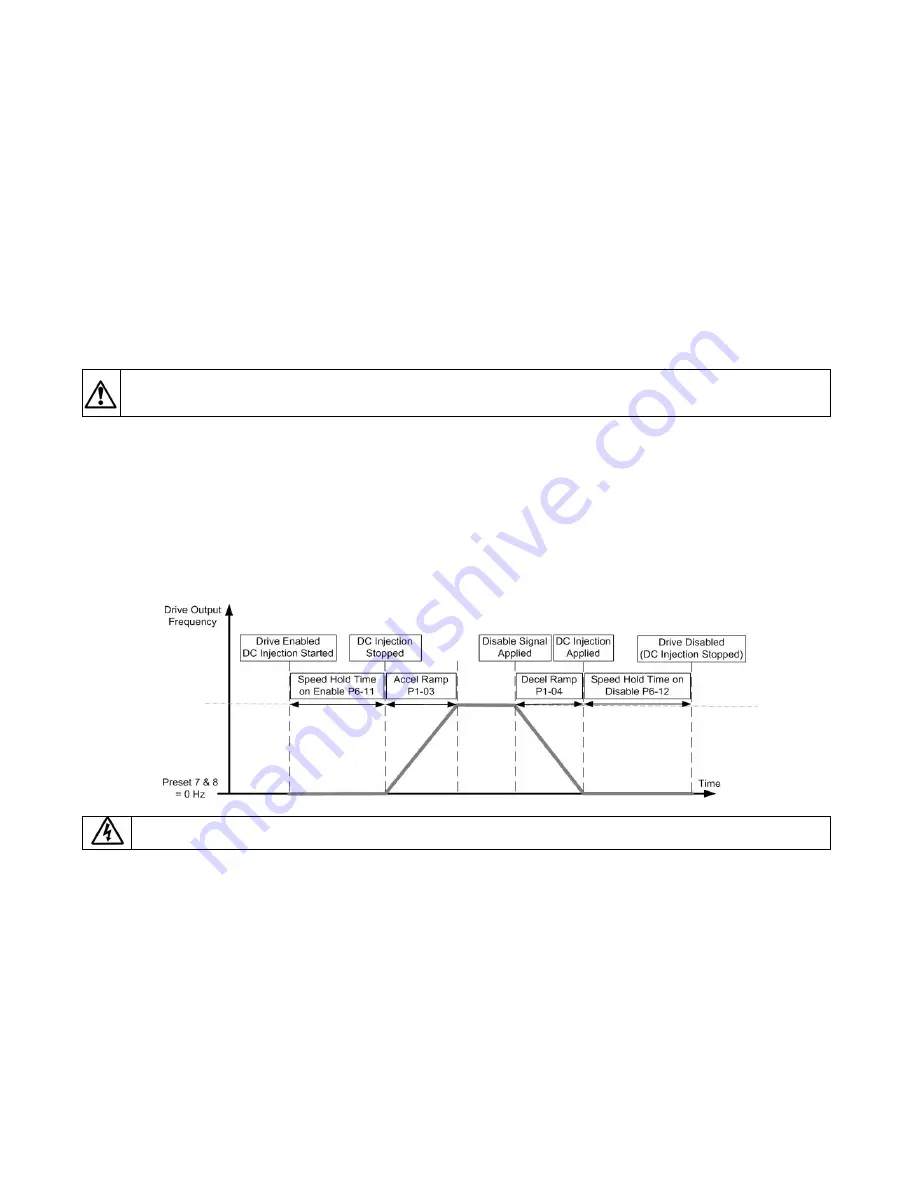
The time to apply DC Injection Voltage on motor starting is set by parameter P6-11 (Speed Hold Time on Enable). The time to apply DC
Injection Voltage on motor stopping is set by parameter P6-12 (Speed Hold Time on Disable). The value set in either P6-11 or P6-12 represents
the time in seconds that DC Injection Braking will be applied (maximum of 250 secs). The function is then activated by the Enable / Disable
input (generally configured as digital input 1 – control terminal 2) going to an enable (start) or disable (stop) condition.
The speed for the Speed Hold Time on Enable is set in Preset Speed 7 (P2-07) and the speed for the Speed Hold Time on Disable is set in Preset
Speed 8 (P2-08). These parameters must be set to 0 for the DC Injection function.
Note: Preset Speed 7 (P2-07) and Preset Speed 8 (P2-08) are also used as Boost Speeds within the PID function (see section 8) and hence DC
Injection cannot be used when the PID controller is enable (P1-12=3).
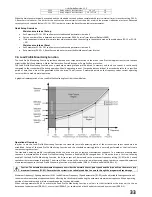
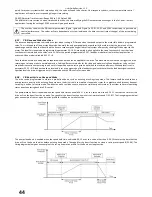
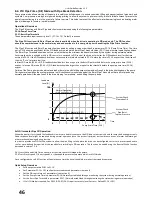
Ramp to Stop should be enabled (P1-05=0) and appropriate ramp rates set in P1-03 and P1-04. The timing diagram for the DC Injection
function is shown below.
Danger: The output from the drive to the motor will remain active whilst DC Injection braking is applied. Always disconnect
power to the drive and wait 10 minutes before work is carried out to the drive or motor.
Quick Setup Overview:
Setting up DC Injection Braking on Start or Stop
Set Basic parameters P1-01 to P1-10.
Ensure P1-05 is set to 0, Ramp to Stop. Ensure appropriate ramp rates are set in P1-03 and P1-04.
Set Parameter P1-14 = 201 to allow access to advanced parameters in menu 6
Set Preset Speed 7 and 8 (P2-07 & P2-08) to 0 Hz
Set the DC Injection Braking Time required on Start in parameter P6-11.
Set the DC Injection Braking Time required on Stop in parameter P6-12.
Set the DC Injection Braking Voltage to apply in P6-18.
Monitor current levels on the drive display and motor temperature to ensure they remain within the motor manufacturers specified
limits.
Operational Overview:
Setting up DC Injection Braking on zero speed reference
Summary of Contents for HVAC H2
Page 1: ......
Page 72: ...User Guide Revision 1 12 72 82 H2MAN BE_V1 11...

