Hardware Replacement
3.2 Replacing the 2.5” SATA Mass
Storage
The following is needed:
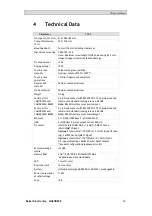
•
A new 2.5” SATA mass storage
•
A TX10 Torx screwdriver
Note:
Make sure to use adequate ESD protection.
Follow the steps below to replace the 2.5” SATA mass storage:
1. Power off the operator panel.
2. Remove the front frame assembly by removing the eight M3x8 Torx screws
on the back cover assembly.
Caution:
During disassembly, it is important to take care of the cable between the front and the
rear part. If you disconnect a cable, be sure that the right cable will be in the right
position when assembling.
Note:
The exchange of electronic components is only for experienced professionals.
Incorrect handling of electronic components or cables plugged in wrong, can lead to
the destruction of the device.
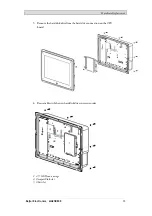
3. Remove the four M3x4 Torx screws on the two hard drive brackets. Remove
the two hard drive brackets.
4. Remove the two M3x6 Torx screws that are securing the brackets to the CPU
board.
Beijer Electronics, MAEN083E
12


