ITALIANO
ENGLISH
FRANÇAIS
26
COD. 653628 Rev.0
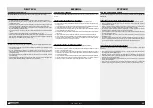
TARATURA BASE DELLA MACCHINA
Premere il tasto MENÙ e tenerlo premuto.
Appena sul display di sinistra compare la scitta
CAL
rilasciare immediatamente il tasto e premere
(entro 1,5sec) il tasto MM/INCH.
Ora il display di sinistra mostra la scritta
C-1
.
Prima fase di taratura: correzione squilibrio albero.
1 - Smontare la ruota e la flangia a coni eventualmente presente sull’albero;
2 - eseguire un lancio (senza flangia e senza ruota);
3 - al termine del lancio lo squilibrio misurato viene memorizzato; ciò consente di compensare
elettronicamente eventuali squilibri residui dell’albero della macchina.
Ora il display di sinistra mostra la scritta
C-2
.
Seconda fase di taratura: auto-taratura equilibratrice.
1 - Fissare saldamente la flangia a coni sull’albero e montare una
ruota di vettura
in buone condizioni
di medie dimensioni (larghezza 5.5", diametro 14") sulla flangia stessa fissandola bene;
2 - impostare con
molta attenzione
le misure della ruota utilizzando le corrispondenti coppie di tasti
(indicate con
4
,
5
e
6
in
fig. 19
);
3 - eseguire un lancio con la ruota;
4 - al termine del lancio la macchina richiede l’impostazione del valore del peso per le successive fasi
di taratura; il valore proposto automaticamente è 100g e viene visualizzato sul display di destra: il
dispaly visualizza
C-3 100
;
5 - modificare, se necessario, il
valore in grammi
del peso scelto per l’autotaratura ruota utilzzando i
tasti indicati con
5
in
fig. 19
;
il display di destra mostra il valore modificato;
6 - apporre il peso del valore prescelto sul
lato interno
della ruota ed eseguire un lancio;
7 - al termine del lancio
togliere il peso
di calibrazione
dal lato interno
della ruota ed
apporlo sul lato
esterno
nella posizione simmetricamente opposta (il display visualizza
C-4
ed il valore del peso di
calibrazione prescelto);
8 - eseguire un nuovo lancio;
9 - al termine del lancio occorre girare manualmente la ruota in modo da portare il peso di calibrazione
in posizione perpendicolare ad ore 6 (in basso sotto l’albero principale); il display visualizza
C-5
ed
il valore dell’angolo di calibrazione;
10-
tenendo la ruota in questa posizione
, premere il tasto SPLIT (che presenta entrambi i led accesi).
La taratura eseguita viene automaticamente memorizzata in modo permanente.
BASIC CALIBRATION OF MACHINE
Press the MENU key and keep pressed.
As soon as
CAL
appears on the screen, immediately release the key and press the MM/INCH key
(within 1.5sec).
The writing
C-1
will appear on the screen.
First calibration stage: correction of shaft unbalance.
1 - Dismount wheel and cone flange if present on shaft;
2 - launch machine (without flange and wheel);
3 - at end of run the unbalance measured is saved; this enables the machine to compensate any re-
sidual shaft unbalance electronically.
Now
C-2
will appear on the left display.
Second calibration stage: balancer self-calibration.
1 - Tightly fasten the cone flange on the shaft and mount a medium-sized vehicle wheel in good condi-
tion (width 5.5", diameter 14") on the flange, fastening well;
2 -
very carefully
set the wheel measurements using the corresponding pair of keys (indicated by
4
,
5
and
6
in
fig. 19
);
3 - launch a wheel run;
4 - on completion, the machine will request the weight setting for the following calibration phases; the
automatic set weight is 100g, which appears on the right display;
C-3 100
appears on the display;
5 - change the gram setting if necessary for wheel self-calibration, using if necessary the keys indi-
cated by
5
in
fig. 19
;
the right display will show the changed setting;
6 - locate the preselected weight on the internal side of the wheel and launch;
7 - at the end of the launch remove the calibration weight from the internal side of the wheel and locate
it on the external side at the symmetrically opposite position (
C-4
and the preselected calibration
weight appear on the display);
8 - launch again;
9 - at the end of the run the wheel must be manually rotated so as to bring the calibration weight into a
perpendicular position at 6 o’clock (bottom, below the main shaft);
C-5
and the calibration angle
setting will appear on the display;
10-
keeping the wheel in this position
, press the SPLIT key (with both LEDs lit up).
The calibration setting is automatically and permanently saved.
ETALONNAGE DE BASE DE LA MACHINE
Presser la touche MENU et continuer de la presser.
Dès que l’afficheur gauche montre
CAL,
relâcher la touche immédiatement et frapper (dans 1,5sec) la
touche MM/INCH.
L’afficheur gauche montre maintenant
C-1
.
Première phase d’étalonnage: correction du balourd de l’axe.
1 - Démonter la roue et le plateau à cônes éventuellement présent sur l’axe;
2 - exécuter un lancer (sans plateau ni roue);
3 - à la fin du lancer, le balourd mesuré est mémorisé; cela permet de compenser électroniquement les
éventuels balourds résiduels de l’axe de la machine.
L’afficheur gauche montre maintenant
C-2
.
Deuxième phase d’étalonnage: auto-étalonnage de l’équilibreuse.
1 -Fixer solidement le plateau à cônes sur l’axe et monter sur le plateau une
roue de tourisme
en
bonnes conditions de dimensions moyennes (largeur 5.5", diamètre 14") en la fixant bien;
2 -en faisant
très attention,
introduire les mesures de la roue utilisant les paires de touches
correspondantes indiquées par
4
,
5
et
6
dans la
fig. 19
);
3 -exécuter un lancer avec la roue;
4 -à la fin du lancer, la machine demande l’introduction de la valeur de la masse pour les phases
d’étalonnage suivantes; la valeur proposée automatiquement est de 100g et est affichée à droite:
l’afficheur montre
C-3 100
;
5 -modifier, si nécessaire, la
valeur en grammes
de la masse choisie pour l’auto-étalonnage de la roue
en utilisant les touches indiquées par
5
dans la
fig. 19
;
l’afficheur droit montre la valeur modifiée;
6 -mettre la masse de la valeur choisie sur le
côté intérieur
de la roue et exécuter un lancer;
7 -à la fin du lancer,
ôter la masse
de calibrage
du côté intérieur
de la roue et
la mettre sur le côté
extérieur dans la position symétriquement opposée
(l’afficheur montre
C-4
et la valeur de la masse
de calibrage choisie);
8 -exécuter un nouveau lancer;
9 -à la fin du lancer, faire tourner la roue à la main de façon à amener la masse de calibrage en position
perpendiculaire à 6 heures (en bas sous l’axe principal); l’afficheur montre
C-5
et la valeur de l’angle
de calibrage;
10-
tout en gardant la roue à cette position
, frapper la touche SPLIT (qui montre les deux leds allumées).
L’étalonnage exécuté est mémorisé automatiquement de façon permanente.
Summary of Contents for MICROTEC 810
Page 44: ...MICROTEC 810 N 653332 Rev 2 ...
Page 45: ...MICROTEC 810 N 653333 Rev 3 ...
Page 48: ...OPTIONAL N 653334 Rev 1 ...
Page 49: ......


