Appendix
Operating manual CARLO Alu 230
V2.7 E
Page 47 of 56
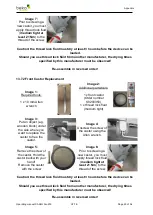
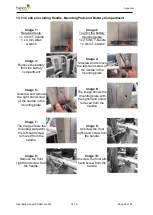
Image 11:
Remove the front left-
hand screw from the
handle.
Image 12:
Remove the diode
plug of the handset
from the control box.
Image 13:
Remove the jack plug
of the lifting motor
from the control box.
Image 14:
Remove the jack plug
of the spreading
motor from the control
box.
Image 15:
Unscrew and remove
the locking screw of
the control box and
remove the control
box.
Image 16:
Unscrew and remove
the top locking screw
from the battery
compartment.
Image 17:
Unscrew and remove
the middle locking
screw from the
battery compartment.
Image 18:
Unscrew and remove
the bottom locking
screw from the
battery compartment.
Image 19:
Remove the battery
compartment from the
mounting plate.
Image 20:
Unscrew and remove
the two top locking
screws from the
mounting plate.
Image 21:
Unscrew and remove
the two bottom
locking screws from
the mounting plate.
Image 22:
Remove the mounting
plate.
Re-assemble in reversed order!

