18
9. ACCESSORIES
9.1 External keypad
The four indicator push buttons are located behind
the instrument control cover, for applications
requiring frequent adjustment an optional control
cover fitted with an external keypad is available.
This keypad maintains the enclosure ingress
protection and accidental push button activation
can be prevented by use of a menu security
access code, see section 6.10.
9.2 Units measurement & instrument
identification.
Both the BA304E and the BA324E indicators are
fitted with a blank escutcheon around the liquid
crystal display. This can be supplied printed with
any units of measurement and tag information
specified at the time of ordering. Alternatively, the
information may be added on-site via an embossed
strip, dry transfer or a permanent marker.
To gain access to the display label remove the
terminal cover by unscrewing the two 'A' screws
which will reveal two concealed 'D' screws. If the
instrument is fitted with external keypad, also
unscrew the two 'C' screws securing the buttons
and un-plug the five way connector. Finally
unscrew all four 'D' screws and carefully lift off the
front of the instrument. The location of all the
screws is shown in Fig 4.
Add the required legend to the display escutcheon,
or stick a new pre-printed self-adhesive
escutcheon, which is available from BEKA
associates, on top of the existing escutcheon. Do
not remove the original escutcheon.
Both indicators can also be supplied with a blank
or custom laser engraved stainless steel plate
secured by two screws to the front of the
instrument enclosure. This plate can
accommodate:
1 row of 9 alphanumeric characters 10mm high
or 1 row of 11 alphanumeric characters 7mm high
or 2 rows of 18 alphanumeric characters 5mm high
9.3 Alarms
CAUTION
These alarms outputs should not be used for
critical safety applications such as an
emergency shut down system.
Both models can be supplied with factory fitted
dual solid state, single pole alarm outputs. Each
alarm output may be independently conditioned as
a high or low alarm with a normally open or
normally closed output in the non-alarm condition.
When the 4/20mA current powering the indicator is
removed both alarm outputs will open irrespective
of configuration. The open circuit condition should
therefore be chosen as the alarm condition when
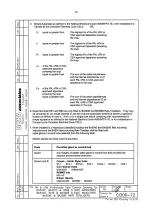
designing an alarm system. Fig 9 illustrates the
conditions available and shows which are fail safe.
When an alarm occurs an alarm annunciator on
the indicator front panel is activated and if required
the numerical display can alternate between the
measured value and the alarm channel
identification ‘ALr1’ or ‘ALr2’.
CAUTION
The alarms are activated by the indicator’s
numerical display. Use of the Tare Function
‘tArE’ will change the numerical display, the
alarms will continue to function at the original
displayed value, but this will correspond to a
different input current.
Fig 9 Alarm outputs
Configurable functions for each alarm include
adjustable setpoint, hysteresis, alarm delay and
alarm accept.


