background image

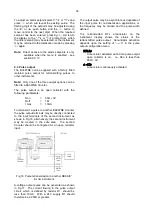
6.7  Input pulse counting edge:   

Cnt EdgE

This function defines whether the BA367NE Counter
is  incremented/decremented  on  the  leading  or
trailing edge of an input pulse.

To check or change the input pulse edge on which
the  count  occurs  select  

Cnt  EdGE

 from  the

configuration menu and press


(

 which will reveal

EdGE 1

 or  

EdGE 2

.  If required press the  

&

 or  

*

button  to  change  the  setting,  followed  by  the


)

button to return to the configuration menu.


EdGE 1

             Type of input          Counting edge

Voltage

Low to high

Switch contact

Closed to open

Open collector

Closed to open

Proximity detector

High to low current


EdGE 2

             Type of input          Counting edge

Voltage

High to low

Switch contact

Open to closed

Open collector

Open to closed

Proximity detector

Low to high current

6.8  Display update interval:   

uPdAtE

If  either  the  rate  or  the  total  display  is  likely  to
change  rapidly,  a  longer  interval  between  display
updates may simplify reading.  This function allows
one of six different display intervals between 0.5 and
5  seconds  to  be  selected.    The  selected  display
update interval does not affect the update time of
any other instrument function.

To adjust the update interval select 

uPdAtE

 from the

configuration  menu  and  press  

(

  to  reveal  the

current  update  interval.      Pressing  the  

&

 or  

*

button  will  scroll  through  the  six  times.  When  the
required  interval  has  been  selected  press  

)

 to

enter  the  selection  and  return  to  the configuration
menu.

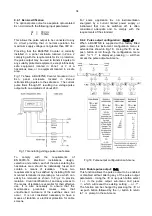
6.9  Upper display:  

di5P-1

Usually the total count is shown on the larger upper
eight  digit  display,  but  this  function  reverses  the
display locations allowing rate to be shown on the
larger upper display and total on the smaller lower
display. 

To check the setting for the display, select  

dI5P-1

from the configuration menu and press 

(

 which will

reveal if the display is showing 

rAtE

 or 

totAL

.  The

setting can be changed by pressing the  

&

 or  

*

button  followed  by  the  

)


button  to  enter  the

selection and return to the configuration menu.

6.10  Lower display:  

di5P-2

This  function  turns  the  lower  display  

on

 or  

off

.

When turned  

off

, the BA367NE will only have one

eight digit display which may be configured in the

di5P-1

  function to show the total count or rate.

To  check  the  setting  for  the  lower  display,  select

di5P-2

  from  the  configuration  menu  and  press

(

 that will reveal if the lower display is  

on

 or 

oFF

.

The setting may be changed by pressing the 

&

 or

*

 button  followed  by the  

)


button to  enter the

selection and return to the configuration menu.

6.11  Position of the decimal points:   

dP

The  upper  and  lower  displays  have  eight  and  six
digits  respectively.    This  function  enables  the
position of the decimal point in both displays to be
independently positioned as shown below.  

    Upper display


Total        

0


0


0


.


0


.


0


.


0


.


0


.


0      

1 of 5 positions or absent

Rate

0


0


.


0


.


0


.


0


.


0

1 of 4 positions or absent

    Lower display


Total


0


.


0


.


0


.


0


.


0


.


0     

1 of 5 positions or absent

Rate             

0 0


.


0


.


0


.


0


.


0

1 of 4 positions or absent

To adjust the position of the decimal points select 

dP

from  the  configuration  menu  and  press  

(

.    The

upper display defined as the rate or total display by
function  

di5P-1

 (section 6.9) will be activated and

identified  by  the  display  annunciator  as  Rate  or
Total.   The decimal point, which may be positioned
as shown in the table above, is moved by operating
the  

&

 or  

*

 push button.  The  

&

 button moves

the position of the decimal point to the left and the

*

 button moves the decimal point position to the

right.

When  the  decimal  point  in  the  upper  display  has
been positioned pressing the 

(


button will transfer

control to the lower display variable, but it will be
shown and annunciated on the larger upper display.
The position of the decimal point may be positioned
in the same way by operating the 

&

 and 

*

 push

buttons.  When both decimal points are positioned
as  required,  enter  the  settings  and  return  to  the
configuration menu by operating the 

)

 button.

Note:

Adjustment   of   a   decimal   point   position   will
disable  the  following  outputs  which must be
re-enabled after the adjustment is complete:

Pulse output

Optional Alarm outputs.

Optional 4/20mA output.

19

Summary of Contents for BA364G

Page 1: ...Issue 7 9th July 2019 BA367NE One input Ex nA and Ex tc Counter Issue 7 ...

Page 2: ... type inP tYPE 6 6 Input debounce dEbouncE 6 7 Input pulse counting edge Cnt EdgE 6 8 Display update interval uPdAtE 6 9 Upper display di5P 1 6 10 Lower display di5P 2 6 11 Position of the decimal points dP 6 12 Total scale factor 5CALE t 6 13 Rate scale factor 5CALE r 6 14 Timebase t bA5E 6 15 Display filter FiLtEr 6 16 Direction of count uP or dn 6 17 Reset value CLr VAL 6 18 Local reset LoC CLr...

Page 3: ...play mode 9 4 Pulse Output 9 4 1 Ex nA certification 9 4 2 Pulse output configuration PuL5E oP 9 4 3 Enable pulse output EnbL 9 4 4 Source of pulse output 5ourCE 9 4 5 Divide output pulse frequency diVidE 9 4 6 Output pulse width durAtion 9 4 7 Pulse storage 9 5 4 20mA output 9 5 1 Ex nA certification 9 5 2 Configuration 9 5 3 4 20mA output 4 20 oP 9 5 4 Enable 4 20mA output EnbL 9 5 5 Select rate...

Page 4: ...ounter initialisation is performed After a short delay the following display sequence occurs All segments of the display are activated Counter starts functioning using the configuration information stored in the instrument s permanent memory Unless total and grand total displays have been reset to zero new pulses will be added to the existing totals 2 2 Controls The BA367NE Counter is controlled a...

Page 5: ...dicator of the display rotates for two seconds each time an input pulse is received on either input Appears to rotate continuously when combined input frequency on both inputs exceeds 0 5Hz Reset Activated while the total display annunciator is being reset via the front panel push buttons or the external reset terminals Rate Identifies rate display annunciator Total Identifies total display annunc...

Page 6: ...closure located in Zone 2 When connected to a suitable system and correctly mounted in a panel enclosure complying with the requirements for Type of protection n the panel enclosure containing the BA367NE Counter may be installed in Zone 2 explosive gas air mixture not likely to occur and if it does will only exist for a short time Be used with gases in groups Group A propane Group B ethylene Grou...

Page 7: ... Ex e Ex p and Ex d protected apparatus located in Zone 2 Because the BA367NE is not certified intrinsically safe it should not be connected to an intrinsically safe system BEKA Application Guide AG310 Guide for Installation of extra low voltage d c Ex nA instrumentation which can be downloaded from www beka co uk contains explanations and recommendations for the installation of Ex nA equipment In...

Page 8: ...nted terminals incorporating an easily removable fuse which can be extracted to achieve isolation as shown in Fig 2 Clear identification of and easy access to the means of isolation is essential for their effective use It is also necessary to ensure that the maintenance procedure makes sure that unauthorised re closure of the switches does not occur It is not considered necessary to have a means o...

Page 9: ... 6 providing the minimum operating voltage of the proximity detector is greater than 7 5V The sensor and the associated wiring should be able to withstand a 500V rms insulation test to earth The BA367NE contain a configurable debounce circuit to prevent false triggering See section 6 6 4 2 5 Magnetic pick off input Magnetic pick off sensors usually have a low level ac voltage output which a BA367N...

Page 10: ... the edges of aperture are de burred b Inspect the Counter s captive gasket and ensure that it is not damaged before inserting it into the panel enclosure aperture c If the enclosure panel is less than 1 0mm thick or is non metallic an optional BEKA stainless steel support plate should be slid over the rear of the indicator before the panel clamps are fitted to evenly distribute the clamping force...

Page 11: ...scale card showing the requested units of measurement if this information is not supplied when the instrument is ordered a blank card will be fitted A pack of self adhesive scale cards printed with common units of measurement is available as an accessory from BEKA associates Custom printed scale cards can also be supplied To change a scale card unclip the protruding end of the flexible strip by ge...

Page 12: ...n uP or dn uP Clear value clr val 00000000 Local clear Local total reset Clr tot oFF Local grand total reset Clr Gtot oFF Security code CodE 0000 Note While the instrument is being configured counting continues so that any input pulses occurring during this time are recorded 6 1 Configuration structure Fig 10 shows the calibration structure of the BA367NE Counter The pulse input is passed to the 5...

Page 13: ... 5AVE while the new information is stored in permanent memory If after accessing the configuration menu the interval between operating any front panel push button exceeds one minute the BA367NE will automatically return to the display mode and any configuration changes will not be stored in permanent memory When making changes to multiple configuration functions it is therefore sensible to occasio...

Page 14: ...ngineering units 5CALE r may be adjusted between 0 0001 and 99999 e g if one pulse represents 2 pump strokes and the rate display is required in pump strokes 5CALE r should be set to 2 0 The rate display is independent of the total display See section 6 13 Display Summary of function t bA5E Timebase Selectable multiplier allowing rate to be displayed in units per second per minute or per hour Sele...

Page 15: ...al can not be restored See section 6 20 Clr Gtot Resets grand total to zero from within configuration menu This function resets the grand total to zero from within the configuration menu when CLr YE5 is selected Note Once reset the grand total can not be recovered See section 6 21 Display Summary of function CodE Access code Defines a four digit alphanumeric code that must be entered to gain acces...

Page 16: ...16 ...

Page 17: ...17 ...

Page 18: ...the input miscounting when the input pulse has noisy edges such as those resulting from a mechanical contact closing and bouncing Three levels of protection may be selected The amount of debounce applied depends upon the type of Counter input that has been selected in the inP tYPE function Select inPut in the configuration menu and press which will reveal the inP tYPE prompt press the or button to...

Page 19: ...eturn to the configuration menu 6 10 Lower display di5P 2 This function turns the lower display on or off When turned off the BA367NE will only have one eight digit display which may be configured in the di5P 1 function to show the total count or rate To check the setting for the lower display select di5P 2 from the configuration menu and press that will reveal if the lower display is on or oFF Th...

Page 20: ...e counts per unit of time The unit of time is the timebase of the instrument which is determined by t bA5E described in section 6 14 To check or change the rate scale factor select 5CALE r from the configuration menu and press which will reveal the existing value with one digit flashing The value of the flashing digit may be adjusted by pressing the or button When this digit has been adjusted as r...

Page 21: ...ount uP or dn This function defines whether input pulses increment or decrement the total display i e whether the BA367NE is an up counter or a down counter When configured as a down counter with a non zero number entered for the reset value CLr VAL the BA367NE will count down from the reset value to zero To check or change the count direction select uP or dn from the configuration menu and press ...

Page 22: ...the LoC CLr prompt in the configuration menu Note Once reset the grand total can not be recovered 6 21 Reset grand total from configuration menu Clr Gtot The grand total is a separate sixteen digit counter which is incremented or decremented in parallel with the total display but is not reset when the total display is reset The grand total may be viewed in the display mode in two eight digit secti...

Page 23: ...f strokes that a reciprocating pump makes in thousands of strokes on the larger upper display and to show the speed of pumping in strokes per hour on the lower display The stroke sensor is a proximity detector which produces four pulses per stroke The total display is only to be resettable by an external contact not from the BA367NE Counter front panel Similarly the grand total is not to be resett...

Page 24: ...mple the proximity detector produce four pulses per pump stroke The BA367NE is required to display thousands of pump strokes therefore the total scale factor 5CALE t should be set to 4 x 1000 4000 Select 5CALE t from the configuration menu and press to view the current value with one digit flashing Use the or button to adjust the flashing digit and the button to transfer control to the next digit ...

Page 25: ...ation menu and press which will reveal the existing security code with the first digit flashing Enter the new code 1209 using the or button to adjust the flashing digit and the button to transfer control to the next digit When the new code has been entered press to return to the configuration menu Step 12 Return to the display mode Following completion of configuration return the BA367NE to the di...

Page 26: ... Optional alarms do not function Alarms have been disabled following configuration change Re enable both alarms 8 2 Fault finding after commissioning EN 60079 17 Electrical installations inspection and maintenance permits live maintenance in Zone 2 if a risk analysis demonstrates that this does not introduce an unacceptable risk The removal of covers opening of Ex n enclosure is permitted if this ...

Page 27: ...nmental conditions 8 5 Guarantee Instruments which fail within the guarantee period should be returned to BEKA associates or our local agent It is helpful if a brief description of the fault symptoms is provided 8 6 Customer comments BEKA associates is always pleased to receive comments from customers about our products and services All communications are acknowledged and whenever possible suggest...

Page 28: ...refore be chosen for the alarm condition Alarm annunciators on the instrument display indicate the status of each alarm If an alarm delay or silence time has been selected the annunciator will flash during the delay or silence period The BA367NE internal counters are up dated and compared with the alarm setpoint twice per second irrespective of the display update time selected This may result in a...

Page 29: ...o alarm AL1 The following table summarises each of the alarm configuration functions and includes a cross reference to more detailed information Again only the functions on alarm AL1 are listed Display Summary of function EnbL Alarm enable Enables or disables the alarm without changing the alarm parameters See section 9 3 4 tYPE Type of alarm Defines whether the alarm operates on the rate or total...

Page 30: ... return to the Hi Lo prompt in the alarm sub menu 9 3 8 Alarm output status no nC Each single pole alarm output may be open or closed in the non alarm condition When the BA367NE power supply is turned off or disconnected the alarm output s will open irrespective of whether normally open or normally closed outputs have been selected Therefore when designing an alarm system normally closed nc should...

Page 31: ...on After an alarm has occurred operating the button will cause the alarm output to revert to the non alarm condition for the programmed alarm silence time When an alarm is silenced by operating the push button the Counter s alarm annunciator will flash until the silence time expires To adjust the alarm silence time select 5iL using the or push button in the selected alarm sub menu and press which ...

Page 32: ... the AC5P sub menu and press which will cause the Counter to display 0000 with one digit flashing The flashing digit may be adjusted using the or push button when set as required operating the button will transfer control to the next digit When all the digits have been adjusted press twice to return to the AC5p prompt in the configuration menu The revised security code will be activated when the C...

Page 33: ...e to another BA367NE Counter the pulse output terminals may be directly connected to the input terminals of the second instrument as shown in Fig 16 alternatively the second instrument may be located in the safe area The second Counter should be configured for an open collector input Fig 16 Pulse retransmission to another BEKA E Ex nA instrument A voltage output pulse can be generated as shown in ...

Page 34: ...unted terminals incorporating a fuse which can easily be removed as shown in Fig 2 to provide isolation Clear identification of and easy access to the means of isolation is essential for their effective use It is also necessary to ensure that the maintenance procedure makes sure that unauthorised re closure of the switches does not occur It is not considered necessary to have a means of isolation ...

Page 35: ... to followed by the button to return to diVidE prompt in the sub menu Note This function only appears in the pulse output sub menu when 5CALEd is selected in the 5ource sub function See 9 4 4 9 4 6 Output pulse width durAtion When 5CALEd is selected in the 5ource sub function 9 4 4 the output pulse width is defined by this function One of following millisecond pulse widths may be selected 0 1 0 5 ...

Page 36: ...mply with the requirements of EN 60079 14 Electrical installations design selection and erection each of the wires entering the hazardous area should be individually fused and contain a means of isolation These two requirements may be satisfied by installing DIN rail mounted terminals incorporating a fuse which can easily be opened as shown in Fig 2 to provide isolation Clear identification of and...

Page 37: ...tput sub menu and press to reveal the existing setting totAL or rAtE The function can be changed by pressing the or push button followed by the button to return to the 4 20tYPE prompt in the sub menu 9 5 6 Display which corresponds to 4mA output 4 000 The Counter display which corresponds to a 4 000mA output current is defined by this function Using the or push button select 4 000 in the 4 20mA ou...

Page 38: ...d in the main section of this instruction manual all BA367NE Counters have ATEX dust ignition protection by enclosure certification Ex tc permitting installation in combustible dust atmospheres The front panel push button switches are non incendive and have been certified intrinsically safe Ex ic without the need for Zener barriers or galvanic isolators This appendix describes ATEX installations i...

Page 39: ...nspections depends upon environmental conditions Removal of flammable dust should be performed with care to avoid creating a dust cloud Appendix 2 IECEx certification Appendix 2 IECEx certification A2 0 The IECEx Certification Scheme IECEx is a global certification scheme for explosion protected products which aims to harmonise international certification standards For additional information about...

Page 40: ...L safety parameters are the same as the ATEX and IECEx parameters the systems shown in sections 3 4 and 5 of this manual may therefore also be used for US and Canadian installations subject to complying with the local codes of practice ETL and cETL codes CL I Zone 2 AEx nA ic IIC T5 Gc US gas Zone cert Zone 22 AEx ic tc IIIC T80ºC Dc US dust Zone cert Ex nA ic IIC T5 Gc Canadian gas Zone cert Ex i...

Reviews: