background image

5

5.  INSTALLATION

5.1 Location
The  BA448CF-P  is  housed  in  a  robust  aluminium
enclosure with a toughened glass window mounted
in  a  Noryl  bezel.    The  front  of  the  instrument
provides  IP66  protection  and  a  gasket  seals  the
joint  between  the  instrument  enclosure  and  the
panel.    The  instrument  may  be  installed  in  any
panel  providing  the  environmental  limits  shown  in
the specification are not exceeded.

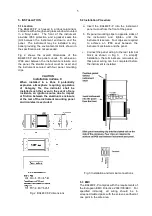
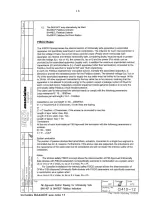
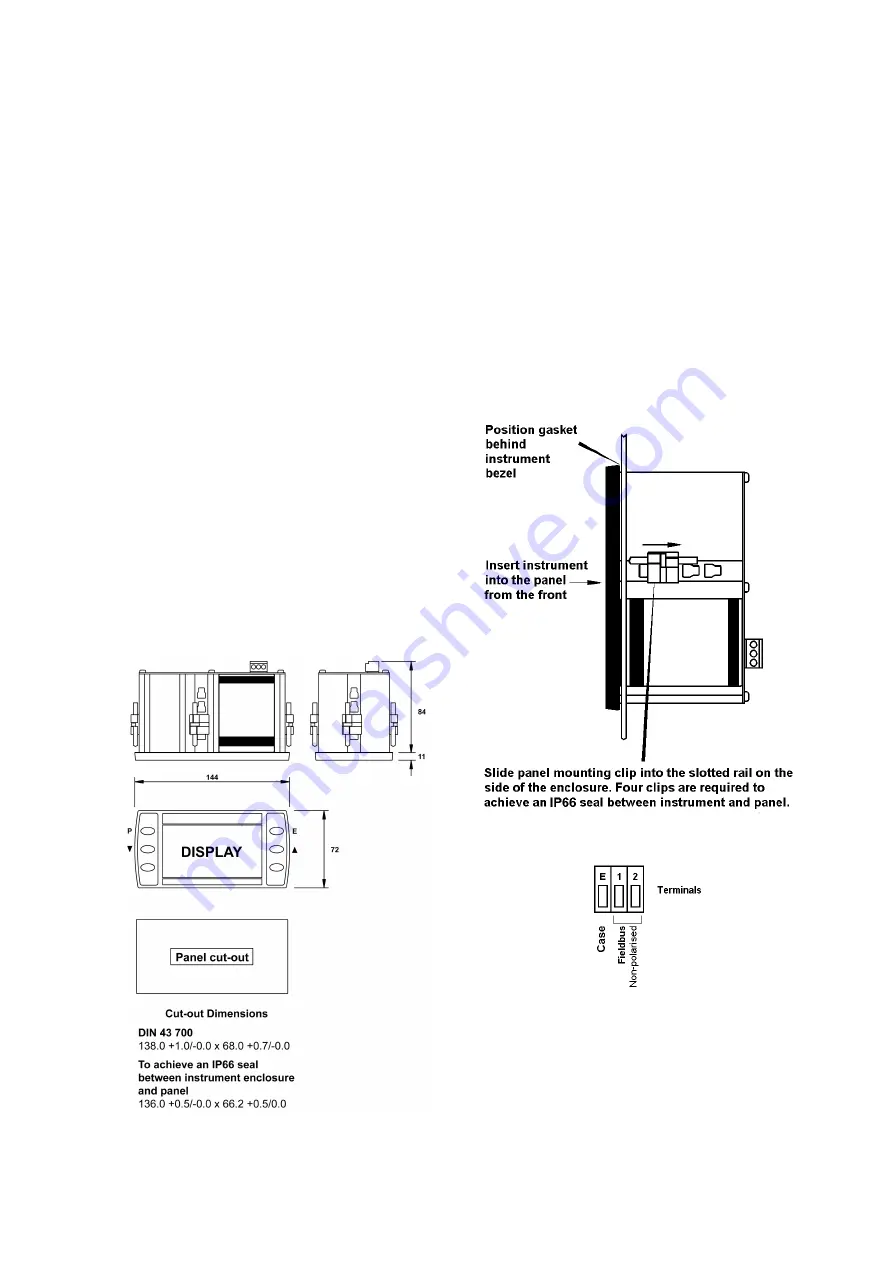
Fig  2  shows  the  overall  dimensions  of  the
BA448CF-P and the panel cut-out.  To achieve an
IP66  seal  between  the  instrument  enclosure  and
the  panel,  the  smaller  cut-out  must  be  used  and
the  instrument  secured  with  four  panel  mounting
clips.

CAUTION

Installation in Zone 0

When  installed  in  a  Zone  0  potentially
explosive  atmosphere  requiring  apparatus
of  Category  1G,  the  indicator  shall  be
installed  such that even in the  event  of  rare
incidents,  an  ignition  source  due  to  impact
or friction between the aluminium enclosure
at the rear of the instrument mounting panel
and iron/steel is excluded.

Fig 2  BA448CF-P dimensions

5.2 Installation Procedure

a.  Insert  the  BA448CF-P  into  the  instrument

panel cut-out from the front of the panel.

b. Fix panel mounting clips to opposite sides of

the  instrument  and  tighten  until  the
instrument is secure.  Four clips are required
to  achieve  an  IP66  seal  between  the
instrument enclosure and the panel.

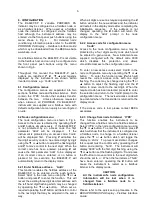
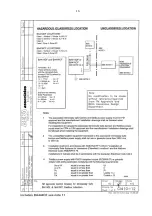
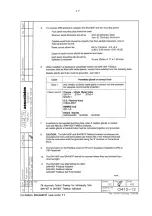
c.  Connect the panel wiring to the rear terminal

block  as  shown  in  Fig  3.      To  simplify
installation,  the  terminals  are  removable  so
that  panel  wiring  can  be  completed  before
the instrument is installed.

Fig 3  Installation and terminal connections

5.3  EMC
The BA448CF-P complies with the requirements of
the  European  EMC  Directive  2004/108/EEC.    For
specified  immunity,  all  wiring  should  be  in
screened twisted pairs with the screens earthed at
one point in the safe area.

Summary of Contents for BA448CF-P

Page 1: ...Supplied by Call us on 44 0 118 916 9420 Email info 247able com com Installation Maintenance Instructions BA448CF P...

Page 2: ...Park Danehill Lower Earley Reading Berkshire RG6 4UT UK Tel 44 0 118 9311188 Email info able co uk Aberdeen Office Unit 6 Airside Business Park Kirkhill Industrial Estate Dyce Aberdeen AB21 0GT UK Tel...

Page 3: ...Issue 2 23 rd June 2011 BA448CF P PROFIBUS PA Intrinsically safe Panel mounting 8 variable Fieldbus Indicator Issue 2...

Page 4: ...ured input parameters 6 4 3 Enter address display parameters 6 4 4 Enable selected input 6 4 5 Enter source address 6 4 6 Enter destination address 6 4 7 Enter Index 6 4 8 Decimal point position 6 4 9...

Page 5: ...es to this manual For additional node configuration information please refer to the BEKA PROFIBUS PA Display Fieldbus Interface Guide which is available from the BEKA sales office or may be downloaded...

Page 6: ...on information The instrument serial number and year of manufacture are shown on the rear panel adjacent to the terminals 4 SYSTEM DESIGN FOR HAZARDOUS AREAS 4 1 FISCO Systems The BA448CF P may be con...

Page 7: ...that even in the event of rare incidents an ignition source due to impact or friction between the aluminium enclosure at the rear of the instrument mounting panel and iron steel is excluded Fig 2 BA4...

Page 8: ...the or button When set as required operating the P button will transfer control to the next digit that may be adjusted in the same way When all digits are set as required operating the E button will...

Page 9: ...BA448CF P listener are not known In the SCAn function pressing the P button causes the BA448CF P listener to search the fieldbus segment to which it is connected for all data sources The hexadecimal...

Page 10: ...8...

Page 11: ...eters Sub menu which allows known fieldbus device addresses to be entered and all display parameters adjusted for each of the eight fieldbus listener inputs See section 6 4 3 Enb Enable selected input...

Page 12: ...source address to the selected input and return the display to the source and destination addresses from which another data source address may be selected When a data source address is allocated to a...

Page 13: ...mode irrespective of the numeric value When positioned as required operating the E button will enter the selection and return to the dP prompt in the edit sub menu 6 4 9 Configuration of bargraph dis...

Page 14: ...evised access code will be activated when the transmitter is returned to the display mode If the access code is lost please contact BEKA associates 6 4 12 Change from fieldbus listener to fieldbus nod...

Page 15: ...y mode 7 2 Fault finding after commissioning ENSURE PLANT SAFETY BEFORE STARTING MAINTENANCE Live maintenance is permitted on intrinsically safe equipment installed in a hazardous area but only certif...

Page 16: ...a scale for the horizontal bargraph 8 2 Tag number The BA448CF P can be supplied with a thermally printed tag number on the rear panel adjacent to the terminals 8 3 BEKA PROFIBUS PA Display Fieldbus...

Page 17: ...SCO Field Device requirements specified in IEC60079 27 The intrinsically safe system shown in Fig 1 of this manual may therefore be used for installations in the USA and Canada providing the fieldbus...

Page 18: ...16...

Page 19: ...17...

Page 20: ...18...

Page 21: ...19...

Page 22: ...20...

Page 23: ...21...

Page 24: ...22...

Page 25: ...BA448CF P may be installed in Zone 0 explosive gas air mixture continuously present Note Special conditions for safe use apply see above Zone 1 explosive gas air mixture likely to occur in normal oper...

Reviews: