3
1.
DESCRIPTION
The BR323AL and BR323SS are flameproof,
field mounting, loop powered 5 digit indicators
which display the current flowing in a 4/20mA
loop in engineering units. The instruments only
introduce a 2.3V drop allowing them to be
installed into almost any 4/20mA loop.
The main application of these loop powered
indicators is to display a measured variable or
control signal in a hazardous process area. The
zero and span of the digital display are
configurable via a temporary serial data link
using the free Windows
®
compatible BEKA
software. This software also enables linear,
square root or custom linearisation to be
selected and the units of measurement legend,
which appears below the main display, to be
entered.
The two models are functionally identical. The
BR323AL is housed in an epoxy painted
flameproof aluminium enclosure and the
BR323SS is in a stainless steel flameproof
enclosure. Both enclosures provide IP66 &
NEMA Type 4X protection. In this instruction
manual BR323 refers to the removable
electronic assembly which is common to both
the BR323AL and the BR323SS.
Both instruments have been certified flameproof
and comply with the European ATEX Directive
94/9/EC. They also have Factory Mutual
explosion proof and dust ignition proof approval.
For use in Canada, the BR323SS which is
housed in a stainless steel enclosure, has CSA
explosion proof component approval.
Note:
The BR323AL, which has an aluminium
enclosure, is not approved for use in Canada.
The BR323 removable electronic assembly,
which is common to both models may only be
installed in a hazardous area when mounted
within a flameproof BR323AL aluminium or
BR323SS stainless steel enclosure.
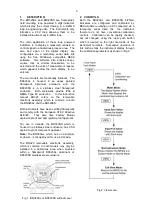
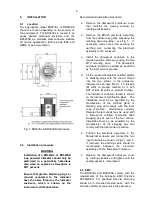
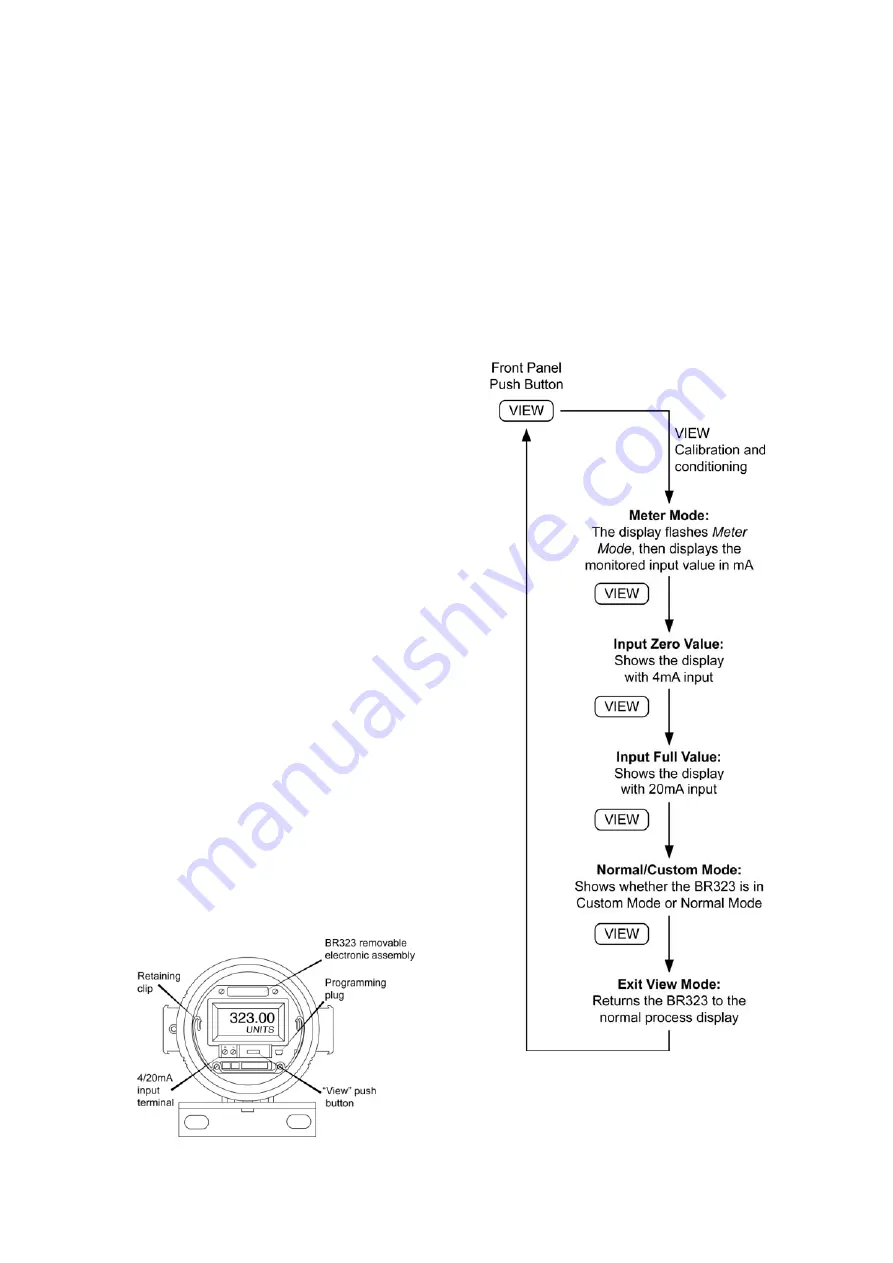
Fig 1 BR323AL or BR323SS without cover
2. CONTROLS
Both the BR323AL and BR323SS 4/20mA
indicators are configured and calibrated by
BEKA software running on a PC connected via a
temporary serial data link, the indicators
therefore do not have conventional calibration
controls. Calibration can be rapidly checked,
but not changed, using the ‘view’ push button
which is located on the right hand side of the
instrument terminals. Successive operation of
this button steps the instrument display through
the calibration parameters as shown in Fig 2.
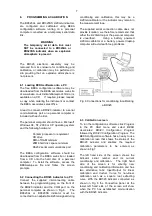
Fig 2 View menu


