EN / 24
4 First Use
Before you start using your product, it is re-
commended to do the following stated in the
following sections respectively.
4.1 First Timer Setting
Always set the time of day before
using your oven. If you do not set it,
you cannot cook in some oven mod-
els.
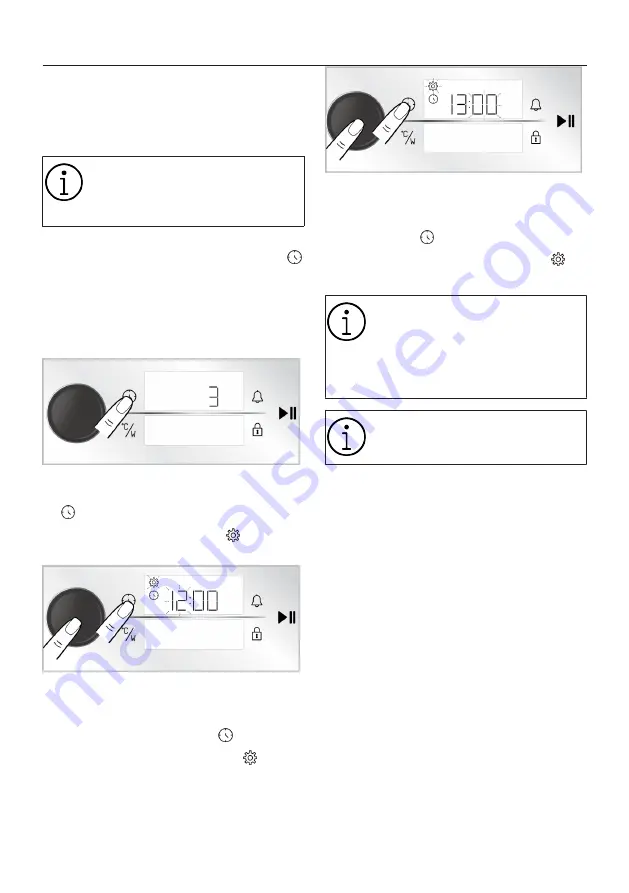
a. With the oven turned off (while the time of
day appears on the display), touch the
key for about 3 seconds to activate the
settings menu.
ð
A countdown of 3-2-1 appears on
the display. When the countdown is
over, the settings menu is activated.
b. Activate the timer field by pushing the
oven control knob once or touching the
key once.
ð
The timer field and the symbol
flash on the timer/duration display.
c. Set the time of day by turning the oven
control knob to right/left and activate the
minute field by pushing the oven control
knob once or touching the key once.
ð
The minutes field and the symbol
flash on the timer/duration display.
d. Set the minute by turning the oven con-
trol knob to right/left. Approve the setting
by pushing the oven control knob once or
touching the key once.
ð
The time of day is set and the
symbol illuminates continuously.
If the first timer setting is not per-
formed, the time of day starts from
the time set at the production pro-
cess. You can change the time of
day setting later as described in the
“Settings”
section.
In the event of a long power outage,
the time of day setting is cancelled.
It should be set again.
4.2 Initial Cleaning
a. Remove all packaging materials.
b. Remove all accessories from the oven
provided with the product.
c. Operate the product for 30 minutes and
then, turn it off. This way, residues and
layers that may have remained in the
oven during production are burned and
cleaned.
d. When operating the product, select the
highest temperature and the operating
function that all the heaters in your
product operate. See “Oven operating
functions [
18]”. You can learn how to
operate the oven in the following section.
e. Wait for the oven to cool.
f. Wipe the surfaces of the product with a
wet cloth or sponge and dry with a cloth.
Summary of Contents for BBCW12400X
Page 52: ...EN 52 ...
Page 53: ...EN 53 ...
Page 54: ...EN 54 ...
Page 55: ...EN 55 ...
Page 56: ...EN 56 ...
Page 57: ...EN 57 ...
Page 58: ......
Page 59: ......
Page 60: ......


