background image

12

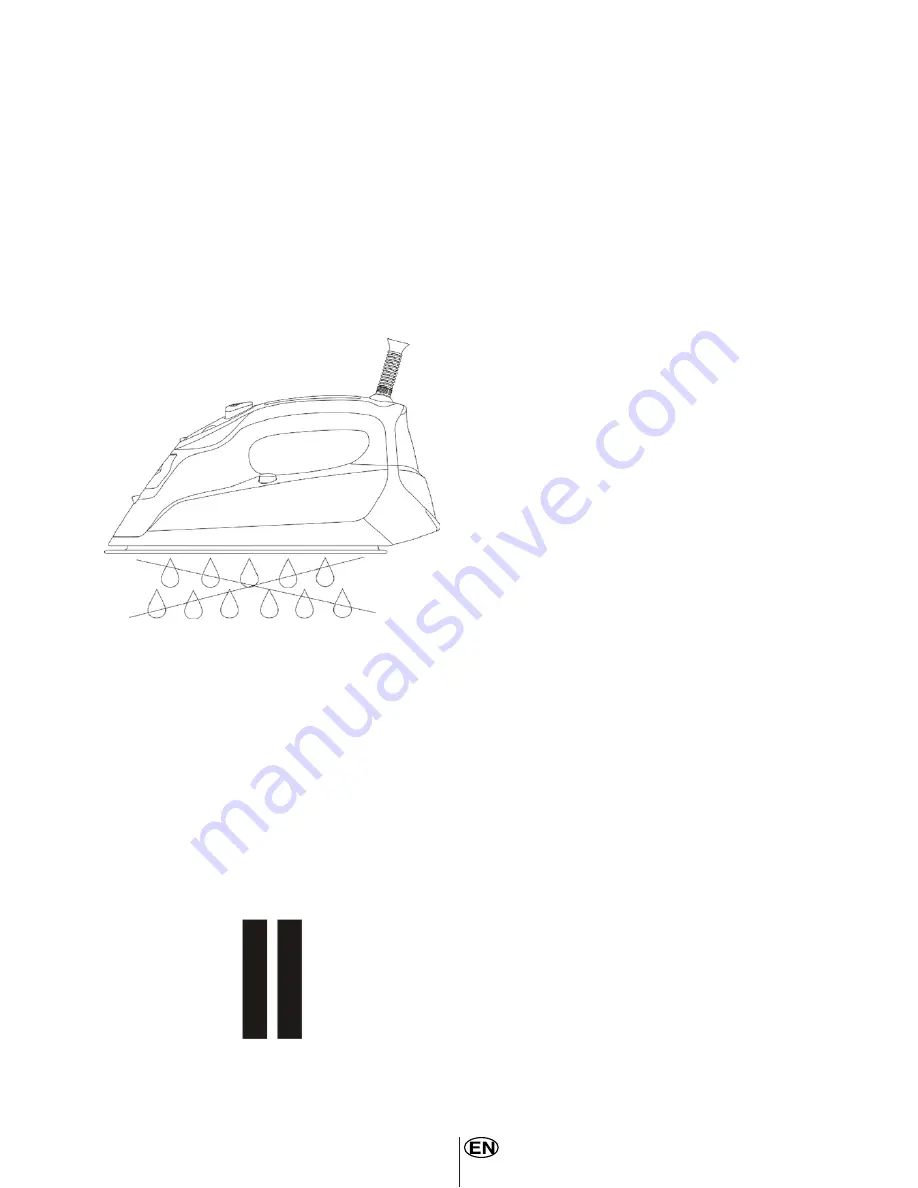
Anti-Drip

1. 

Anti-drip system, which is de-

signed to prevent water escaping

from the soleplate when the iron is 

too cold automatically.

2.

 During use, the anti drip system 

may emit a loud clicking sound, 

particularly during heat-up or 

whilst cooling down. This is per-

fectly normal and indicates that the 

system is functioning correctly.

Auto Shut-Off

The Auto shut-off feature will oper-

ate automatically when the iron is 

unattended and it is connected to 

a mains supply outlet.

Auto Shut-Off In Horizontal

1.

 The iron will switch off automati-

cally with a “Beep” around 30 Sec 

if the iron is immobile in the ironing 

position (horizontal).

2.

 Pause symbol would be flashing

on the LCD, the LCD back lights 

gone off after first 5 flashes and 

then the pause symbol will con-

tinue the flashing.

3.

 Simply moving the iron, the iron 

will back on.

Auto Shut-Off In Vertical

1.

 The iron will switch off auto-

matically with a “Beep” around 8 

minutes if the iron is left on its heel 

rest position (vertically).

2. 

Pause symbol would be flashing 

on the LCD, the LCD back lights 

gone off after first 5 flashes and 

then the pause symbol will con-

tinue the flashing.

3.

 Simply moving the iron, the iron 

will back on.

Note:

 The iron will take about 60 

seconds to reach its previous sole-

plate temperature.

Language Selection Feature

To change language settings, 

press ”temperature down” button 

and hold 3 seconds, “EN” would 

be shown and Press temperature 

down button again, language 

would be changed from EN 

(English) to FR (French) and FR 

to DE (German) and the language 

system run in a loop. For a desired 

“language”, press ”temperature 

up” button or leave the “language” 

shown for 3 seconds, then the 

language setting would be settled.

Note:

 Default language setting will 

be English

Summary of Contents for BKK 2141

Page 1: ...BKK 2141 Electronic Steam Iron User Manual ...

Page 2: ... reference The User Manual will help you use your machine in a fast and safe way Read the User Manual before installing and starting your product In particular follow the instructions related to safety Keep this User Manual within easy reach for future reference Also read all additional documents supplied with this product Remember that this User Manual is also applicable for several other models ...

Page 3: ...1 1 Safety Warnings 2 3 2 Technical Specifications of Appliance 4 5 3 Operating the Appliance 6 13 4 Cleaning and Care 13 CONTENTS ...

Page 4: ... When placing the iron on its stand ensure that the surface on which the stand is placed is stable 9 If the power cord or supply cord is damaged the manufac turer or its service agent or similarly qualified person must re place it in order to avoid a hazard 10 Empty the water tank after use 11 This appliance is not intended for use by persons including children with reduced physic al sensory or me...

Page 5: ...8 Do not touch the iron rest dur ing or just after ironing It is hot 9 Do not roll the power cord or supply cord around the iron unit or base console for storage until it has cooled down completely 10 Do not attempt to open the cabinet or dismantle any parts from the appliance there is no serviceable part inside ...

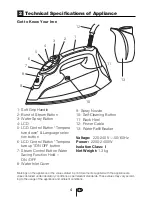
Page 6: ...ance 2 Get to Know Your Iron 1 Soft Grip Handle 2 Burst of Steam Button 3 Water Spray Button 4 LCD 5 LCD Control Button Tempera ture down Language selec tion button 6 LCD Control Button Tempera ture up ON OFF button 7 Steam Control Button Water Saving Function Hold ON OFF 8 Water Inlet Cover 9 Spray Nozzle 10 Self Cleaning Button 11 Back Heel 12 Power Cable 13 Water Refill Beaker Valtage 220 240V ...

Page 7: ...rments 2 Test ironing a small area on the backside or inside the garment if you are unsure about the type of fabric Start with a low tempera ture and increase gradually 3 Wait for about three minutes before ironing heat sensitive fabrics Temperature adjustment needs certain time to reach the required level no matter it is higher or lower 4 Delicate fabrics such as silk wool velour etc are best iro...

Page 8: ...How To Fill Water 1 Press and hold the Tempera ture up ON OFF button 3 sec the LCD display will off with a beep sound 2 Disconnect the iron from mains supply outlet 3 Release the Water Inlet Cover 4 Fill water through the water inlet hole 5 Fill up to the Max level marked on the side of water tank Note Do not use chemical mixed water or any other liquids ...

Page 9: ...with a beep sound 9 Double continuous beep sound would be heard and LCD would display the steam off indicator if press the steam button for the lower and medium tem perature settings Acryl Nylon Silk Poly Blend Wool 10 The iron is ready for use First Time Ironing 1 Remove any protective films or stickers from the soleplate and the cabinet if any 2 Unwind and straighten the power cord 3 Fill the ir...

Page 10: ...ready to use 6 Press and hold the Tempera ture up ON OFF button 3 sec the LCD display will off with a beep sound 7 Disconnect the iron from mains supply outlet 8 When the iron gets cool com pletely store it vertically in a safe place How To Select The Water Saving Mode 1 Connect the iron to a suitable mains supply outlet 2 Beep sound would be heard and the LCD would display all logos for a Second ...

Page 11: ...ton Jeans Linen Double continuous beep sound would be heard and LCD would display the steam off indicator if press the steam button for the lower and medium temperature settings Acryl Nylon Silk Poly Blend Wool Burst Of Steam This function provides extra amount of steam to remove stub born wrinkles 1 Fill the iron as described in the section of How To Fill Water 2 Connect the iron to a suitable ma...

Page 12: ... 1 Fill the iron as described in How To Fill Water 2 Connect the iron to a suitable mains supply outlet 3 Beep sound would be heard and the LCD would display all logo for a Second then turn off 4 Press Temperature up ON OFF button once the LCD would display the fabric type ACRYL temperature indicators and the steam indicator 5 To select the temperature set ting according to the recommen dation of ...

Page 13: ...e the iron on a surface in upright standing position 3 Connect the iron to a suitable mains supply outlet 4 Beep sound would be heard and the LCD would display all logo for a Second then turn off 5 Press Temperature up ON OFF button once the LCD would display the fabric type ACRYL temperature indicators and the steam indicator 6 Select the Max temperature setting See How To Set Tem perature 7 Depr...

Page 14: ... tinue the flashing 3 Simply moving the iron the iron will back on Auto Shut Off In Vertical 1 The iron will switch off auto matically with a Beep around 8 minutes if the iron is left on its heel rest position vertically 2 Pause symbol would be flashing on the LCD the LCD back lights gone off after first 5 flashes and then the pause symbol will con tinue the flashing 3 Simply moving the iron the i...

Page 15: ...ns supply outlet 2 Use a damped cloth or non scratching cleaner to remove any deposits on the sole plate or the cabinets Note Never use sharp or rough objects to remove the deposits on the sole plate Never use any abrasive vinegar or descaling agents to clean the iron Cleaning and Care 4 Feature Blue color LED will emit beside from water tank during the complete session of ironing It impresses mor...

Page 16: ...www beko com ...

Reviews: