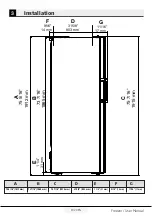
Installation
11 / 20 EN
Freezer / User Manual
3.4.Electrical
connection
A
WARNING
:
Do not make
connect
i
ons v
i
a extens
i
on
cables or mult
i
-plugs.
B
WARNING
:
Damaged power
cable must be replaced by the
Author
i
zed Serv
i
ce Agent.
C
If two coolers are to be
i
nstalled s
i
de by s
i
de, there
should be at least 1 5/8”
(4 cm ) d
i
stance between
them.
•
Our company shall not be l
i
able
for any damages that w
i
ll ar
i
se
when the product
i
s used
w
i
thout ground
i
ng and electr
i
cal
connect
i
on
i
n accordance w
i
th the
nat
i
onal regulat
i
ons.
•
Power cable plug must be w
i
th
i
n
easy reach after
i
nstallat
i
on.
•
Do not extens
i
on cords or cordless
mult
i
ple outlets between your
product and the wall outlet.
C
Hot Surface Warn
i
ng!
Side walls of your product is
equipped with refrigerant
pipes to improve the cooling
system. Refrigerant with
high temperatures may
flow through these areas,
resulting in hot surfaces
on the side walls. This is
normal and does not need
any servicing. Please pay
attention while touching
these areas.
3.5. Connecting
the water hose
to the freezer
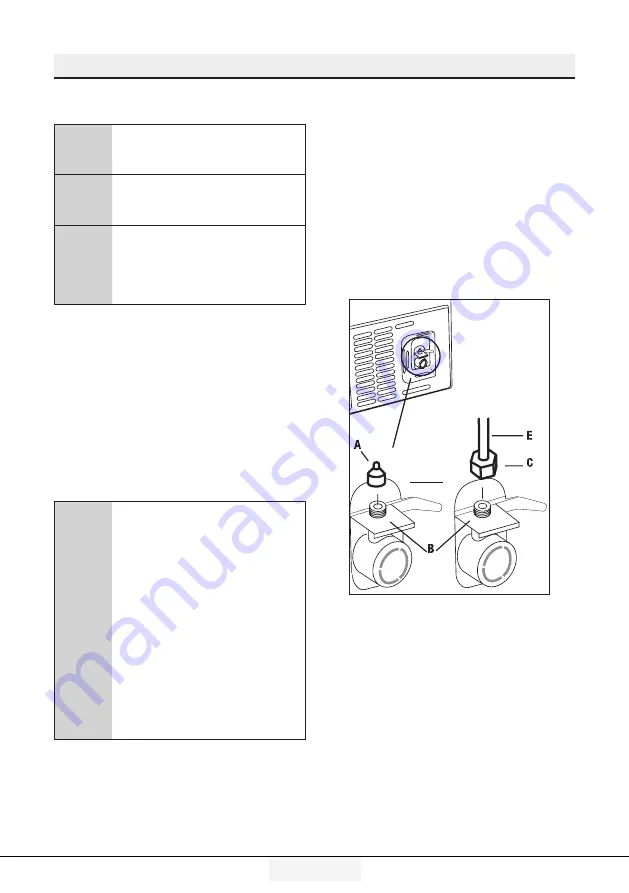
1.
Remove the valve channel cover
(A) from the water
i
nlet valve.
2.
Connect the water l
i
ne (C) to the
i
nlet valve (B) and t
i
ghten by hand
to secure
i
t. It
i
s not necessary to
use pl
i
ers, but
i
f there
i
s a leak, you
may t
i
ghten sl
i
ghtly w
i
th a pa
i
r of
pl
i
ers.


