CLEARPOINT® Flanged L100-L304_us_en_2014-6 (rev. A)
11
FILTER ELEMENT REPLACEMENT
•
Where appropriated, close shutoff valves at gas inlet and outlet
•
Depressurize the housing, this can be accomplished by pushing the test button on the BEKOMAT® drain installed
on the bottom port.
•
Unbolt top lid. You can use the last flange screw as a pivot. The lid is then simply turned aside to provide full
access.
•
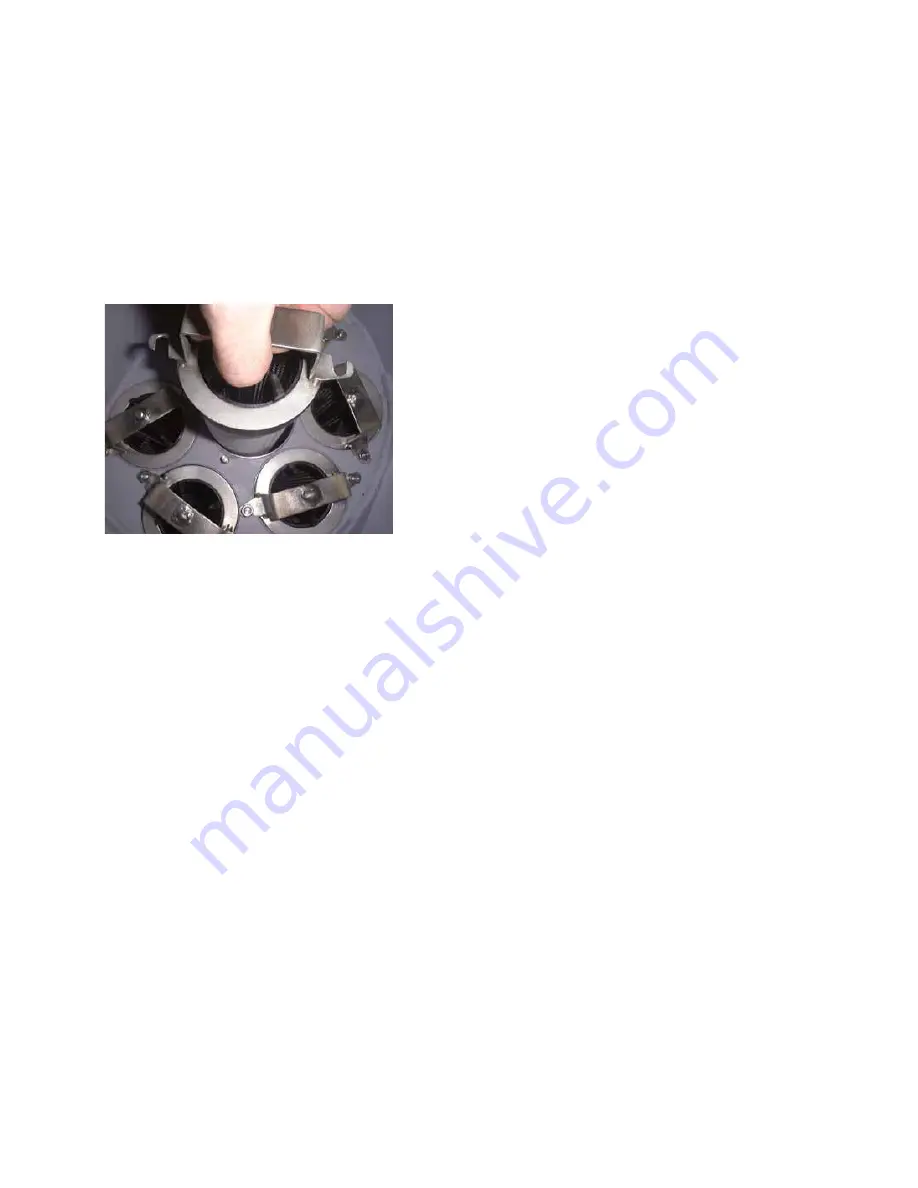
Subsequent to the loosening of two nuts and a slight turn in clockwise direction, the filter elements, along with
the tie rod unit, may be completely removed from the housing.
•
Unscrew the filter elements counter-clockwise from the tie rod unit.
•
Replace the O-ring of the tie rod unit to ensure proper seal to the filter plate.
•
Screw new filter elements onto the treaded rod (finger tight 4.7 Nm, without tools) and place unit into the
housing. Retighten the nuts in order to secure the tie rod unit.
•
Replace flange gasket on top
•
When reassembling the lid to the vessel, confirm the bolt, flat washer, lock washer and nut are assembled in this
order. The lock washer will always be on the vessel side of the assembly.
•
Lubricated bolt threads in area of nut engagement
•
Install all bolts and nuts finger tight.
•
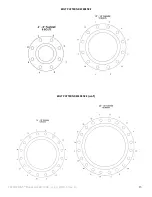
After you have installed all the bolts with flat washer on top and lock washer on bottom proceed to number the
bolts according appropriate bolt patterns listed on page 12 & 13
•
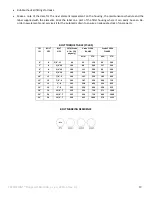
Apply torque in 20% (1/5) steps of required final torque, loading all bolts at each step before proceeding to next
step. Refer to torque values on page # 12
•
Tighten bolts in sequential order at each step until final torque is reached. Refer to torque valves located on page
12.
•
Use rotational tightening until all bolts are stable at final torque level. Two completed rotations are required.
•
Slowly admit pressure to the filter by gradual opening of the shutoff valves.


