background image

Washing Machine / User‘s Manual 

25 / 36  EN

Operating the product

The programme resumes. Water is drained, 

laundry is spun and the programme is completed.

• Pet hair removal

This function helps to remove pet hair that remain 

on your garments more effectively.

When you select this function, Prewash and Extra 

Rinse steps are added to the normal programme. 

Thus, washing is performed with more water 

(30%) and the pet hair is removed more effectively.

A

WARNING: 

Never wash your pets in the 

washing machine.

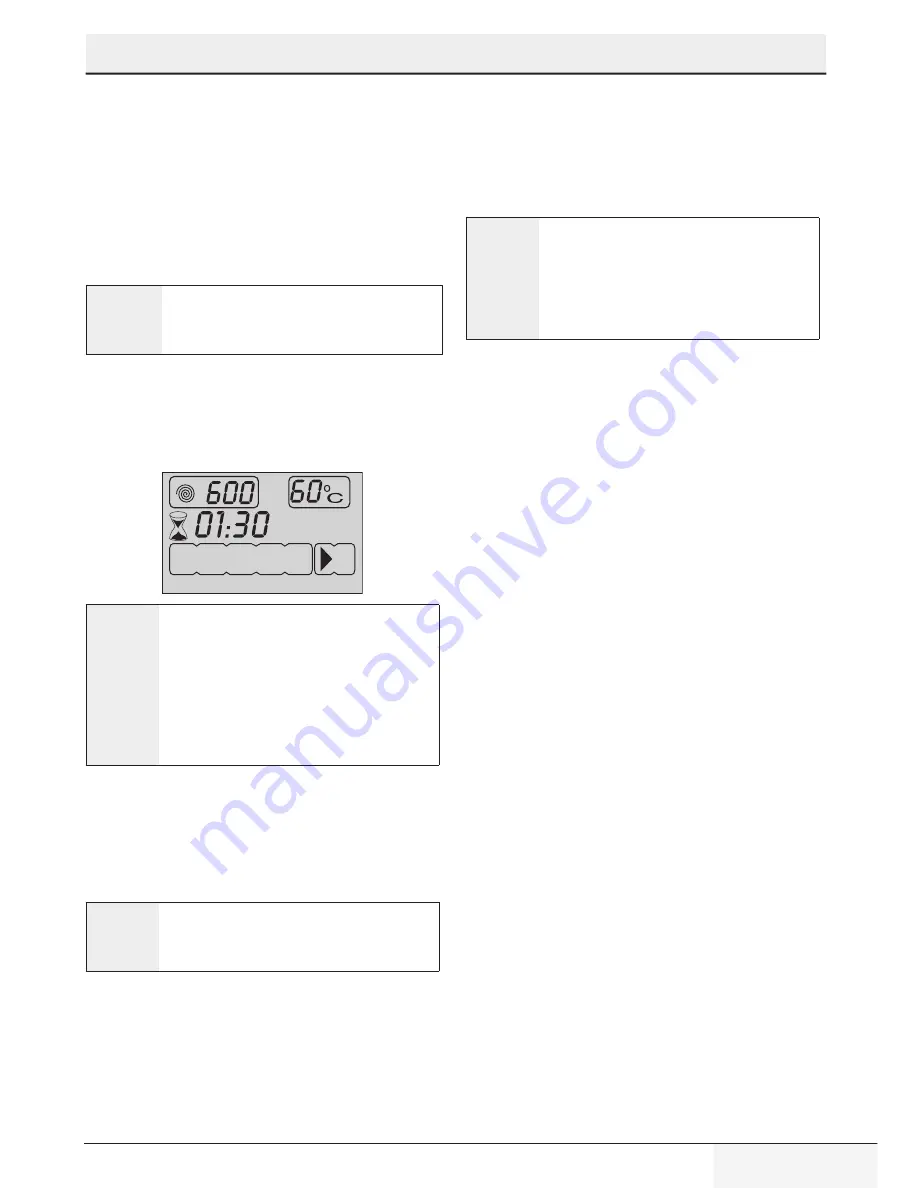
5.12 Time display

Remaining time to complete the programme 

appears on the display while the programme is 

running. Tim is displayed as “

01:30

” in hours and 

minutes format.

C

Programme time may differ from 

the values in the “Programme and 

consumption table” depending on the 

water pressure, water hardness and 

temperature, ambient temperature, 

amount and the type of laundry, auxiliary 

functions selected and the changes at the 

mains voltage.

Delayed start

With the Delayed Start function the startup of 

the programme may be delayed up to 24 hours. 

Delayed start time can be increased by increments 

of 30 minutes. 

C

Do not use liquid detergents when you set 

Delayed Start! There is the risk of staining 

of the clothes.

1. Open the loading door, place the laundry and put 

detergent, etc.

2. Select the washing programme, temperature, 

spin speed and, if required, the auxiliary 

functions.

3. Set the desired delayed start time by pressing 

the Delayed Start + or - buttons. Delayed Start 

symbol flashes.

4. Press Start / Pause / Cancel button. Delayed 

start countdown starts. Delayed Start symbol 

illuminates steadily. Start symbol appears. “:” 

sign in the middle of the delayed start time on 

the display starts flashing.

C

Additional laundry may be loaded during 

the delayed start period. At the end of 

the countdown, Delayed Start symbol 

disappears, washing cycle starts and the 

time of the selected programme appears 

on the display.

Changing the delayed start period

If you want to change the time during countdown:

1. Press Start / Pause / Cancel button. “:” sign 

in the middle of the delayed start time on the 

display stops flashing. Pause symbol appears. 

Delayed Start symbol flashes. Start symbol 

disappears.

2. Set the desired delayed start time by pressing 

the Delayed Start + or - buttons.

3. Press Start / Pause / Cancel button. Delayed 

Start symbol illuminates steadily. Pause symbol 

disappears. Start symbol appears.

4. “:” sign in the middle of the delayed start time 

on the display starts flashing.

Cancelling the Delayed Start function

If you want to cancel the delayed start countdown 

and start the programme immediately:

1. Press Start / Pause / Cancel button. “:” sign 

in the middle of the delayed start time on the 

display stops flashing.

2. Start symbol disappears. Pause symbol and 

Delayed Start symbol flashes.

3. Decrease the delayed start time by pressing 

the Delayed Start - button. Programme duration 

appears after 30 minutes.

4. Press Start / Pause / Cancel button to start the 

programme.

5.13 Starting the programme

1. Press Start / Pause / Cancel button to start the 

programme.

2. Start symbol showing the startup of the 

programme will turn on.

3. Loading door is locked and Door Locked symbol 

appears on the display.

Summary of Contents for D4 9101 E

Page 1: ...D4 9101 E Washing Machine User s Manual 2820523452_EN 230313 0923 Document Number ...

Page 2: ...in the user manual Remember that this user manual is also applicable for several other models Differences between models will be identified in the manual Explanation of symbols Throughout this user manual the following symbols are used C Important information or useful hints about usage A Warning for hazardous situations with regard to life and property B Warning for electric shock Packaging mater...

Page 3: ...anel 19 5 2 Display symbols 19 5 3 Preparing the machine 19 5 4 Programme selection 20 5 5 Main programmes 20 5 6 Additional programmes 20 5 7 Special programmes 21 5 8 Temperature selection 21 5 9 Spin speed selection 22 5 10 Programme and consumption table 23 5 11 Auxiliary function selection 24 5 12 Time display 25 5 13 Starting the programme 25 5 14 Progress of programme 26 5 15 Loading door l...

Page 4: ...lter while there is still water in the drum Otherwise risk of flooding and injury from hot water will occur Do not force open the locked loading door The loading door will be ready to open just a few minutes after the washing cycle comes to an end In case of forcing the loading door to open the door and the lock mechanism may get damaged Unplug the product when not in use Never wash the product by...

Page 5: ...igh quality parts and materials which can be reused and are suitable for recycling Therefore do not dispose the product with normal domestic waste at the end of its service life Take it to a collection point for the recycling of electrical and electronic equipment Please consult your local authorities to learn the nearest collection point Help protect the environment and natural resources by recyc...

Page 6: ... EN Washing Machine User s Manual 2 Your washing machine 2 1 Overview 7 3 4 6 5 2 1 8 1 Power cable 2 Top panel 3 Control panel 4 Filter cap 5 Adjustable feet 6 Loading door 7 Detergent drawer 8 Drain hose ...

Page 7: ... is used for the mains hose connection a Electronical water shut off a Mechanical water shut off c Standard 5 Liquid detergent container 6 User Manual 7 Blind plug 8 Plastic plug group Number of transportation safety bolts may change depending on the model of your machine This may be supplied with the machine depending on the model of your machine This is supplied if your machine is equipped with ...

Page 8: ...oduct exactly C Values stated on the product labels or in the documentation accompanying it are obtained in laboratory conditions in accordance with the relevant standards Depending on operational and environmental conditions of the product these values may vary Models EN Maximum dry laundry capacity kg Height cm Width cm Depth cm Net weight 4 kg Electrical input V Hz Total current A Total power W...

Page 9: ...oses as well as the power cable are not folded pinched or crushed while pushing the product into its place after installation or cleaning procedures 3 1 Appropriate installation location Place the machine on a rigid floor Do not place it on a long pile rug or similar surfaces Total weight of the washing machine and the dryer with full load when they are placed on top of each other reaches to appro...

Page 10: ...nd stopper group A WARNING Models with a single water inlet should not be connected to the hot water tap In such a case the laundry will get damaged or the product will switch to protection mode and will not operate A WARNING Do not use old or used water inlet hoses on the new product It may cause stains on your laundry 1 Connect the special hoses supplied with the product to the water inlets on t...

Page 11: ...re follow the heights described in the figure To prevent flowing of dirty water back into the machine and to allow for easy discharge do not immerse the hose end into the dirty water or do not drive it in the drain more than 15 cm If it is too long cut it short The end of the hose should not be bent it should not be stepped on and the hose must not be pinched between the drain and the machine If t...

Page 12: ...ent value of the fuse or breaker in the house is less than 16 Amps have a qualified electrician install a 16 Amp fuse The voltage specified in the Technical specifications section must be equal to your mains voltage Do not make connections via extension cables or multi plugs B WARNING Damaged power cables must be replaced by the Authorized Service Agents Transportation of the product 1 Unplug the ...

Page 13: ...ll ll ll ll lll ll l Drying Symbols Suitable for dryer No Iron Sensitive Delicate dry Do not dry with dryer Do not dry Do not dry clean DRYING Drying Settings At any temperature At high temperature At medium temperature At low temperature Without heating Hang to dry Lay to dry Hang wet to dry Lay in shadow to dry Dry cleanable Iron IRON Dry or Steam Iron at high temperature Iron at medium temperat...

Page 14: ...als such as flour lime dust milk powder etc intensely must be shaken off before placing into the machine Such dusts and powders on the laundry may build up on the inner parts of the machine in time and can cause damage 4 3 Things to be done for energy saving Following information will help you use the product in an ecological and energy efficient manner Operate the product in the highest capacity ...

Page 15: ...door can only be opened a while after the programme comes to an end A WARNING In case of misplacing the laundry noise and vibration problems may occur in the machine 4 7 Using detergent and softener C When using detergent softener starch fabric dye bleach or limescale remover read the manufacturer s instructions on the package carefully and follow the suggested dosage values Use measuring cup if a...

Page 16: ...ng liquid detergents If the product contains a liquid detergent cup Make sure that you have placed the liquid detergent cup in compartment nr 2 If the liquid detergent has lost its fluidity dilute it with water before putting in the detergent cup If the product does not contain a liquid detergent cup Do not use liquid detergent for the prewash in a programme with prewash Liquid detergent stains yo...

Page 17: ...p Do not use bleaching agent and detergent by mixing them Use just a little amount approx 50 ml of bleaching agent and rinse the clothes very well as it causes skin irritation Do not pour the bleaching agent onto the clothes and do not use it for coloured clothes When using oxygen based bleaches select a programme that washes at a lower temperature Oxygen based bleaches can be used together with d...

Page 18: ...urs can be used at dosages recommended for heavily soiled clothes Prefer liquid detergents produced for delicate clothes Woolen and silk clothes must be washed with special woolen detergents Normally Soiled For example stains caused by body on collars and cuffs Powder and liquid detergents recommended for whites can be used at dosages recommended for normally soiled clothes Powder and liquid deter...

Page 19: ... Spin Speed indicator b Temperature indicator c Spin symbol d Temperature symbol e Remaining Time and Delayed Start indicator f Programme Indicator symbols Prewash Main Wash Rinse Softener Spin g Economy symbol h Delayed Start symbol i Door Locked symbol j Start symbol k Pause symbol l Auxiliary Function symbols m No Water symbol 5 3 Preparing the machine 1 Make sure that the hoses are connected t...

Page 20: ...mme For curtains and tulle use the Synthetic 40 C programme with prewash and anti creasing functions selected As their meshed texture causes excessive foaming wash the veils tulle by putting little amount of detergent into the main wash compartment Do not put detergent in the prewash compartment Yünlü Woollens Use this programme to wash your woolen clothes Select the appropriate temperature comply...

Page 21: ...me It is a maintenance programme C Do not run the programme when there is something in the machine If you try to do so the machine detects that there is a load inside and aborts the programme 5 7 Special programmes For specific applications select any of the following programmes Durulama Rinse Use this programme when you want to rinse or starch separately Sıkma Pompa Spin Drain Use this programme ...

Page 22: ...s well 5 9 Spin speed selection Whenever a new programme is selected the recommended spin speed of the selected programme is displayed on the spin speed indicator To decrease the spin speed press the Spin Speed Adjustment button Spin speed decreases gradually Then depending on the model of the product Rinse Hold and No Spin options appear on the display See Auxiliary function selection section for...

Page 23: ...y of the machine It is normal that small differences may occur between the time shown on the display and the real washing time EN 2 Auxiliary functions Programme C Max Load kg Water Consumption l Energy Consumption kWh Max Speed Ön Yıkama Hızlı Yıkama Rinse Plus Kırışık Azaltma İlave Su Rinse Hold Selectable temperature range C Pamuklu 90 9 87 2 70 1600 90 Soğuk Pamuklu 60 9 85 1 80 1600 90 Soğuk ...

Page 24: ...nsing steps for lightly soiled laundry F2 appears on the display when you select this function b C When you select this function load your machine with half of the maximum laundry specified in the programme table Rinse Plus This function enables the machine to make another rinsing in addition to the one already made after the main wash Thus the risk for sensitive skins babies allergic skins etc to...

Page 25: ... 4 Press Start Pause Cancel button Delayed start countdown starts Delayed Start symbol illuminates steadily Start symbol appears sign in the middle of the delayed start time on the display starts flashing C Additional laundry may be loaded during the delayed start period At the end of the countdown Delayed Start symbol disappears washing cycle starts and the time of the selected programme appears ...

Page 26: ...hen the loading door is locked This symbol will flash until the loading door becomes ready to open when programme completes or the machine is paused Do not force to open the loading door in this step Symbol disappears when the door is ready to open You can open the door when the symbol disappears 5 16 Changing the selections after programme has started Switching the machine to pause mode Press the...

Page 27: ... machine is in Rinse Hold mode If you want to spin your laundry when the machine is in this mode Adjust the spin speed and press Start Pause Cancel button Pause symbol disappears and Start symbol appears Programme resumes discharges the water and spins the laundry If you only want to drain the water without spinning Just press Start Pause Cancel button Pause symbol disappears Start symbol appears ...

Page 28: ...the display Prewash Main Wash Rinse Softener and Spin 6 5 End of programme End appears on the display at the end of the programme Symbols of the programme steps remain lit Auxiliary function spin speed and temperature that were selected at the beginning of the programme remain selected 6 6 Cancelling the programme Press and hold Start Pause Cancel button for 3 seconds Start symbol flashes Symbol o...

Page 29: ...n back to its seating and push its front section downwards to make sure that the locking tab engages 7 2 Cleaning the loading door and the drum Residues of softener detergent and dirt may accumulate in your machine in time and may cause unpleasant odours and washing complaints To avoid this use the Drum Cleaning programme If your machine is not featured with Drum Cleaning programme use Cottons 90 ...

Page 30: ...ur machine prevents solid items such as buttons coins and fabric fibers clogging the pump impeller during discharge of washing water Thus the water will be discharged without any problem and the service life of the pump will extend If the machine fails to drain water the pump filter is clogged Filter must be cleaned whenever it is clogged or in every 3 months Water must be drained off first to cle...

Page 31: ...nd by the plug again and fix the hose in its place d Turn the pump filter to take it out Discharging the water when the product does not have an emergency draining hose a Place a large container in front of the filter to catch water from the filter b Loosen pump filter anticlockwise until water starts to flow Fill the flowing water into the container you have placed in front of the filter Always k...

Page 32: ...just the feet to level the machine A hard substance might have entered into the pump filter Clean the pump filter Transportation safety bolts are not removed Remove the transportation safety bolts Laundry quantity in the machine might be too little Add more laundry to the machine Machine might be overloaded with laundry Take out some of the laundry from the machine or distribute the load by hand t...

Page 33: ...rum Machine does not switch to spinning step There might be an imbalance of laundry in the machine Automatic unbalanced load detection system might be activated due to the unbalanced distribution of the laundry in the drum The machine will not spin if water is not drained completely Check the filter and the draining hose Excessive foam might have occurred and automatic foam absorption system might...

Page 34: ...ff after washing Insufficient amount of detergent is used Using insufficient amount of detergent for the water hardness can cause the laundry to become stiff in time Use appropriate amount of detergent according to the water hardness Detergent is put in the wrong compartment If detergent is put in the prewash compartment although prewash cycle is not selected machine can take this detergent during...

Page 35: ...gramme and consumption table When you use additional chemicals stain removers bleachs and etc reduce the amount of detergent Laundry remains wet at the end of the programme Excessive foam might have occurred and automatic foam absorption system might have been activated due to too much detergent usage Use recommended amount of detergent Machine does not switch to spinning step when the laundry is ...

Page 36: ... partial load min 176 Programme time of the standard 40 C cotton programme at partial load min 147 Duration of the left on mode min N A Airborne acoustical noise emissions washing spinning dB 55 70 Built in No 1 Scale from A Highest Efficiency to D Lowest Efficiency 2 Energy Consumption based on 220 standard washing cycles for cotton programmes at 60 C and 40 C at full and partial load and the con...

Reviews: