14 / 36 EN
Refrigerator/User Manual
Installat
i
on
4.2 Installing the
Plastic Wedges
Plast
i
c wedges suppl
i
ed w
i
th the
product are used to create the d
i
stance
for the a
i
r c
i
rculat
i
on between the
product and the rear wall.
1.
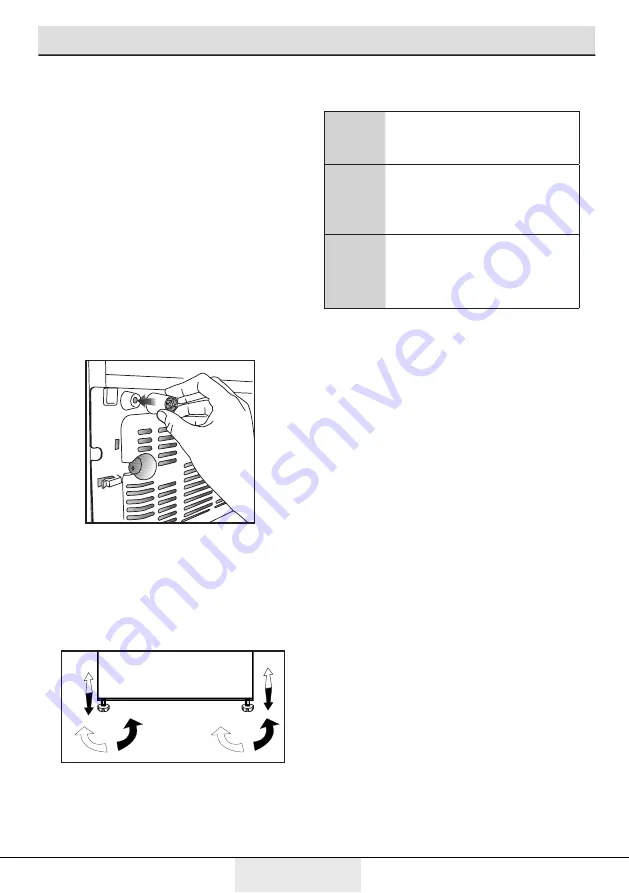
To install the wedges, remove the
screws on the product and use the
screws supplied together with the
wedges.
2.
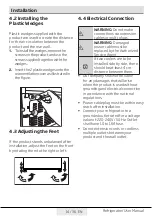
Insert the 2 plastic wedges onto the
rear ventilation cover as illustrated in
the figure.
4.3 Adjusting the Feet
If the product stands unbalanced after
i
nstallat
i
on, adjust the feet on the front
by rotat
i
ng them to the r
i
ght or left.
4.4 Electrical Connection
A
WARNING:
Do not make
connect
i
ons v
i
a extens
i
on
cables or mult
i
-plugs.
B
WARNING:
Damaged
power cable must be
replaced by the Author
i
zed
Serv
i
ce Agent.
C
If two coolers are to be
i
nstalled s
i
de by s
i
de, there
should be at least 4 cm
d
i
stance between them.
•
Our company shall not be l
i
able
for any damages that w
i
ll ar
i
se
when the product
i
s used w
i
thout
ground
i
ng and electr
i
cal connect
i
on
i
n accordance w
i
th the nat
i
onal
regulat
i
ons.
•
Power cable plug must be w
i
th
i
n easy
reach after
i
nstallat
i
on.
•
Connect your refr
i
gerator to a
grounded outlet rated for a voltage
value of 220-240V /50 Hz. Outlet
shall have 10 to 16A fuse.
•
Do not extens
i
on cords or cordless
mult
i
ple outlets between your
product and the wall outlet.


