background image

Cordless Stick Vacuum Cleaner / User Manual

11 /   EN

2

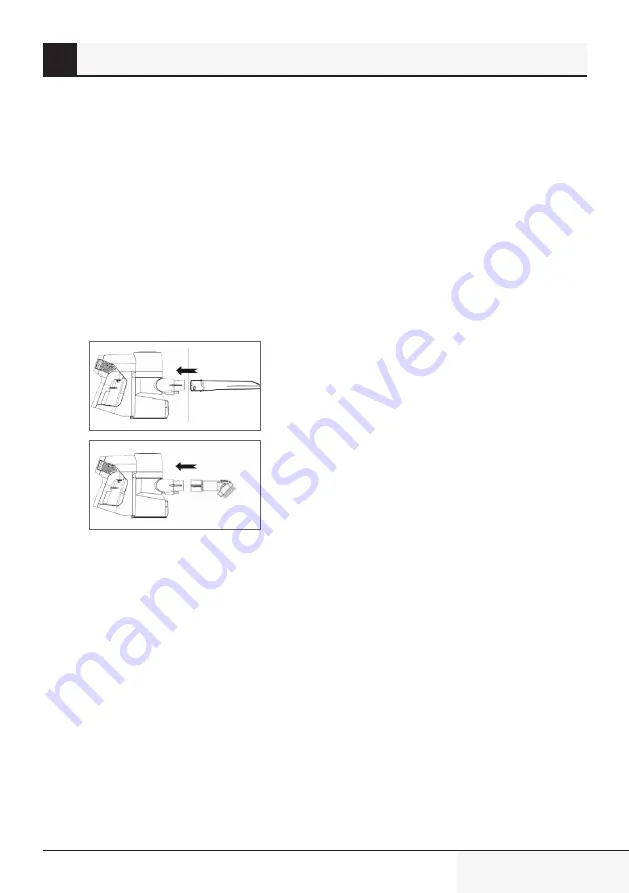
  Part assembling

2.1 Elbow (11) 

The elbow is an extension tool, one end is inserted 

into the suction port , the other end is connected 

with the accessories, which can clean corners or 

narrow spaces.

2.2 Crevice tool (12) and 2in1 

Brush (8) 

Push the round part of the accessory into the 

suction part until it clicks.
The hairbrush of the 2in1 accessory can be 

removed.

Summary of Contents for VRX 221 DR

Page 1: ...VRX 221 DR Cordless Stick Vacuum Cleaner User Manual 01M 8818733200 5219 01 EN ...

Page 2: ...ENGLISH 07 14 CONTENTS ...

Page 3: ...EN OPERATION CLEANING AND CARE 9 8 10 3 4 7 5 1 6 11 12 2 ...

Page 4: ...4 1 4 5 8 7 6 9 2 3 10 ON OFF A B OFF ...

Page 5: ...5 11 12 13 14 15 16 OFF 17 18 19 ...

Page 6: ...6 20 21 22 23 24 25 26 27 28 1 2 24h NEW ...

Page 7: ...ns of this manual C Important information and useful advices regarding the usage A WARNING Warnings for dangerous situations concerning the safety of life and property Protection class for electric shock 1 On off button 2 Dust cup release button 3 Metal tube release button 4 Electrical turbo brush 5 Machine body 6 Battery pack 7 Dust cup 8 Two in one brush 9 Charging dock 10 Power supply plug 11 E...

Page 8: ...amaged do not use it Contact an authorised service centre Your mains power supply should comply with the information supplied on the rating plate of the appliance Do not use the appliance with an extension cable Prevent damage to the power cable by not squeezing bending or rubbing it on sharp edges Do not touch the appliance or its plug when it is plugged in to the mains supply if your hands are d...

Page 9: ...nce The appliance is only to be used with the power supply unit provided with the appliance 1 Important safety and environmental instructions The adapter must be removed from the socket outlet and the battery pack must be removed fromtheappliancebeforecleaning or maintaining the appliance If the adapter is damaged it must be replaced by the manufacturer or its agent or similarly qualified person i...

Page 10: ...es are to be inserted with the correct polarity Exhausted batteries are to be removed from the appliance and safely disposed of If the appliance is to be stored unused for a long period the batteries should be removed Thesupplyterminalsarenottobe short circuited Only use with ZB1852 battery 1 Important safety and environmental instructions ...

Page 11: ...iontool oneendisinserted into the suction port the other end is connected with the accessories which can clean corners or narrow spaces 2 2 Crevice tool 12 and 2in1 Brush 8 Push the round part of the accessory into the suction part until it clicks The hairbrush of the 2in1 accessory can be removed ...

Page 12: ...battery to be damaged 3 1 Charging Indicator Working Charging Fully charged Low power Persistent light blue Blinking light blue Persistent light blue 2 minutes and then going out Blinking red light 3 2 Charging dock 9 While charging the battery on the charging dock the chargeindicatorflashesblue C When you receive this product please use the charger provided by our company to recharge the battery ...

Page 13: ...stic or other wastes Take them to the packaging material collection points designated by the local authorities 4 6 Information on waste batteries This symbol on rechargeable batteries or on the packaging indicates that the rechargeablebatterymaynotbedisposed of with regular household rubbish For certainrecharge ablebatteries thissymbolmaybe supplemented by a chemical symbol Symbols for mercury Hg ...

Page 14: ...ic of Ireland Any parts removed during repair work or any product that has been replaced becomes our property The guarantee is not transferrable if the product is resold The Guarantee does not cover Transit installation or delivery damage Accidental damage Misuse or abuse Replacement of any consumable item or accessories These include but are not limited to plugs cables light bulbs knobs filters a...

Page 15: ...www beko com ...

Reviews: