background image

EN / 31

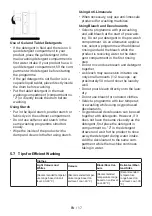
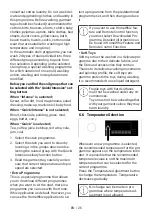
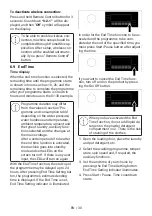
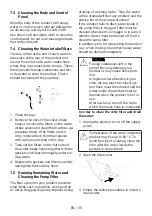
Additional laundry can be added
into the machine during the End
Time countdown. At the end of the
countdown, End Time indicator
turns off, washing cycle starts and
the time of the selected pro-
gramme appears on the display.

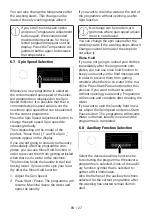
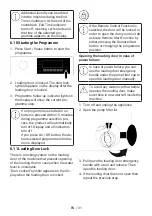
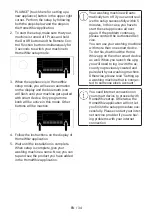
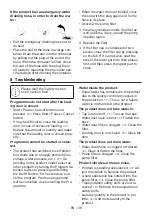
6.10 Starting the Programme

1. Press Start / Pause button to start the

programme.

2. Loading door is locked. The door lock

symbol appears on the display after the
loading door is locked.

3. Programme follow-up indicator lights on

the display will show the current pro-
gramme step.

If no programme is started or no
button is pressed within 10 minutes
during programme selection pro-
cess, the product will automatically
turn off. Display and all indicators
turn off.
If you press On / Off button, the de-
fault selected programme informa-
tion is displayed.

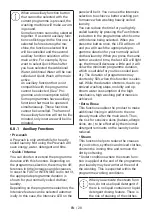
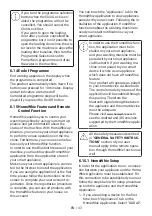
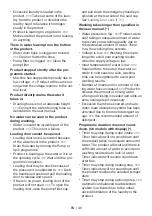
6.11 Loading Door Lock

There is a locking system on the loading
door of the machine that prevents opening
of the loading door in cases when the water
level is unsuitable.
"Door Locked" symbol appears on the dis-
play when the loading door is locked.

If the Remote Control Function is
selected, the door will be locked. In
order to open the door you must de-
activate Remote Start Function by
either pressing the Remote Start
button or changing the programme
position.

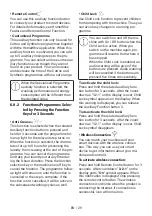
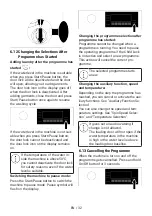
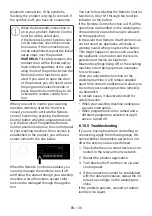
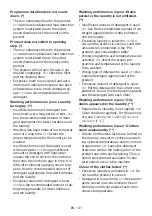
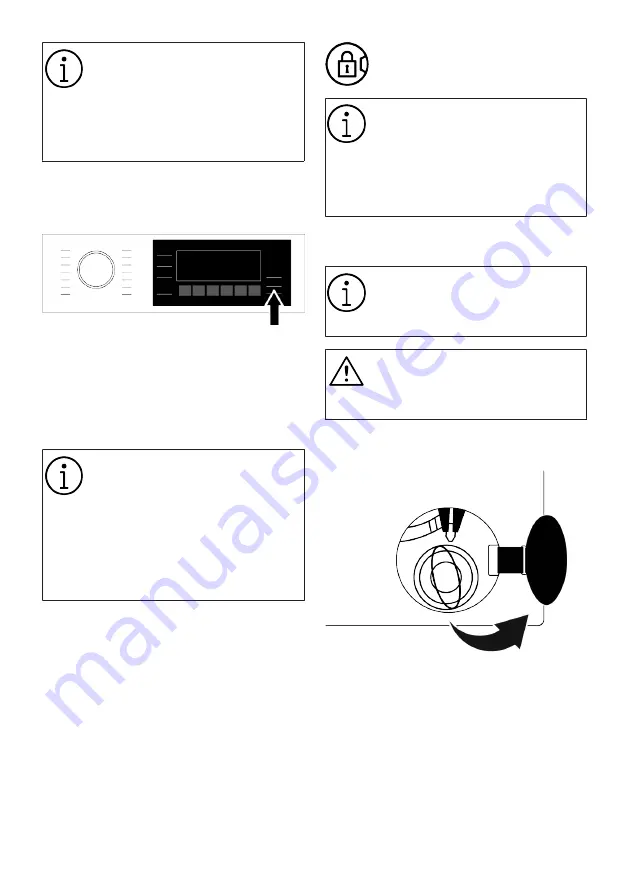
Opening the loading door in case of
power failure:

In case of power failure, you can
use the loading door emergency
handle under the pump filter cap to
open the loading door manually.

To avoid any water overflow before
opening the loading door, make
sure there is no water left inside the
machine.

1. Turn off and unplug the appliance.

2. Open the pump filter lid.

3. Pull down the loading door emergency

handle with a tool and release. Then
open the loading door.

4. If the loading door does not open then

repeat the previous step.

Summary of Contents for WM710

Page 1: ...Washing Machine User Manual WM710 2820530311 EN 16 08 2022 10 46 ...

Page 2: ...n 18 6 Operating the Product 18 6 1 Control Panel 19 6 2 Symbols on the Display 20 6 3 Programme and Consumption Table 21 6 4 Programme Selection 23 6 5 Programmes 23 6 6 Temperature Selection 26 6 7 Spin Speed Selection 27 6 8 Auxiliary Function Selection 27 6 8 1 Auxiliary Functions 28 6 8 2 Functions Programmes Selec ted by Pressing the Function Keys for 3 Seconds 29 6 9 End Time 30 6 10 Starti...

Page 3: ...in the user manual Thus you protect yourself and your product against possible dangers Keep the user manual If you hand over the product to someone else provide the user manual as well Warranty terms usage and troubleshooting methods of your product are in user guide Symbols and Definitions The following symbols are used in the user guide Danger that could result in death or injury Important infor...

Page 4: ...for commercial purposes or it should not be used out of its intended use The product must only be used for washing and rinsing of laundry that are marked ac cordingly This appliance is intended to be used in household and sim ilar applications For example Personnel kitchens of stores offices and other work envir onments Ranches By customers of hotels mo tels and other accommoda tion facilities Bed...

Page 5: ...cal Safety Product should be unplugged during installation mainten ance cleaning and repair pro cedures If the power cable is damaged it must be replaced by the au thorised service in order to avoid possible risks Do not tuck the power cable under and behind the product Do not place heavy objects on the power cable Do not over bend crush and touch the power cable to sources of heat Do not use an e...

Page 6: ...cessary arrangements These operations are the re sponsibility of the customer Check for any damage on the product before installing it Do not have the product installed if it is damaged Injuries may occur if hands are put into uncovered slots Close the holes of the transportation safety bolts with plastic plugs Do not install or leave the product at locations where it may be exposed to external en...

Page 7: ...roduct be hind a door a sliding door or at another location that will pre vent the door from opening completely If a drier is to be placed on the product fix with a suitable con nection apparatus obtained from the authorised service There is a risk of contact with electrical pieces when the up per trays is removed Do not dismantle the upper tray of the product Place the product at least 1 cm away ...

Page 8: ... do not wash rinse or spin laundry contamin ated with dry cleaning deter gent Do not place your hands into the rotating drum Wait until the drum no longer rotates Do not place your hand or a metal object under the wash ing machine If washing laundry at high tem peratures the discharged washing water would burn your skin if in contact with your skin for ex when the dis charge hose is connected to t...

Page 9: ...ion symbol for waste electrical and electronic equipment WEEE This product has been manu factured with high quality parts and materi als which can be reused and are suitable for recycling Do not dispose of the waste product with normal domestic and other wastes at the end of its service life Take it to the collection center for the recycling of electrical and electronic equipment Please consult yo...

Page 10: ... cm 58 Single Water inlet Double Water inlet Electrical input V Hz 230 V 50Hz Total current A 10 Total power W 2200 Main model code 1621 The model information as stored in the product database can be reached by entering following website and search ing for your model identifier found on energy label https eprel ec europa eu The consumption values apply when wireless network connection is turned of...

Page 11: ...he product into its place after installation or cleaning procedures Prior to installation visually check if the product has any defects on it Do not have the product installed if it is dam aged Damaged products cause risks for your safety 4 1 Appropriate Installation Location Place the product on a hard and level floor Do not place it onto a carpet with high pile or other similar surfaces Inap pro...

Page 12: ...again in the future Install the transportation safety bolts in reverse order of the disas sembly procedure Never move the product without the transportation safety bolts properly fixed in place 4 4 Connecting to Water Supply NOTICE Models with a single water inlet shall not be connected to the hot water tap In such a case the laun dry will get damaged or the product will switch to protection mode ...

Page 13: ...6 If the length of the hose is too short use it by adding an original extension hose The overall length of the hose shall not be longer than 3 2 m To prevent water leaks always secure the connection between the extension hose and the draining hose of the product with a suit able clamp so that it does not come off and cause leaks 4 6 Adjusting the Stands NOTICE In order to ensure that the product o...

Page 14: ... colour and degree of soiling and allow able water temperature Always observe the instructions given on the garment care labels 5 2 Preparing Laundry for Washing Laundry items with metal attachments such as underwiring belt buckles or metal buttons will damage the product Remove the metal pieces or wash such clothes by putting them in a laundry bag or pillow case Take out all substances in the poc...

Page 15: ...d ing door is locked while a programme is running The door lock will open once the programme is completed Then you can open the loading door If the door does not open apply the solutions provided for Loading door cannot be opened error in the Troubleshooting section 5 5 Correct Load Capacity The maximum load capacity depends on the type of laundry the degree of soiling and the desired washing prog...

Page 16: ...etergents are valid for selectable temperature range of programmes Only detergents softeners and ad ditives suitable for washing ma chines should be used Do not use soap powder Adjusting the Detergent Amount The amount of detergent depends on the amount of laundry how soiled they are and the water hardness Do not exceed the recommended dosage values on the detergent packaging in or der to eliminat...

Page 17: ...mpartment As an alternative applica tion select a programme with additional rinsing and add the bleach while the product is receiving water to the deter gent compartment in the first rinsing step Do not mix and use bleach and detergent together As bleach may cause skin irritation use only small amounts 1 2 tea cups ap proximately 50 ml and rinse the laundry well Do not pour bleach directly onto th...

Page 18: ...r moderately soiled clothes Prefer liquid deter gents produced for delicate clothes Woollen and silk clothes must be washed with special wool len detergents Lightly Soiled No visible stains exist Powder and liquid deter gents recommended for whites can be used at dosages recommended for lightly soiled clothes Powder and liquid deter gents recommended for colours can be used at dosages recommended ...

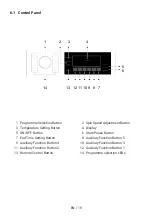
Page 19: ...utton 3 Temperature Setting Button 4 Display 5 ON OFF Button 6 Start Pause Button 7 End Time Setting Button 8 Auxiliary Function Button 5 9 Auxiliary Function Button 4 10 Auxiliary Function Button 3 11 Auxiliary Function Button 2 12 Auxiliary Function Button 1 13 Remote Control Button 14 Programme selection LEDs ...

Page 20: ...layed Start Enabled Indicator 8 Door Lock Engaged Indicator 9 Auxiliary Function Indicators 5 10 Child Lock Engaged Indicator 11 Auxiliary Function Indicators 4 12 No Water indicator 13 Auxiliary Function Indicators 3 14 Auxiliary Function Indicators 1 15 Auxiliary Function Indicators 2 16 Spin Speed Indicator The visuals used for machine de scription in this section are schem atic and may not mat...

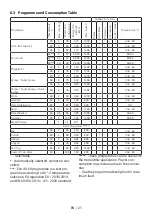
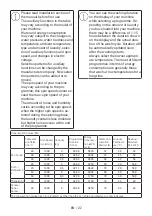
Page 21: ... Cold 90 Wolle 40 2 60 0 60 1200 Cold 40 Hemden 60 4 70 1 40 800 Cold 60 Trommelreinigung 90 80 2 60 600 90 Sport 40 5 60 0 65 1200 Cold 40 FleckenExpert 60 4 5 86 1 85 1400 30 60 Hygiene 90 9 125 3 00 1400 20 90 SteamTherapy 1 1 1 0 11 Extra Programme Mix 40 4 83 1 10 800 Cold 40 Curtain 40 2 98 0 90 800 Cold 40 Delicate 40 4 65 0 85 800 Cold 40 Lingerie 30 1 78 0 30 600 Cold 30 Soft Toys 40 2 80...

Page 22: ...hine while selecting a programme De pending on the amount of laundry you have loaded into your machine there may be a difference of 1 1 5 hours between the duration shown on the display and the actual dura tion of the wash cycle Duration will be automatically updated soon after the washing starts Always select the lowest appropri ate temperature The most efficient programmes in terms of energy con...

Page 23: ...within 3 to 10 minutes in these programmes Eco 40 60 In the Eco 40 60 programme you may wash normally soiled cotton laundry that are specified to be washed together at 40 C or 60 C This programme is the stand ard test programme according to the EU environmentally friendly design and energy labelling regulations Although this programme washes longer than other washing programmes it is more efficien...

Page 24: ...this programme to wash your fibre duvets that bear machine washable tag Check that you have loaded the duvet cor rectly in order not to damage the machine and the duvet Remove the duvet cover be fore loading the duvet into the machine Fold the duvet into two and load it into the machine Load the duvet into the machine while paying attention that it will not con tact the door gasket or the glass Be...

Page 25: ...ng the required hygiene Turn on the programme when the machine is completely empty For better results use powder anti limescale drum cleaning ma terials suitable for washing machines when the powder detergent function is se lected Leave the loading door half closed after the programme ends for the inside of the machine to dry This is not a washing programme This is a maintenance programme Do not t...

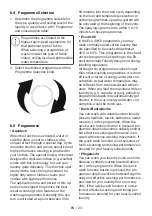
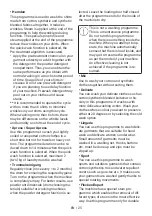
Page 26: ...re that correct temperature and spin speed are selected Extra Programme This is a special programme that allows you to download different programmes when you want to At the start there is a programme you can see with the Home Whiz application as default However you can use the HomeWhiz application to se lect a programme from the predetermined programme set and then change and use it If you want to...

Page 27: ... the Spin Speed 2 Press Start Pause The programme will resume Machine drains the water and spins the laundry If you want to drain the water at the end of the programme without spinning use No Spin function No change can be made in pro grammes where spin speed adjust ment is not allowed You can change the spin speed after the washing starts if the washing steps allow it Changes cannot be made if th...

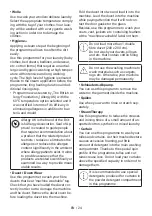
Page 28: ...ensive LED on the panel will be lit You can use the Intensive selection to achieve a better washing per formance when washing heavily soiled laundry You can reduce the time for your lightly soiled laundry by pressing the Fast Intens ive button in the programmes which come with intense being selected When you press the button once the LED will turn off and you will reach the appropriate pro gramme ...

Page 29: ... is cancelled or the step is complete If the function is not cancelled it will be active in the subsequent washing cycles as well Child Lock Use Child Lock function to prevent children from tampering with the machine Thus you can avoid any changes in a running pro gramme You can switch on and off the ma chine with On Off button when the Child Lock is active When you switch on the machine again pro...

Page 30: ...he end time function is activated the machine goes into standby mode and some LEDs on the screen turn off If there is any user input the LEDs will turn on again With the End Time function the start up of the programme may be delayed up to 24 hours After pressing End Time Setting but ton the programme s estimated ending time is displayed If the End Time is set End Time Setting indicator is illumina...

Page 31: ...oading Door Lock There is a locking system on the loading door of the machine that prevents opening of the loading door in cases when the water level is unsuitable Door Locked symbol appears on the dis play when the loading door is locked If the Remote Control Function is selected the door will be locked In order to open the door you must de activate Remote Start Function by either pressing the Re...

Page 32: ...ress the Start Pause button to switch the machine to pause mode Pause symbol will flash on the display Changing the programme selection after programme has started Programme cannot be changed when a programme is running You need to pause the operating programme if the Child Lock is not active and select a new programme This action will cancel the current pro gramme The selected programme starts an...

Page 33: ...te your user account re gistration Once the registration procedure is complete you can use all products with the HomeWhiz feature in your house on this account You can touch the Appliances tab in the HomeWhiz application to view appliances paired with your account Following the in stallation of the application HomeWhiz function enables the washing machine to send you instant notifications via your...

Page 34: ...ur washing machine a name Now you can tap and see the product you have added in the HomeWhiz Application Your washing machine will auto matically turn off if you cannot real ize the setup successfully within 5 minutes In this case you have to start the setup process all over again If the problem continues please contact the Authorised Ser vice You can use your washing machine with more than one sm...

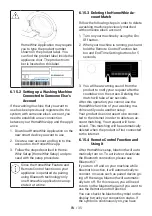
Page 35: ...1 Turn on your machine by using the On Off button 2 When your machine is running push and hold the Remote Control Function but ton and End Time Setting buttons for 5 seconds 3 You will hear warning sound from the product to notify your request after the countdown on the screen Deleting the match will take a few seconds After this operation you cannot use the HomeWhiz function of your washing ma ch...

Page 36: ...ica tion You can follow whether the Remote Control function is On or Off through the function indicator on the button If the Remote Control function is Off all the operations are handled on the washing ma chine and only status follow up is allowed on the application In the event that Remote Start function can not be turned on appliance will make a warning sound when you press the button This might...

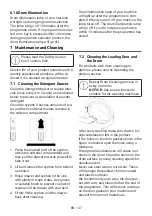
Page 37: ...tment 1 Press the marked part of the syphon within the softener compartment and then pull the drawer towards yourself to take it out 2 Lift and remove the syphon from behind as shown 3 Rinse drawer and syphon in the sink with plenty of warm water Use gloves or suitable brush to prevent contact of residues in the drawer with your skin 4 Firmly fit the syphon and the drawer back after cleaning 7 2 C...

Page 38: ...g Water and Cleaning the Pump Filter The filter system in your product prevents solid items such as buttons coins and fab ric fibres clogging the pump impeller during draining of washing water Thus the water will be drained without any problem and the service life of the pump will extend If the product fails to drain water inside it the pump filter is clogged Filter must be cleaned whenever it is ...

Page 39: ...ing Reduce the amount of laundry and make sure that the loading door is closed prop erly Programme cannot be started or selec ted The product has switched to self protec tion mode due to a supply problem line voltage water pressure etc De pending on the product model select an other program by turning the Program Se lection button or pressing and holding the On Off button for 3 seconds to can cel ...

Page 40: ...filter cap and pull down the emergency handle po sitioned at the rear side of the said cap See Loading Door Lock 31 Washing takes longer than specified in the user manual Water pressure is low Product waits until taking in adequate amount of water to prevent poor washing quality due to the decreased amount of water There fore the washing time extends Voltage is low Washing time is pro longed to av...

Page 41: ...ed Use the recommended amount of de tergent appropriate for water hardness and the laundry Washing performance is poor Stains persist or the laundry is not whitened Insufficient amount of detergent is used Use the recommended amount of de tergent appropriate for water hardness and the laundry Excessive laundry is loaded in Do not load the product in excess Load with amounts recommended in the Pro ...

Page 42: ...mell like the softener Detergent was put in the wrong compart ment If detergent is put in the pre wash compartment although prewash cycle is not selected product the can take this detergent during rinsing or softener step Wash and clean the drawer with hot water Put the detergent in the correct compartment Detergent was mixed with the softener Do not mix the softener with deter gent Wash and clean...

Page 43: ...ler or the Authorised Service Agent Never try to repair a nonfunctional product yourself Check the HomeWhiz section for the relevant troubleshooting in formation 9 DISCLAIMER WARNING Some simple failures can be adequately handled by the end user without any safety issue or unsafe use arising provided that they are carried out within the limits and in accordance with the following instructions see ...

Page 44: ...ts contacting in such cases authorized professional repairers or re gistered professional repairers On the con trary such attempts by end users may cause safety issues and damage the product and subsequently cause fire flood electrocution and serious personal injury to occur By way of example but not limited to the following repairs must be addressed to au thorized professional repairers or re gis...

Reviews: