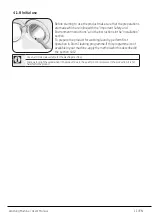
background image

4.1 Installation

• 

Apply


to


the


nearest


authorized


service


agent


for


the


installation


of


your


product.

• 

Preparation


of


the


location


and


electrical,


tap


water


and


waste


water


installations


at


the


place


of

installation is under customer's responsibility. 

• 

Make


sure


that


the


water


inlet


and


discharge


hoses


as


well


as


the


power


cable


are


not


folded,


pinched or crushed while pushing the product into its place after installation or cleaning 

procedures. 

• 

Make


sure


that


the


installation


and


electrical


connections


of


the


product


are


performed


by


authorized service. Manufacturer shall not be held liable for damages that may arise from 

procedures carried out by unauthorized persons. 

• 

Prior


to


installation,


visually


check


if


the


product


has


any


defects


on


it.


If


so,


do


not


have


it


installed.

Damaged products cause risks for your safety.

4.1.1 Appropriate installation location

• 

Place


the


product


on


a


hard


and


level


floor.


Do


not


put


it


onto


a


carpet


with


high


pile


or


other

similar surfaces.

• 

When


the


washing


machine


and


dryer


are


placed


on


top


of


each


other,


their


total


weight


–when


loaded–


amounts


to


180


kilograms.


Place


the


product


on


a


solid


and


flat


floor


that


has


sufficient

load carrying capacity!

• 

Do


not


place


the


product


on


the


power


cable.

• 

Do


not


install


the


product


in


the


environments


where


the


temperature


falls


below


0


ºC.

• 

Leave


a


minimum


space


of


1


cm


between


the


machine


and


the


furniture.

• 

On


a


graduated


floor,


do


not


place


the


product


next


to


the


edge


or


on


a


platform.

•   

Do


not


place


heat


sources


such


as


Hobs,


Irons,


Ovens,


etc.


on


the


washing


machine


and


do


not


use

them on the product.

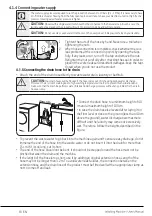
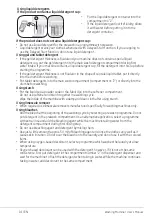
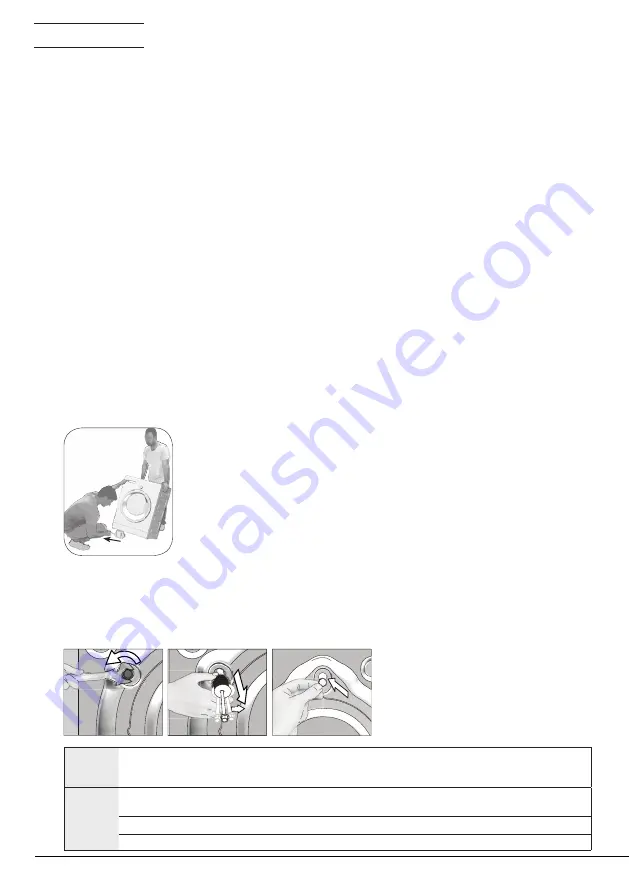
4.1.2 Removing packaging reinforcement

Tilt the machine backwards to remove the packaging 

reinforcement. Remove the packaging reinforcement by pulling the 

ribbon. Do not make this operation alone by yourself. 

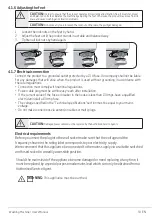
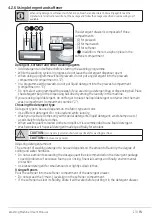
4.1.3 Removing the transportation locks

Loosen


all


bolts


with


an


appropriate


wrench


until


they


turn


freely.

2  Remove the transport safety bolts by turning them slightly.

3  Insert the plastic covers in the bag containing the user manual to the openings on the rear 

panel.

A

CAUTION: 

Remove the transportation safety bolts before operating the washing machine! Otherwise, the 

product will be damaged.

C

Keep the transportation safety bolts in a safe place to reuse when the washing machine needs to be moved again 

in the future.
Install the transport safety bolts in reverse order of the disassembly procedure.
Never move the product without the transportation safety bolts properly fixed in place!

7

 / EN

Washing Machine / User’s Manual

Summary of Contents for WTG721M1

Page 1: ...2302061151 Washing Machine User Manual WTG721M1W EN Document Number ...

Page 2: ...This product was manufactured using the latest technology in environmentally friendly conditions ...

Page 3: ...sk of flooding and injury from hot water will occur u Donotforceopenthelockedloadingdoor Doorcanbeopenedafew minutes after the washing cycle ends In case of forcing the loading door to open the door and the lock mechanism may get damaged u Use detergents softeners and supplements suitable for automatic washing machines only u Follow the instructions on the label of textiles and the detergent packa...

Page 4: ...y a 13 A fuse Do not neglect to have the grounding installation made by a qualified electrician Our company shall not be liable for any damages that will arise when the product is used without grounding in accordance with the local regulations u Donotwashtheproductbysprayingorpouringwaterontoit Riskof electric shock u Never touch the power cable plug with wet hands Do not grab the power cord to un...

Page 5: ...11 65 EU It does not contain harmful and prohibited materials specified in the Directive 2 2 Package information Packaging materials of the product are manufactured from recyclable materials in accordance with our National Environment Regulations Do not dispose of the packaging materials together with the domestic or other wastes Take them to the packaging material collection points designated by ...

Page 6: ...sions washing spinning dB Built in Height cm Width cm Depth cm Net weight 4 kg Beko WTG721M1W 7 A 173 0 93 0 64 0 64 0 250 Single Water inlet Double Water inlet Available Electrical input V Hz 230V 50Hz 2200 Total current A 10 Total power W Main model code 9210 1 Energy Consumption based on 220 standard washing cycles for cotton programmes at 60 C and 40 C at full and partial load and the consumpt...

Page 7: ...fficient load carrying capacity Do not place the product on the power cable Do not install the product in the environments where the temperature falls below 0 ºC Leave a minimum space of 1 cm between the machine and the furniture On a graduated floor do not place the product next to the edge or on a platform Do not place heat sources such as Hobs Irons Ovens etc on the washing machine and do not u...

Page 8: ...bathtub A CAUTION Your drain house will be flooded if the hose comes out of its housing during water discharge Moreover there is risk of scalding due to high washing temperatures In order to prevent such situations and make sure that the machine performs water intake and discharge processes without any problem fix the drain hose securely Connect the drain hose to a minimum height of 40 cm and a ma...

Page 9: ...Power cable plug must be within easy reach after installation If the current value of the fuse or breaker in the house is less than 13 Amps have a qualified electrician install a 13 Amp fuse The voltage specified in the Technical specifications section must be equal to your mains voltage Do not make connections via extension cables or multi plugs B CAUTION Damaged power cables must be replaced by ...

Page 10: ...e same colour as that visible on the pin face of the plug Fuse covers are available from any good electrical store Important Fitting a different plug As the colours of the wires in the mains lead of this appliance may not correspond with the coloured markings identifying the terminals on your plug proceed as follows 1 Connect the green yellow or green earth wire to the terminal in the plug marked ...

Page 11: ...pare the product for washing laundry perform first operation in Drum Cleaning programme If this programme is not available in your machine apply the method which is described in the section 4 4 2 C Use an anti limescale suitable for the washing machines Some water might have remained in the product due to the quality control processes in the production It is not harmful for the product 11 EN Washi...

Page 12: ...t be shaken off before placing into the machine Such dusts and powders on the laundry may build up on the inner parts of the machine in time and can cause damage 4 2 3 Things to be done for energy saving Following information will help you use the product in an ecological and energy efficient manner Operate the product in the highest capacity allowed by the programme you have selected but do not o...

Page 13: ...ergent container into the main wash compartment compartment number 2 Choosing the detergent type Detergent type to be used depends on the fabric type and color Use different detergents for coloured and white laundry Wash your delicate clothes only with special detergents liquid detergent wool shampoo etc used solely for delicate clothes When washing dark coloured clothes and quilts it is recommend...

Page 14: ...er soda or the fabric dye into the softener compartment Do not use softener and starch together in a washing cycle Wipe the inside of the machine with a damp and clean cloth after using starch Using limescale remover When required use limescale removers manufactured specifically for washing machines only Using bleaches Add the bleach at the beginning of the washing cycle by selecting a prewash pro...

Page 15: ...ed clothes Prefer liquid detergents produced for delicate clothes woollen and silk clothes must be washed with special woollen detergents Normally Soiled For example stains caused by body on collars and cuffs Powder and liquid detergents recommended for whites can be used at dosages recommended for normally soiled clothes Powder and liquid detergents recommended for colors can be used at dosages r...

Page 16: ...0 Temperature Adjustment button 60 1000 20 90 40 30 800 600 400 1 2 3 4 5 7 6 0 1 9 8 1 Make sure that the hoses are connected tightly 2 Plug in your machine 3 Turn the tap on completely 4 Place the laundry in the machine 5 Add detergent and fabric softener 1 Select the programme suitable for the type quantity and soiling degree of the laundry in accordance with the Programme and consumption table...

Page 17: ...0 90 7 62 2 00 1400 Cold 90 60 7 62 1 10 1400 Cold 90 30 7 60 0 20 1400 Cold 90 Daily Quick Super short Fast 90 2 41 0 15 1400 Cold 30 Mixed Fabrics 40 3 5 65 0 75 800 Cold 40 HandWash 40 1 5 55 0 55 1200 Cold 40 Delicates 40 3 5 51 0 65 1200 Cold 40 Down Wear 60 2 70 1 25 1000 Cold 60 Sports 40 3 5 44 0 45 1200 Cold 40 Dark Care 40 3 82 0 85 1200 Cold 40 Lingerie 30 1 65 0 30 1000 Cold 30 Shirts ...

Page 18: ...shing action in order not to damage the clothes 4 3 6 Additional programmes For special cases additional programmes are available in the machine C Additional programmes may differ according to the model of the machine Cottons Eco Use to wash your normally soiled durable cotton and linen laundry Although it washes longer than all other programmes it provides high energy and water savings Actual wat...

Page 19: ...vers such as gore tex etc It makes sure your garments are washed gently thanks to special rotating movements Lingerie You can use this programme to wash delicate garments that are suitable for hand wash and delicate women s underwear Small amount of garments must be washed in a washing net Hooks buttons etc must be done up and zips must be zipped up Down Wear Use this programme to wash your coats ...

Page 20: ...n options appear on the display When No Spin is selected the rinse level indicator lights will not turn on Rinse hold If you are not going to unload your clothes immediately after the programme completes you can use rinse hold function to keep your laundry in the final rinsing water in order to prevent them from getting wrinkled when there is no water in the machine Press Start Pause button after ...

Page 21: ...etely empty To obtain better results put powder lime scale remover for washing machines into the detergent compartment no 2 When the programme is over leave the loading door ajar so that the inside of the machine gets dry C This is not a washing programme It is a maintenance programme Do not run the programme when there is something in the machine If you try to do so the machine detects that there...

Page 22: ...own on the display C Additional laundry may be loaded during the delayed start period 5 At the end of the countdown duration of the selected programme will be displayed _ will disappear and the selected programme will start Changing the delayed start period If you want to change the time during countdown 1 Press the Delayed Start button Time will increase by 1 hour each time you press the button 2...

Page 23: ... loading door cannot be opened If you are obliged to open the Loading Door while the Loading Door light is off you must cancel the current programme See Cancelling the programme 4 3 15 Changing the selections after programme has started Switching the machine to pause mode Press the Start Pause button to switch the machine to pause mode while a programme is running The light of the step which the m...

Page 24: ... of the programme 1 Wait until the loading door light illuminates steadily 2 Press On Off button to switch off the machine 3 Take out your laundry and close the loading door Your machine is ready for the next washing cycle 4 3 18 Your machine features Standby Mode After you switch on your machine with On Off button if no programme is started or no other procedure is performed at the selection step...

Page 25: ...ke sure that no foreign substance is left in the drum If the holes on the bellow shown in the figure is blocked open the holes using a toothpick Foreign metal substances will cause rust stains in the drum Clean the stains on the drum surface by using cleaning agents for stainless steel Never use steel wool or wire wool These will damage the painted chromated and plastic surfaces 4 4 3 Cleaning the...

Page 26: ...o clean the dirty filter and discharge the water 1 Unplug the machine to cut off the supply power A CAUTION Temperature of the water inside the machine may rise up to 90 ºC To avoid the burning risk clean the filter after the water inside the machine is cooled down 2 Open the filter cover 3 Follow the below procedures in order to drain water The product does not have an emergency water drain hose ...

Page 27: ...lem Reason Programme does not start after c Start Pause Cancel button was not pressed Programme cannot be started or selected pressure etc mode after the programme water the programme started low voltage come to an end 29 EN ...

Page 28: ...h to spinning step There might be unbalanced load in the machine Automatic unbalanced load detection system might be activated due to the unbalanced distribution of the laundry in the drum The machine will not spin if water is not drained completely Check the filter and the draining hose Excessive foam might have occurred and automatic foam absorption system might have been activated due to too mu...

Page 29: ...amount of detergent for the water hardness can cause the laundry to become stiff in time Use appropriate amount of detergent according to the water hardness Detergent is put in the wrong compartment If detergent is put in the prewash compartment although prewash cycle is not selected machine can take this detergent during rinsing or softener step Put the detergent in the correct compartment Deterg...

Page 30: ...nd l water and pour into the main wash compartment of the detergent drawer Put detergent into the machine suitable for the programmes and maximum loads indicated in the Programme and consumption table When you use additional chemicals stain removers bleachs and etc reduce the amount of detergent Laundry remains wet at the end of the programme Excessive foam might have occurred and automatic foam a...

Page 31: ...www beko com ...

Reviews: