background image

RTD THERMOMETER 


4. OPERATION INSTRUCTIONS 


4.1 Power-Up 

Press the “

 ” button to turn 

ON

 the thermometer 

Press and hold the “

 ” button for 3 seconds to turn 

OFF 

the thermometer. 

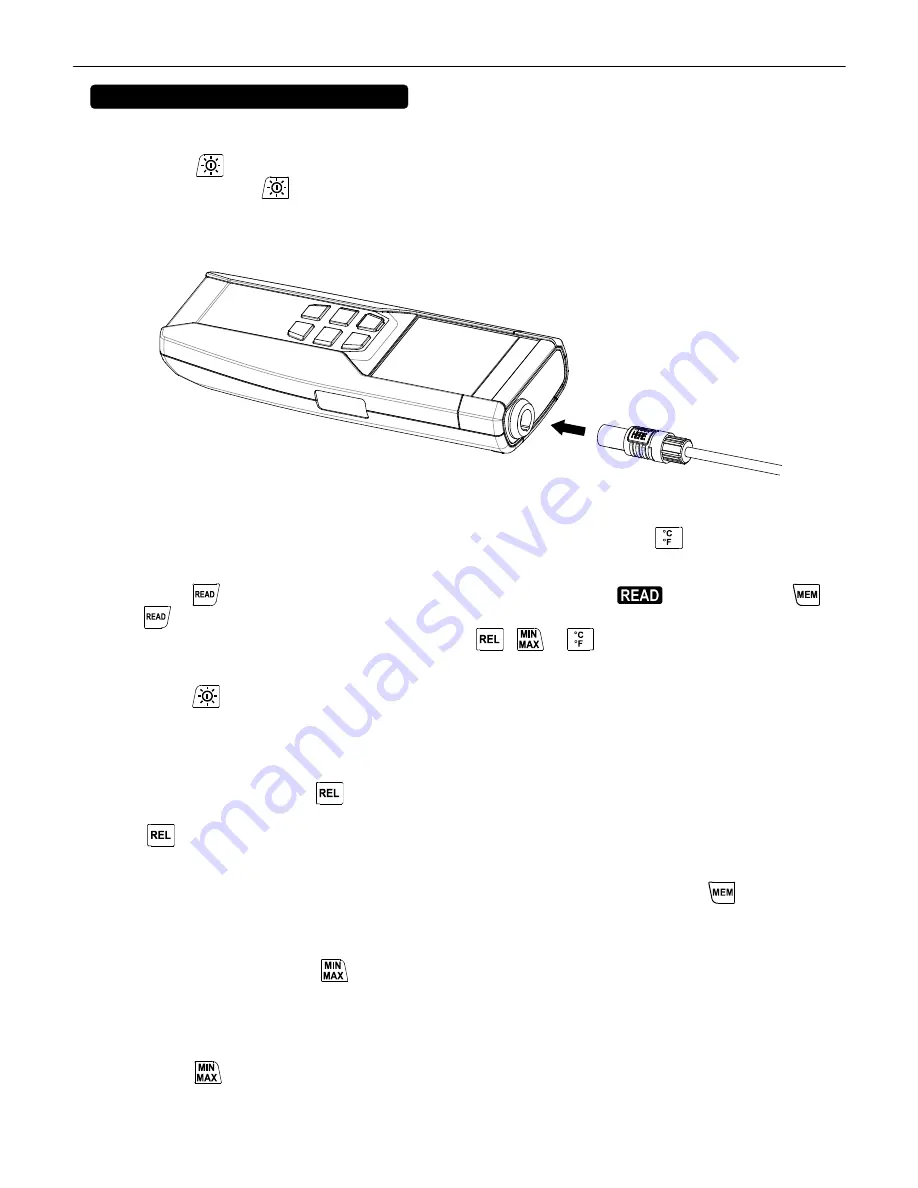
4.2 Connection the Temperature Probe 

For measurement, plug the temperature probe into the input connector. 


4.3 Selecting the Temperature Scale 

When the meter is first powered on, the default scale will show. The default is set on the Celsius 
(°C) scale. The user may change it to Fahrenheit (°F) scale by pressing the 

 button. 

4.4 READ Operation 

Press the 

 button to view the logged readings. The display shows “

”. Press either the 


or  

 button to scroll through the logged readings. The display shows each logged reading, its’ 

time stamp and memory location. Press either the 

 , 

 or 

 button to exit the READ mode. 

4.5 Back light Operation: 

Press the 

 button to turn on the back light.  Press it again to turn it off. 

 
NOTE: The meter will turn the back light off if there is no button pushed for 30 seconds.


4.6 Relative Operation: 

When the user presses the 

 button, the meter will memorize the present reading and the 

difference between the new reading and the memorized data will be shown on the display. Press 
the 

 button again to exit the Relative operation. 

4.7 Memory Operation: 

The thermometer stores a single set of readings in memory each time the


 button is 

pressed

. The thermometer will hold 99 readings.


4.8 MAX/MIN Operation: 

When the user presses the 

 button, the meter will enter the MAX/MIN mode. Under this mode 

the maximum and minimum values are kept in the memory simultaneously and updated with every 
new data. 
 
When the 

MAX

 symbol is display, the Maximum temperature is shown on the display. 

Press the 

 button again, the 

MIN

 symbol and the minimum temperature reading are shown on 

the display. 
 

Summary of Contents for B60901-0100

Page 1: ...e 3 4 3 Selecting the Temperature Scale 3 4 4 READ Operation 3 4 5 Backlit Operation 3 4 6 Relative Operation 3 4 7 Memory Operation 3 4 8 MAX MIN Operation 3 4 9 Auto Power Off 4 4 10 Low Battery Condition 4 5 Temperature Measurement 4 6 Setting the Time 5 7 Clearing Memory 5 8 Temperature Meter Calibration Setup 6 9 Power Preparation 7 10 Maintenance 7 11 Temperature Probe 8 ...

Page 2: ...uracy at 23 5 C 73 9 F Range Accuracy 100 C 400 C 0 05 reading 0 1 C 148 F 752 F 0 05 reading 0 2 F Temperature Coefficient For ambient temperatures from 0 C 18 C and 28 C 50 C for each C ambient below 18 C or above 28 C add the following tolerance into the accuracy spec 0 005 of reading 0 01 C 0 005 of reading 0 02 F Note The basic accuracy Specification does not include the error of the probe pl...

Page 3: ...s under Relative Mode C F Centigrade and Fahrenheit indication A below zero reading m d month day h m hours minute Readings are being logged Logged readings are display 1 Pt type temperature sensor connector 7 C F control button 2 LCD display 8 Read button 3 Power ON OFF and Back light button 9 External DC 9V power supply jack 4 Relative readout button 10 Tilt stand 5 Memory button 11 Battery Comp...

Page 4: ...light Operation Press the button to turn on the back light Press it again to turn it off NOTE The meter will turn the back light off if there is no button pushed for 30 seconds 4 6 Relative Operation When the user presses the button the meter will memorize the present reading and the difference between the new reading and the memorized data will be shown on the display Press the button again to ex...

Page 5: ...ower off mode The meter will power itself off after 30 minutes if no button is pushed To disable the auto power off press and hold the button and then power on the meter There will be two successive beeps to confirm that auto power off is disabled 4 10 Low Battery Condition The temperature meter low battery indication is Low battery Replace the batteries 5 TEMPERATURE MEASUREMENT 5 1 Correct Measu...

Page 6: ...RTD THERMOMETER 5 ...

Page 7: ... button until the display shows the correct day then press the button to select The left two digits will blink 6 6 Press the or button until the display shows the correct hour 24 hour format then press the button to select The right two digits will blink 6 7 Press the or button until the display shows the correct minutes then press the button to store the time in memory Note Holding down either th...

Page 8: ... mode change the offset until the display reading matches the calibration temperature 8 1 1 To enter the setup mode press and hold the and button then power on the meter 8 1 2 Press the button to enter the calibration mode in 3 seconds 8 1 3 Press the button to enter the calibration mode in 3 seconds 8 1 4 Press the or button to confirm the present Temperature value 8 1 5 Press the button twice to...

Page 9: ...Adapter Connection When the AC adapter is used insert the plugs of the adapter into the DC9V connector on the side panel Note When the AC adapter is connected while a battery is inserted the unit will be powered from the adapter the AC adapter has priority 10 Maintenance In order to ensure the accuracy of the thermometer for a longer period of time you should calibrate it once a year Clean the dev...

Page 10: ...mperature probe Specification Sensor Type Platinum resistance thermometer sensor Pt 100 4 wires Accuracy IEC751 class A t measurement temperature Measurement Range 100 to 400 C Temperature Sensor Dimensions Approx 5 0mm 0 2 Temperature Sensor Length Approx 230mm 9 05 Cable Length Approx 1500mm 59 0 ...

Page 11: ...ASL F250 1285 028 415 for 80 to 400ºC H B Instrument Company s laboratory is accredited in accordance with the international Standard ISO IEC 17025 2005 by A2LA H B s laboratory also meets the requirement of ASNI NCSL Z540 1 1994 Please visit www hbinstrument com for the uncertainty of measurement associated with our calibration system It is available on our scope of accreditation Certification at...

Reviews: