Pag. 11/16
[B
el
Engi
neerin
g
hold
s
th
e ri
ght
to
ma
ke
techn
ical
or
oth
er
mod
if
icat
ion
s
to
it
s
pr
odu
cts
wi
tho
ut
pri
or
war
nin
g]
B
el
P
hot
oni
cs
B
IO
2_U
se
r manual
_R
E
V
1.5.do
c
7.
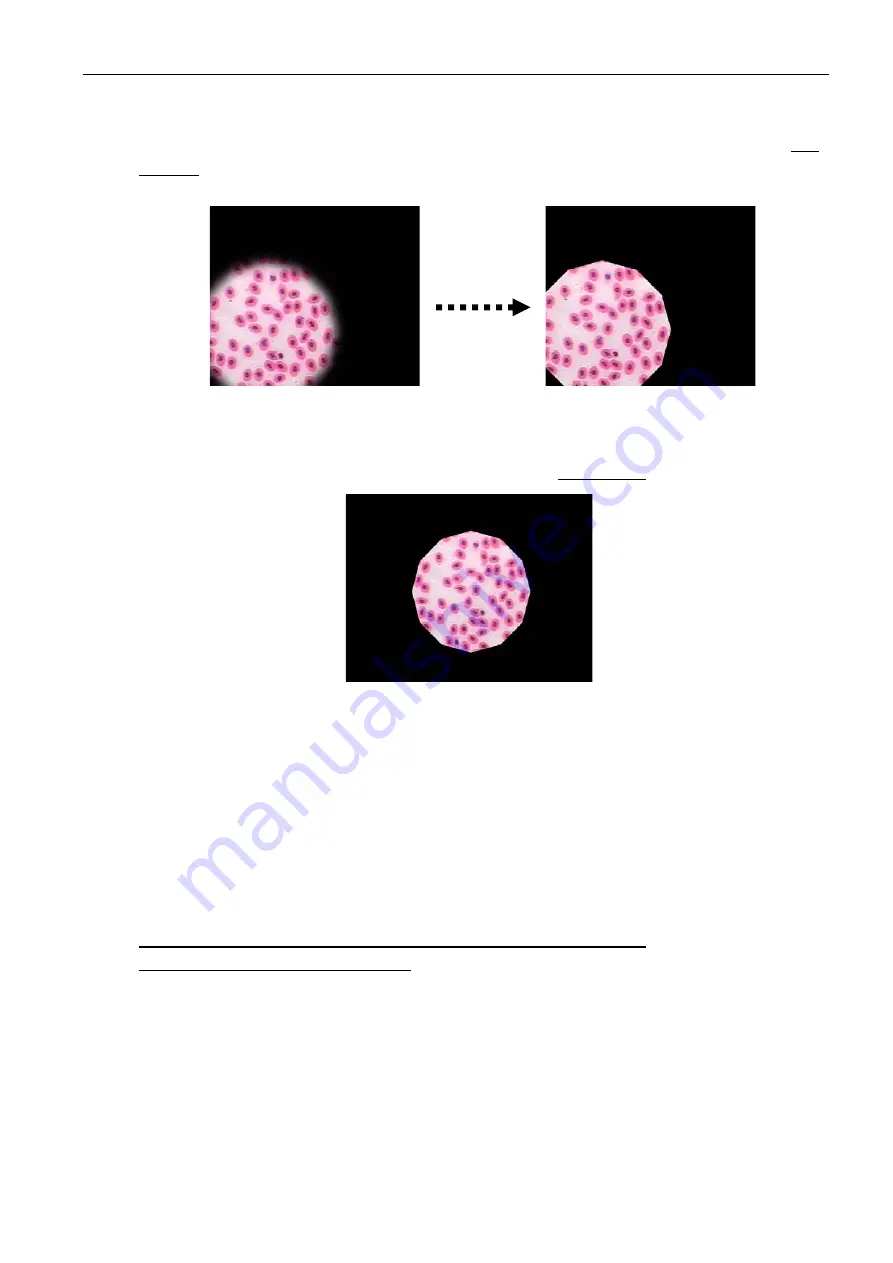
Now close the field diaphragm (A) of the illuminator about half of its total aperture and,
through the appropriate side knob (C), regulate the height of condenser until the image of
the contour (or part of it) of the field diaphragm with its sheets can be observed clearly, like
in fig.10.
8.
If the image of field diaphragm is not centered in the field of view, proceed to its centering
acting on the appropriate side condenser centering screws (E) until the image of field
diaphragm is brought into the center of the field of view, like in fig.11.
9.
At this point, to fine adjust the centering of the condenser, open the illuminator field
diaphragm (A) up to the contour of field of view and verify that the dark edge all around is
equidistant from the edge of the field of view. Act on the appropriate centering screw until
you obtain the best result.
10.Now open completely the illuminator field diaphragm (A) so that its sheets are not anymore
visible in the field of view. The condenser is now centered and at the correct working height
and it is not necessary to center it again subsequently (unless that some changes are made
on the condenser position).
The microscope is now correctly set to work with the best illumination
on the specimen (Köehler illumination).
11.To finish illumination optimization, it is advisable to regulate the condenser aperture
diaphragm (B) to obtain the best resolution and the best image contrast for the
magnification selected. At this point you must close the condenser diaphragm, which was
completely open at the beginning. However it must not be never completely closed since
diffraction effects may reduce resolution of image details.
Fig.10
Fig.11


