background image

tech.support@psbel.com

belfuse.com/power-solutions

USER MANUAL 

12

4  INSTALLATION

Warning: In order to avoid potentially hazardous situations including fire hazard, safety recommendations must be followed. Only 
authorized staff can install the unit.

4.1 CONNECTING THE INPUT TO THE POWER SUPPLY

The LDX-U20 must be connected to a DC power supply rated between 12VDC and 28VDC with a maximum output current of 20A. Use only 
60/75 Class I copper 1.5…2.5mm2 wires stripped 6...7.5mm. The tightening torque must be 0.5…0.6Nm. 
Please respect the wiring polarity!

Note: 

 The input current is equal to the load current plus the current needed by the battery charger to recharge the battery.

Caution: This input is designed to be connected ONLY to a short circuit protected power supply; connecting a battery to this input or 
other DC sources with not defined current limitation may seriously damage the unit or the load and even result in fire hazard. 

4.2 CONNECTING THE LOAD

The LDX-U20 must be connected to a DC load rated between 12VDC and 28VDC / maximum 20A. Use only 60/75 Class I copper 
1.5…2.5mm2 wires stripped 6...7.5mm. The tightening torque must be 0.5…0.6Nm. 
Please respect the wiring polarity! Please check the load and the power supply are rating compliant.

4.3 CONNECTING THE BATTERY

The LDX-U20 must be connected to a battery with nominal voltage between 12VDC and 28VDC with up to 150Ah capacity. Higher capacity 
batteries can also be used at the expense of a longer charging time. Use only 60/75 Class I copper 1.5…2.5mm2 wires stripped 6...7.5mm. 
The tightening torque must be 0.5…0.6Nm. 

Caution: The battery shall be connected to the LDX-U20 through a 30A ATO fuse (or equivalent). Even is the unit is electronically 
protected against short circuit it is mandatory to use a fuse for safety reasons.

Please respect the wiring polarity!

Avoid keeping the LDX-U20 connected to the battery for long time when not used. Although the current consumption from the battery when 
the unit is OFF is very low (about 30µA) it can discharge the battery in the long time.

4.4 CONNECTING THE TEMPERATURE SENSOR

An optional temperature sensor (P/N: WNTC-2MT) can be connected to its input on the front panel. The temperature sensor is provided 
with 2m long cables and must be fixed to the battery body to measure its temperature (an adhesive pad can be used). When the sensor is 
connected the battery temperature is automatically displayed on the LCD and a temperature compensated charge is activated when charging 
Lead-Acid batteries. 

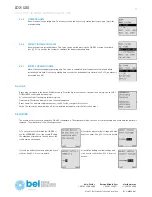
4.5 CONNECTING THE INHIBIT INPUT

An opto-isolated digital input is provided. A digital signal between 5VDC and 30VDC must be applied to this input to enable the INHIBIT 
function. By default when the signal is 0V (or the INHIBIT input is not connected) the unit will switch the load to the battery as soon as the 
input voltage is no more present. Applying a signal to this input inhibits the backup function and the load can be switched OFF as soon at the 
input fails with no battery backup. The polarity of this input can be changed as explained in §5.2.15.

Summary of Contents for LDX-U20

Page 1: ...USER MANUAL belfuse com power solutions LDX U20 12 24 V 20 A High Performance DC UPS ...

Page 2: ...atus 15 5 2 Settings 16 5 2 1 Input nominal voltage 16 5 2 2 Battery chemistry 16 5 2 3 Battery nominal voltage 16 5 2 4 Battery capacity 16 5 2 5 Battery charge voltage 16 5 2 6 Battery charge current 16 5 2 7 Battery deep discharge voltage 17 5 2 8 Battery low voltage 17 5 2 9 Battery nominal internal resistance 17 5 2 10 Battery maximal internal resistance variation 17 5 2 11 Battery maximum te...

Page 3: ... BCG 00946_001 LDX U20 12 V 24 V 20 A High Performance DC UPS 3 5 3 Info 20 5 3 1 Firmware version 20 5 3 2 Serial 20 5 3 3 Name 20 5 3 4 Power ON cycles counter 20 5 3 5 Operating time 21 5 3 6 Battery installation date 21 5 3 7 Battery operating time 21 5 4 Logs 21 5 5 Wizard 21 6 Events and Alarms 22 7 Physical dimensions 25 ...

Page 4: ...temperature compensated charge method 4 Relays Dry Contacts 2 relays are present for remote monitoring See 3 1 for more details 5 Inhibit Input A signal between 5VDC and 30VDC applied to this input inhibits the backup function this input is programmable to be active high or active low see 4 5 6 Battery sense Connection Used to accurately sense the battery voltage by considering the cables voltage ...

Page 5: ...ttery temperature and providing a Coulomb counter User settable maximum backup time Remote input to inhibit the UPS function Connection of a battery thermal sensor optional Integrated data logger with time stamp all events errors are logged in the internal memory and downloadable through the USB interface Automatic PC shutdown restart function see 3 3 Embedded User Interface 4 buttons and 1 color ...

Page 6: ...ease of the PC 3 1 2 DIGITAL INPUT An opto isolated input allows the inhibition of the backup function The polarity of the input can be defined using the Inhibit polarity setting see 5 2 15 3 1 3 DRY CONTACT OUTPUTS 2 relays are present on the LDX U20 User can chose which event activates the relay and the polarity The list of events is the following NAME DESCRIPTION DEFAULT SETTING Backup Active w...

Page 7: ...application provided free and must be connected through USB Optionally POWERMASTER can call a task on the PC before shutting down for example to backup some sensitive data Automatic restart LDX U20 is able to automatically restart a PC which was powered OFF by mistake for example in case of the Operating System OS crash The user may adjust an output current threshold and a timer used for detecting...

Page 8: ...ut voltage OFF This time must be set longer than the maximum time the PC takes to complete the shutdown T3 PC restart minimum OFF time User settable 5 2 25 T3 is the delay used between the return of the input voltage and the activation of the output The same time is used by the automatic restart function as power OFF time to restart the PC The value must be big enough for the PC to detect the supp...

Page 9: ... WNTC 2MT The battery charger takes into account the battery temperature and provides a temperature compensated charging voltage In case of over temperature the system disconnects the battery to prevent damage Coulomb counter It allows having a quick estimation of the remaining battery capacity and consequently the available backup time Deep discharge protection It protects against the deep discha...

Page 10: ...by request The user must set to the unit the following parameters to allow the charger to perform correctly Battery chemistry selectable between Lead Acid Nickel Lithium see 5 2 2 Battery nominal voltage between 12V and 28V see 5 2 3 Battery capacity between 1 2Ah and 150Ah see 5 2 4 Battery charging voltage provided by the battery manufacturer see 5 2 5 Battery charging current provided by the ba...

Page 11: ...if the battery is damaged When the battery is connected for the first time or the system starts from OFF the system assumes the battery is fully discharged and start with 0Ah counter For Lead acid batteries only during battery charge an approximation of charge is done checking the battery voltage Once the battery is fully charged the system sets the counter to the nominal capacity specified by the...

Page 12: ...be used at the expense of a longer charging time Use only 60 75 Class I copper 1 5 2 5mm2 wires stripped 6 7 5mm The tightening torque must be 0 5 0 6Nm Caution The battery shall be connected to the LDX U20 through a 30A ATO fuse or equivalent Even is the unit is electronically protected against short circuit it is mandatory to use a fuse for safety reasons Please respect the wiring polarity Avoid...

Page 13: ...tact using 60 75 Class I copper 0 15 0 5mm2 wires stripped 7 8mm The connector is provided with spring terminals Note the 2 relays contacts have one pole in common 4 7 BATTERY SENSE CONNECTION Figure 9 Battery connection without sense Figure 10 Battery connection with sense The battery sense connection is optional and it is recommended to use it to have an accurate measurement of the battery inter...

Page 14: ...ngs All the device settings are configurable from this menu Use the UP DOWN KEY to navigate through the parameters Press the OK KEY to enter exit the editing mode In editing mode use the UP DOWN KEY to change the highlighted value Info Device information such as firmware version serial number and device name is visible from this menu Logs All the alarms and event are logged in a circular buffer an...

Page 15: ...he symbol changes from green to red A message with the cause appears Output The measured output voltage and current is shown in this section In case of problems with the output the background color of the symbol changes from green to red and a message with the cause appears Battery The battery voltage current temperature resistance and charge are shown in this section In case of problems with the ...

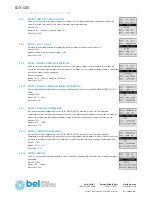
Page 16: ...hium batteries For Lithium the battery pack used must include the protection and balancing circuitry Default Pb Choices Pb NiMh CC CV Lith CC CV 5 2 3 BATTERY NOMINAL VOLTAGE Used to set the nominal battery voltage Default 24V Range 11V 28V or input nominal voltage 20 Resolution 0 1V 5 2 4 BATTERY CAPACITY Used to set the nominal battery capacity of the battery The internal Coulomb counter uses th...

Page 17: ...0mΩ Disabled Automatic Resolution 1mΩ 5 2 10 BATTERY MAXIMAL INTERNAL RESISTANCE VARIATION Combined with the nominal internal resistance it defines the threshold for the ALARM_BATTERY_RI_TOO_ HIGH Default 200 Range 20 300 Resolution 1 5 2 11 BATTERY MAXIMUM TEMPERATURE An optional external temperature sensor P N WNTC 2MT is required Used to set the maximum temperature at which the battery can oper...

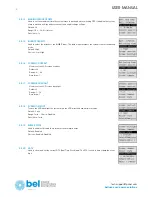
Page 18: ... the backup mode Default High Choices Low High 5 2 16 SCREEN CONTRAST Used to set the LCD screen contrast Default 24 Range 0 40 Resolution 1 5 2 17 SCREEN BACKLIGHT Used to set the LCD screen backlight Default 2 Range 1 10 Resolution 1 5 2 18 SCREEN TIMEOUT To save the LCD backlight the system dims the LCD after the defined timeout value Default 5min Range 1min 30min Disabled Resolution 1min 5 2 1...

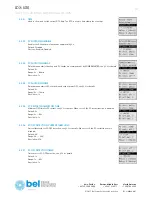
Page 19: ...y POWERMASTER see 3 3 for details Default 0s Range 0s 60min Resolution 1s 5 2 24 PC SHUTDOWN TIME Delay between start of PC shutdown and output power OFF see 3 3 for details Default 0s Range 0s 10min Resolution 1s 5 2 25 PC RESTART MINIMUM OFF TIME Minimum OFF time for PC restart see 3 3 for details When set to 0 the PC restart function is disabled Default 0s Range 0s 60s Resolution 1s 5 2 26 PC O...

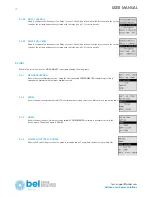
Page 20: ...e 3 1 3 for more details 5 3 INFO While in the info menu use the UP DOWN KEY to navigate through the menu items 5 3 1 FIRMWARE VERSION Shows the current firmware version Using the freely available POWERMASTER software is possible to upgrade the firmware with the latest available version 5 3 2 SERIAL Shows the device serial number S N This serial number corresponds to the S N shown on the device la...

Page 21: ... in the device FLASH memory From the log menu the user can view their history Use the UP DOWN KEYS to navigate between logs For each event the following information is given Timestamp The time and date at which the event happened Event name The name identifying the event see 6 for the complete list of events Value The value may be empty See 6 for the detailed description of this field for each eve...

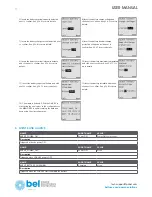
Page 22: ...mperature and click next to confirm See 5 2 11 for more details 11 Insert the battery expected lifetime and click next to confirm See 5 2 13 for more details 12 Insert the battery installation date and click next to confirm See 5 3 6 for more details 12 The wizard is finished Click the OK KEY to start using the new values in the configuration or the MENU KEY to exit discarding the data and keep us...

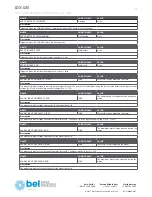
Page 23: ...the alarm threshold The threshold is calculated taking the lowest value between the input nominal voltage 5 2 1 and the battery nominal voltage 5 2 3 10 NAME SHORT NAME VALUE ALARM_INPUT_UNDERVOLT_END IUVE The minimum input voltage reached during the alarm Description The measured input voltage returns above the alarm threshold NAME SHORT NAME VALUE ALARM_INPUT_OVERVOLT_START IOVS Threshold voltag...

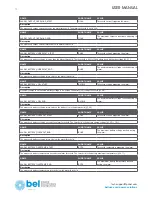
Page 24: ...ng the alarm Description During discharge the measured battery voltage is lower than the battery low voltage threshold 5 2 8 NAME SHORT NAME VALUE ALARM_BATTERY_LOW_END BLOWE The minimum battery voltage reached during the alarm Description The measured battery voltage returns above the battery low voltage threshold 5 2 8 NAME SHORT NAME VALUE ALARM_BATTERY_OVERVOLT_START BOVS Threshold voltage tri...

Page 25: ...n The measured battery temperature returns above the alarm threshold NAME SHORT NAME VALUE ALARM_BATTERY_RI_TOO_HIGH_START Ri high start None Description The measured battery internal resistance exceeds the alarm threshold The threshold is the battery nominal internal resistance 5 2 9 maximal internal resistance variation 5 2 10 NAME SHORT NAME VALUE ALARM_BATTERY_RI_TOO_HIGH_END Ri high end None ...

Reviews: