AIRBLADE® DRYER
Mix and Match
1MANUL011
Belanger, Inc. * 1001 Doheny Ct. * Northville, MI 48167 * Ph (810) 349-7010 * Fax (810) 380-9681
79
Installation
10-Nozzle Frame Assembly: Floor Mounted
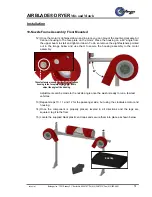
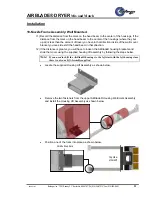
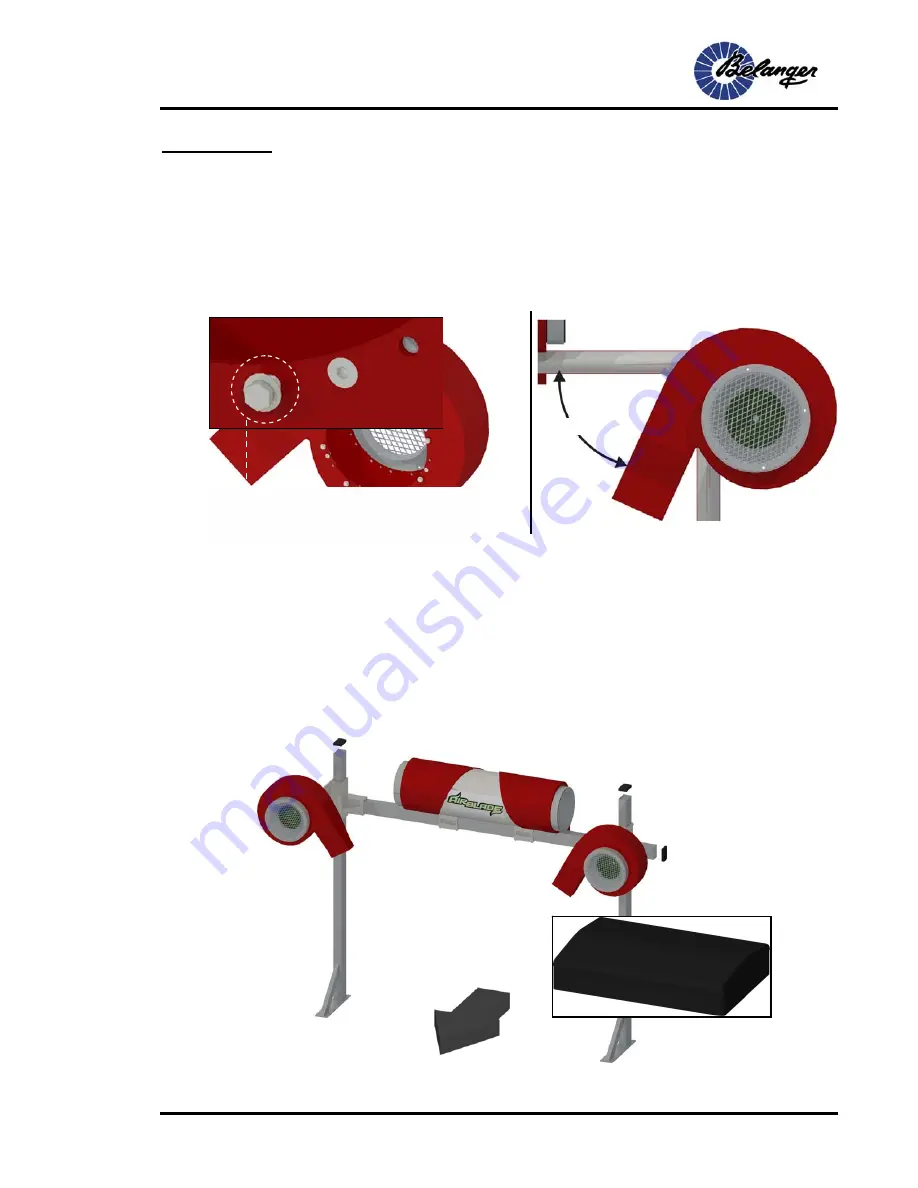
27) Once the motor is tightened down and in place you can mount the counter-clockwise Air
Cannon housing to the face plate on the motor. Place the housing on a 60° angle from
the upper beam to start and tighten it down. To do so remove the eight fasteners pointed
out in the image below and use them to secure the housing assembly to the motor
assembly.
Adjustments can be made to the nozzle angle once the wash is ready to run a few test
vehicles.
28) Repeat steps 10, 11 and 12 for the passenger side, but using the clockwise motor and
housing.
29) Once the component is properly placed, leveled in all directions and the legs are
squared, lag it to the floor.
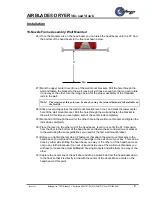
30) Locate the supplied black plastic end caps and secure them into place as shown below.
End Cap
60°
These fasteners are used to mount the Air Cannon
housing to the face plate on the motor and to
adjust the angle of the housing.


