INSTALLATION AND STARTUP
22-22
Belanger, Inc.® * PO BOX 5470. * Northville, MI 48167-5470 * Ph (248) 349-7010 * Fax (248) 380-9681
1MANUL220
Chapter 22 Initial Startup
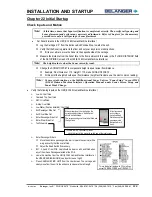
Wheel Cleaner Pump Startup
CAUTION
On startup, the air must be removed from the pump. To do so, loosen the center plug on
the pump, located on the top of the pump between the pump and the coupling guard.
DO NOT start the pump before priming or venting the pump!
Verify the pump rotation according to the arrow on the body of the pump
.
Fill the tank with water turning on the 1-amp breaker inside the control box.
Note:
The solenoid valve will open allowing the water to enter.
Confirm that the water shuts
off when it reaches the “high level” float
-switch with
slosh guard.
Open the priming plug on the pump head. With the water source above the
pump the water will be allowed to fill the pump.
When a steady stream of airless water runs out of the priming port, close the
plug and securely tighten.
Check rotation by bump starting the motor using the motor starter controls.
Verify the motor is turning in the same direction as the indication arrow.
Turn the motor on and check the entire system for leaks.
Set the control function to auto.
Note:
The following information was taken from documents
provided by Grundfos™ (the pump manufacturer).
Priming
To prime the pump in a closed system or an open system where the water source is
above the pump, close the pump isolation valve(s) and open the priming plug on the
pump head. See Figures 5a, 5b, and 5d. Gradually open the isolation valve in the
suction line until a steady stream of airless water runs out the priming port. Close the
plug and securely tighten. Completely open the isolation valves.
In open systems where the water level is below the pump inlet, the suction pipe and
pump must be filled and vented of air before starting the pump. Close the discharge
isolation valve and remove the priming plug. Pour water through the priming hole until the suction pipe and pump are
completely filled with water. If the suction pipe does not slope downward from the pump toward
the water level, the air must be purged while being filled. Replace the priming plug and securely tighten.
Note:
CR, CRI, CRN 1s to 5: For these pumps, it is advisable to open the bypass valve (Figure 5c)
during start-up. The bypass valve connects the suction and discharge sides of the pump, thus
making the filling procedure easier. When the operation is stable, the bypass valve must be
closed.
Summary of Contents for FreeStyler
Page 1: ...FreeStyler Installation Startup FreeStyler Installation Startup 1MANUAL220 Rev14 ...
Page 2: ......
Page 4: ......
Page 12: ......
Page 13: ... Chapter 1 Introduction Chapter 1 Introduction ...
Page 14: ......
Page 26: ......
Page 28: ......
Page 31: ... Chapter 3 Getting Started Chapter 3 Getting Started ...
Page 32: ......
Page 52: ......
Page 53: ... Chapter 4 Frame and Carriage Assembly Chapter 4 Frame and Carriage Assembly ...
Page 54: ......
Page 123: ... Chapter 5 Entrance and Exit Photo Eyes Chapter 5 Entrance and Exit Photo Eyes ...
Page 124: ......
Page 135: ... Chapter 6 Treadle Assembly Chapter 6 Treadle Assembly ...
Page 136: ......
Page 142: ......
Page 144: ......
Page 151: ... Chapter 8 MixStir Options Chapter 8 MixStir Options Triple Foam and High Pressure Wax ...
Page 152: ......
Page 163: ... Chapter 9 Reclaim Water Adapter Kit Option Chapter 9 Reclaim Water Adapter Kit Option ...
Page 164: ......
Page 167: ... Chapter 10 Booster Pump Assembly Option Chapter 10 Booster Pump Assembly Option ...
Page 168: ......
Page 174: ......
Page 175: ... Chapter 11 Bug Spray Applicator Option Chapter 11 Bug Spray Applicator Option ...
Page 176: ......
Page 183: ... Chapter 12 Undercarriage Options Chapter 12 Undercarriage Options ...
Page 184: ......
Page 191: ... Chapter 13 Water Softener Option Chapter 13 Water Softener Option ...
Page 192: ......
Page 205: ... Chapter 14 HydroBlade Assembly Option Chapter 14 HydroBlade Assembly Option ...
Page 206: ......
Page 226: ......
Page 249: ... Chapter 16 Signage Options Chapter 16 Signage Options ...
Page 250: ......
Page 253: ... Chapter 17 Onboard Dryer Option Chapter 17 Onboard Dryer Option ...
Page 254: ......
Page 258: ......
Page 259: ... Chapter 18 Spot Free Rinse R O Option Chapter 18 Spot Free Rinse R O Option ...
Page 260: ......
Page 264: ......
Page 265: ... Chapter 19 Trades Chapter 19 Trades ...
Page 266: ......
Page 270: ......
Page 271: ... Chapter 20 Electrical Chapter 20 Electrical ...
Page 272: ......
Page 282: ......
Page 284: ......
Page 293: ... Chapter 22 Initial Startup Chapter 22 Initial Startup ...
Page 294: ......
Page 320: ......
Page 321: ......


