5 Startup
5.3 Assemble/disassemble repeater
30
OZD Profi G12D... ATEX 1 V. 03 07/2014
5.3.1 Assembly of OZD Profi G12DU ATEX 1
The Fiberoptic Repeater OZD Profi G12DU ATEX 1 can be
assembled on
- a 35 mm top-hat rail as per IEC 60715: 1981 + A1: 1995
or
- a flat surface (pre-assembled top-hat rail must be
unscrewed beforehand).
Assembly on top-hat rail
Select the assembly location such that climatic limit val-
ues specified in the technical data are maintained.
Consider adequate space for the connection of bus and
supply cables.
For easy installation of the optical fibre connect this to
the repeater before the assembly.
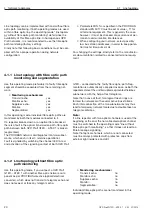
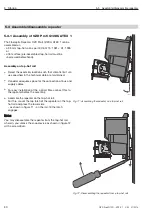
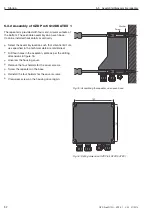
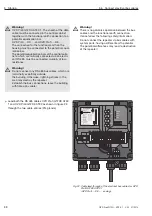
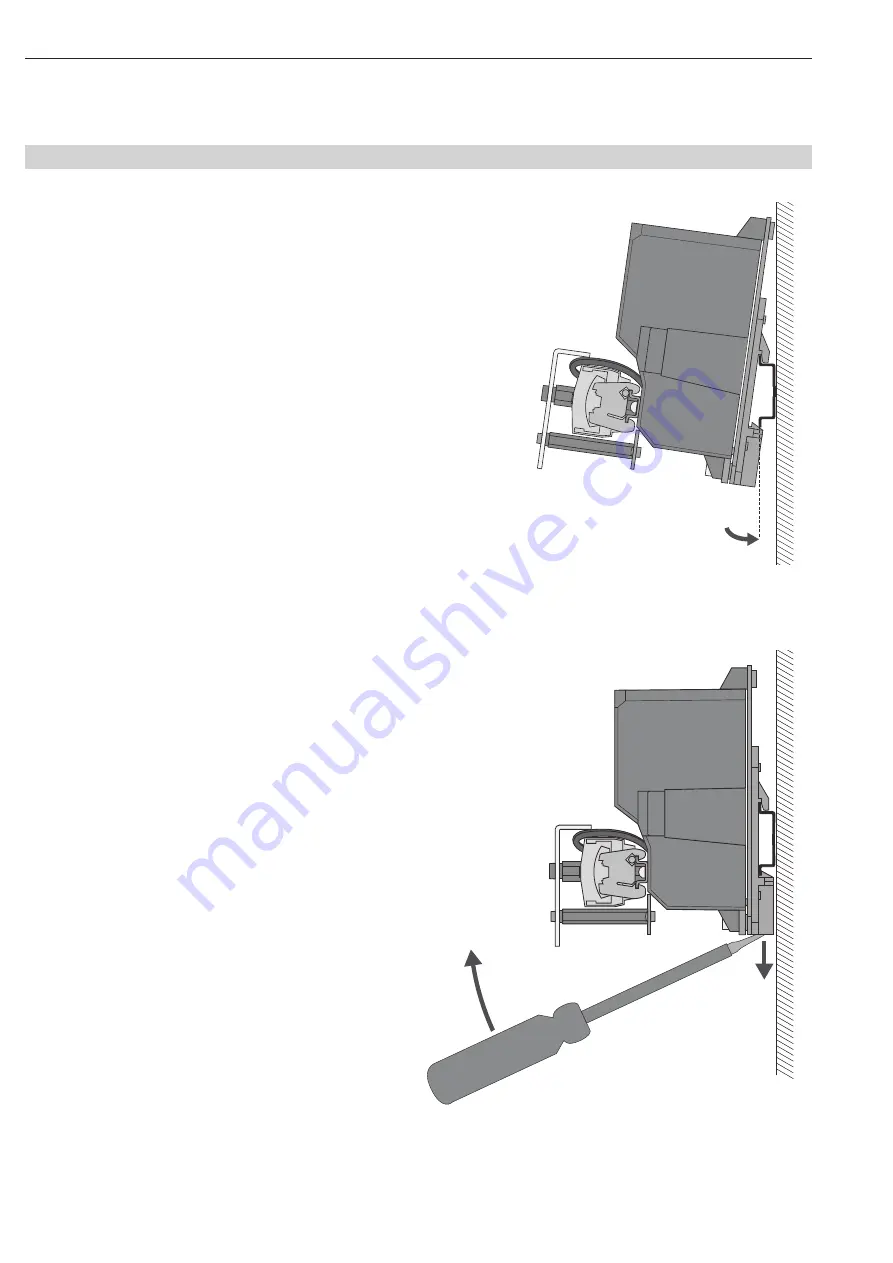
Assemble the repeater on the top-hat rail.
For this, mount the top latch of the repeater on the top-
hat rail and press the lower side
- as shown in figure 11 - on the rail, till the latch
engages.
Note:
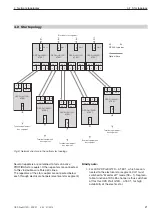
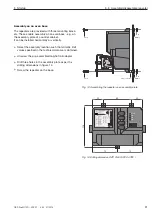
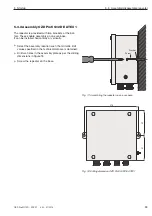
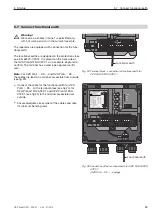
You may disassemble the repeater from the top-hat rail,
wherein, you unlock the snap device as shown in figure 12
with a screwdriver .
5.3 Assemble/disassemble repeater
click !
Fig. 11: Assembling the repeater on a top-hat rail
Fig. 12: Disassembling the repeater from a top-hat rail


