Modifying the User Database
55
6.5.1.1 Encryption Key Source
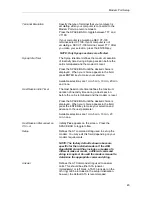
Press the SPACE BAR until the desired choice is displayed from the Encryption Key Source
selections for the ASG Key authentication method. Each selection is described in subsequent
paragraphs. When the appropriate source is displayed, press the ENTER key to select it. After
the ENTER key is pressed, the system will confirm that the user has been added to the database.
The three choices are listed below:
•
Randomly
Generated
•
Device ID/User Code
•
Fixed
NOTE:
To maintain security, be sure to protect ASG Key seed values and passwords. This
information is the key to security on the ASG Guard/ASG Guard Plus.
6.5.1.2 Encryption Key Source: Randomly Generated
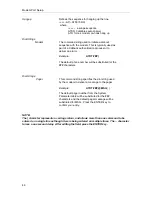
Randomly generated means that the ASG Guard/ASG Guard Plus generates the encryption key.
When this source is selected, the ASG Guard/ASG Guard Plus generates the key value and
displays the information on the screen.
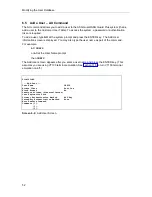
The information displayed in the Enter These Digits as Key1 or Key2 field is to be entered in to
the ASG Key when you initialize the ASG Key. Be sure to note this information carefully. If you
make an error entering the information for the ASG Key, redo the procedure by using the Change
User command. Follow the instructions supplied with the ASG Key to initialize the ASG Key.
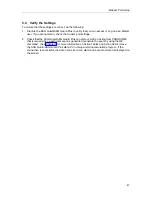
Enter the Test Challenge information displayed on the screen (the test challenge is always
"1234567") into your ASG Key per the instructions provided with the ASG Key. If the Reply on
your ASG Key matches the one on the screen, you have successfully added this user.
•
ASG Key Details
—Encryption Key Source Randomly Generated
Enter These Digits as Key1 or Key2: 0443 2126 = 3422 1505 = 3160 =
Test Challenge: 1234567 ...Reply: 040-2181
Press <ENTER> to Continue
Screen 6-4. ASG Key Details Screen
Summary of Contents for Lucent Technologies Access Security Gateway Guard
Page 12: ...x Page intentionally left blank ...
Page 28: ...ASG Guard Overview 16 Page intentionally left blank ...
Page 36: ...Physical Connections 24 Page intentionally left blank ...
Page 60: ...Modem Port Setup 48 Page intentionally left blank ...
Page 82: ...Modifying the User Database 70 Page intentionally left blank ...
Page 120: ...Action and Event Tables 108 Page intentionally left blank ...
Page 158: ...User Connectivity 146 Page intentionally left blank ...
Page 188: ...Log Functions 176 Page intentionally left blank ...
Page 236: ...Troubleshooting 224 Page intentionally left blank ...
Page 252: ...Internal Battery Replacement 240 Page intentionally left blank ...
Page 258: ...Glossary of Command References 246 Page intentionally left blank ...

