background image

9

6

5

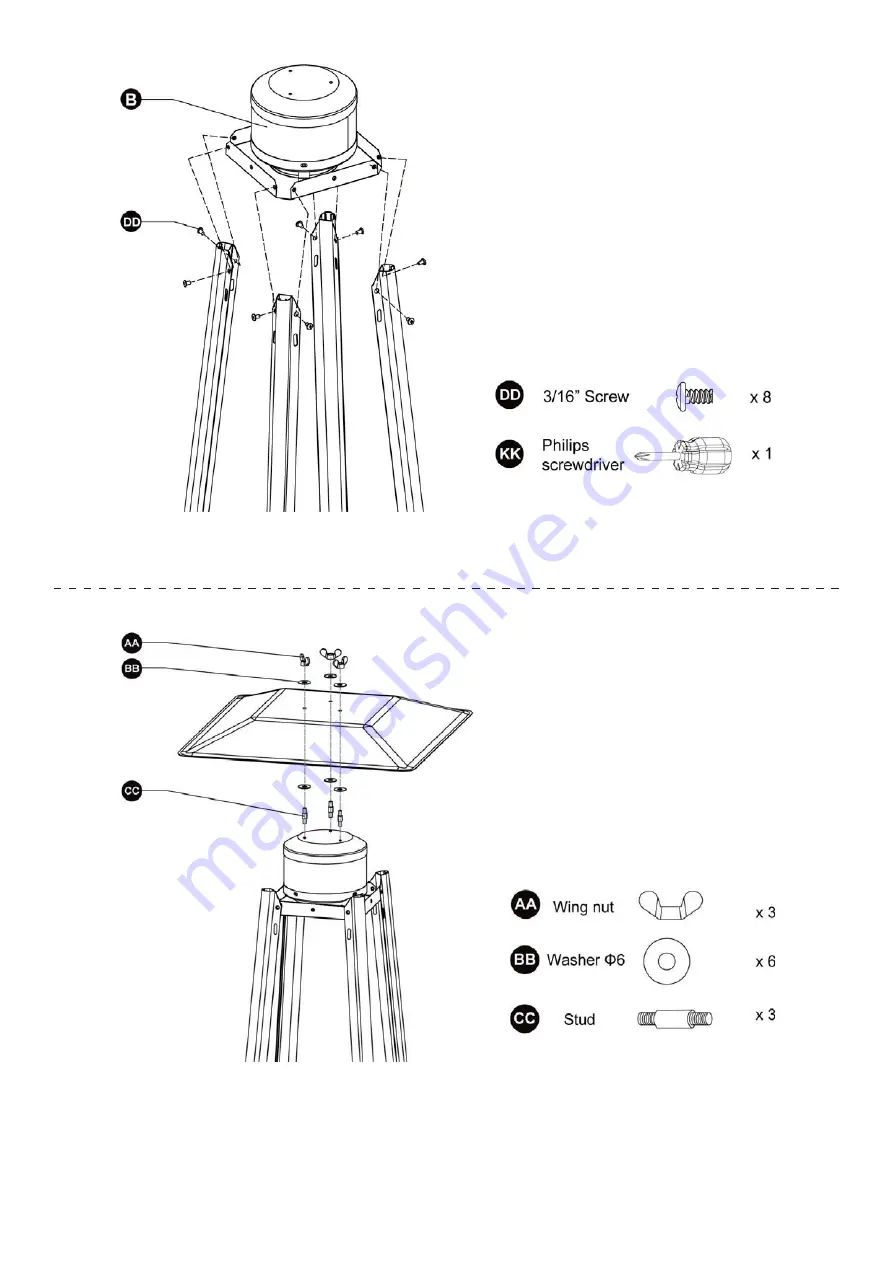
Assemble the flame screen on top of the upper support and secure using 8 pcs of 3/16” screws

Attach the reflector on top of the flame screen by putting 3 pcs of studs on the flame screen, th
3 pcs of washers. Put the reflector on top, and secure the assembly with another 3 washers and 3
wing nuts.

Summary of Contents for 014-HG-PH42

Page 1: ...er item no 014 HG PH42 www bellezefurniture com support bellezefurniture com 1 800 682 6376 bellezefurniture FOLLOW US CONTACT INFO NOTE The instruction booklet contains IMPORTANT safety information Please read and keep for future reference ...

Page 2: ...OOH H SURGXFW LV FDUHIXOO VHOHFWHG WR HQVXUH WKH PHHW RXU VWDQGDUGV DV ZHOO DV RXU VWDQGDUGV H EHOLHYH TXDOLW VKRXOG QHYHU EH GHWHUPLQHG E SULFH ZKLFK LV ZK HOOH H LV FRPPLWWHG WR SURYLGLQJ KLJK HQG PHUFKDQGLVH DW WKH DEVROXWH ORZHVW FRVW PLEASE LIKE COMMENT AND FOLLOW EHOOH HIXUQLWXUH TABLE OF CONTENTS 6DIHW QIRUPDWLRQ 3DFNDJH RQWHQW VVHPEO QVWUXFWLRQ 2SHUDWLRQ QVWUXFWLRQ DUH DQG 0DLQWHQDQFH 7URX...

Page 3: ...KLFK KDV VR VPHOO 8VLQJ WKH DSSOLDQFH LQ DQ HQFORVHG VSDFH ZRXOG FDXVH FDUERQ PRQR LGH SRLVRQLQJ LUUHYHUVLEOH EUDLQ GDPDJH RU HYHQ GHDWK 2 127 XVH WKLV DSSOLDQFH LQ DQ HQFORVHG VSDFH VXFK DV FDPSHU WHQW FDU RU KRPH 2 127 VWRUH RU XVH JDVROLQH IODPPDEOH OLTXLG RU YDSRUV LQ WKH YLFLQLW RI WKLV DSSOLDQFH Q 3 F OLQGHU QRW FRQQHFWHG IRU XVH VKDOO QRW EH VWRUHG LQ WKH YLFLQLW RI WKLV DSSOLDQFH DANGER DA...

Page 4: ...4 PACKAGE CONTENT ...

Page 5: ...5 3x 8x 1x 6x 4x 3x 1x 56x 1x 4x 1x 4x 1x Not include 1x II M5 Flange nut 4x ...

Page 6: ...6 ASSEMBLY INSTRUCTION Estimated Time for Assembly 60 00 1 Attach the wheel assembly to the bottom plate by using 4 pcs of M6 x 12 bolts and 4 pcs of M6 flange nuts ...

Page 7: ... secure the pins Secure the lower support to the base by using 12pcs of 3 16 screws Align the pins on the control box assembly to the holes on the top of the lower support Press to secure the pins Secure the lower support to the control box assembly by using 8 pcs of 3 16 screws 20 DD DD ...

Page 8: ...DD 8 3 4 Assemble the block belt to 2 of the lower support by using 4 pcs of M5 x 12 screws Insert the upper support to the lower support and secure using 8 pcs of 3 16 screws GG 4 ...

Page 9: ...er support and secure using 8 pcs of 3 16 screws Attach the reflector on top of the flame screen by putting 3 pcs of studs on the flame screen th 3 pcs of washers Put the reflector on top and secure the assembly with another 3 washers and 3 wing nuts ...

Page 10: ...hrough the hold of the plate on top of the control box assembly Check and ensure the glass tube is position properly and is completely cover the center hole of the plate on the control box assembly WARNING The black silicon ring must be in pace before operating the appliance Hang the protective guard onto the upper support Secure the protective guards with fixing brackets and 4 pcs of 3 16 screws ...

Page 11: ... cover the front side where the control knob is For the middle 2pcs of holes need use M5 Flange Nut and M5 X 12 Screw Blocking the lower support on front panel using 4pcs of 3 16 screws DD GG FF GG x 6 M5 X 12 Screw FF x 6 M5 Flange nut KK x 1 Philips screwdriver DD x 16 3 16 Screw DD ...

Page 12: ...the front panel and the chain on the other side Secure the knob and chain using a M4 x 10 screw Hook the other end of the chain to the control box assembly Insert the pothook of the front panel to the holes on the bottom plate ...

Page 13: ...quired for the propane gas input adjustment Storing the appliance indoor is only permissible if the cylinder is disconnected and remove from the appliance Propane cylinder must be stored outdoor in a well ventilated area and out of children s reach A disconnected cylinder must have dust cap securely installed and must not be stored in an enclosed area A minimum of 17000 BTU per hour is needed for ...

Page 14: ...U PXVW KDYH D OLVWHG RYHUILOOLQJ SUHYHQWLRQ GHYLFH 7KH F OLQGHU PXVW KDYH D FRQQHFWLRQ GHYLFH FRPSDWLEOH ZLWK WKH FRQQHFWLRQ IRU WKH DSSOLDQFH 7KH F OLQGHU XVHG PXVW LQFOXGH D FROODU WR SURWHFW WKH F OLQGHU YDOYH 2 127 FRQQHFW DQ XQUHJXODWHG SURSDQH F OLQGHU WR WKH KHDWHU 2 127 VWRUH D VSDUH 3 JDV F OLQGHU LQ WKH YLFLQLW RI WKH KHDWHU 2 127 ILOO WKH F OLQGHU EH RQG SHUFHQW IXOO 3ODFH WKH GXVW FDS ...

Page 15: ...he hose and regulator 3 Apply several drops of solution to the connection between regulator and the cylinder 4 Make sure all patio heater and light valves are OFF 5 Turn cylinder valve ON 1 Turn cylinder valve OFF 2 If there is a leak disconnect the connection and reconnect then perform another leak test If bubbles continue to appear after several attempts you should replace the hose or cylinder v...

Page 16: ... WKHUH LV D OHDN This appliance shall be used only in a well ventilated space and shall not be used in a building garage or any other enclosed area An appliance may be installed with shelter no more inclusive than 1 With walls on all sides but with no overhead cover 2 Within a partial enclosure which includes an overhead cover and no more than two side walls These VLGH ZDOOV PD EH SDUDOOHO DV LQ D...

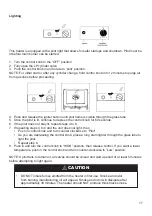
Page 17: ...purge air from gas lines before proceeding 4 Push and release the igniter button until pilot flame is visible through the glass tube 5 Once the pilot is lit continue to depress the control knob for 60 seconds 6 If the pilot does not stay lit repeat steps 4 to 6 7 If repeating steps 4 to 6 and the unit does not light then Push in control knob and turn counter clockwise to Pilot As you are depressin...

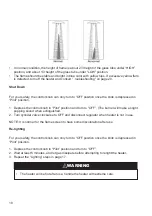
Page 18: ...UHVV WKH FRQWURO NQRE LQ 3LORW SRVLWLRQ DQG WXUQ WR 2 DLW DW OHDVW PLQXWHV DQG OHW JDV GLVVLSDWH EHIRUH DWWHPSWLQJ WR UHOLJKW WKH KHDWHU 5HSHDW WKH LJKWLQJ VWHSV LQ SDJH RU RXU VDIHW WKH FRQWURO NQRE FDQ RQO WXUQ WR 2 SRVLWLRQ RQFH WKH NQRE LV GHSUHVVHG LQ 3LORW SRVLWLRQ HSUHVV WKH FRQWURO NQRE LQ 3LORW SRVLWLRQ DQG WXUQ WR 2 7KH EXUQHU ZLOO PDNH D VOLJKW SRSSLQJ VRXQG ZKHQ H WLQJXLVKHG 7XUQ F OLQ...

Page 19: ...WHU VRXUFHV HDWHU LV DW OHDVW RQ WRS DQG DZD IURP FRPEXVWLEOH PDWHULDOV HDWHU LV SODFHG RQ VROLG DQG OHYHO VXUIDFH 7KHUH LV QR VLJQ RI VSLGHU RU LQVHFW QHVWV LQ WKH KHDWHU OO EXUQHU SDVVDJHV DUH FOHDU 3HRSOH VKRXOG EH DOHUWHG WR WKH KD DUGV RI KLJK VXUIDFH WHPSHUDWXUH DQG VKRXOG VWD DW VDIH GLVWDQFH WR SUHYHQW EXUQV RU FORWKLQJ LJQLWLRQ RXQJ FKLOGUHQ VKRXOG EH FDUHIXOO VXSHUYLVHG ZKHQ WKH DUH DURX...

Page 20: ... GHVLUHG FRYHU XS WKH KHDWHU WR SUHYHQW GHEULV EXLOG XS LQ DLU SDVVDJHV 127 0DNH VXUH WKH KHDWHU LV FRRO GRZQ EHIRUH FRYHULQJ 0DNH VXUH FRQWURO NQRE DQG F OLQGHU YDOYH DUH 2 LVFRQQHFW WKH 3 F OLQGHU 2 127 OHDYH 3 F OLQGHU XQGHU GLUHFW VXQOLJKW RU H FHVVLYH KHDW 6WRUH KHDWHU XSULJKW LQ DQ DUHD DZD IURP GLUHFW FRQWDFW ZLWK LQFOHPHQW ZHDWKHU VXFK DV UDLQ VOHHW KDLO VQRZ GXVW DQG GHEULV I GHVLUHG FRYH...

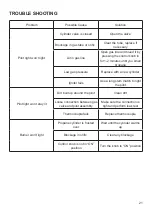
Page 21: ...DV SUHVVXUH 5HSODFH ZLWK D QHZ F OLQGHU JQLWHU IDLOV 8VH D ORQJ VWHP PDWFK WR OLJKW WKH SLORW 3LORW OLJKW ZRQ W VWD OLW LUW EXLOW XS DURXQG WKH SLORW OHDQ GLUW RRVH FRQQHFWLRQ EHWZHHQ JDV YDOYH DQG SLORW DVVHPEO 0DNH VXUH WKH FRQQHFWLRQ LV WLJKW DQG SHUIRUP OHDN WHVW 7KHUPRFRXSOH IDLOV 5HSODFH WKHUPRFRXSOH XUQHU ZRQ W OLJKW 3URSDQH F OLQGHU LV IURVWHG RYHU DLW XQWLO WKH F OLQGHU ZDUPV XS ORFNDJH L...

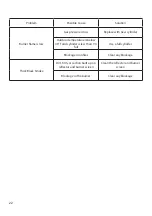
Page 22: ...linder Outdoor temperature is below 40 F and cylinder is less than 1 4 full Use a full cylinder Blockage in orifices Clear any blockage Thick Black Smoke Dirt film or carbon built up on reflector and burner screen Clean the reflector and burner screen Blockage in the burner Clear any blockage ...

Page 23: ... NOTE ...

Page 24: ...XUQLWXUH FOLLOW US CONTACT INFO Easy Return We hope you enjoy your new Belleze furniture Share your photos on Instagram and tag us bellezefurniture H ZRUN KDUG WR PDNH VXUH RUGHU DUULYHV VDIH DQG VHFXUH EXW UHVW DVVXUHG ZH ZLOO WDNH FDUH RI LW LI LW LV QRW XS WR VWDQGDUG I RX QHHG UHSODFHPHQW SDUWV RQWDFW XV DW 1 800 682 6376 RU HPDLO XV DW support bellezefurniture com ZH ZLOO VHQG RX UHSODFHPHQWV...

Reviews: