background image

G93

G93

10

OVEN TIMER OPERATION

The oven timer offers you the following features:

1. Time of Day
2. Minute Minder
3. Automatic Cooking with cook and delay cooking

functions.

The automatic timer can control the main oven only.
When the timer control has been
set for the main oven it is possible to use the top oven
on non automatic cooking.

1. Select foods which will take the same time to cook

and require approximately the same temperature.

2. Set the oven timer so that the food has just finished

or about to finish cooking on your return to the oven.
This will ensure the food has not cooled down and
does not require reheating before serving.

3. Food should be as cold as possible when it goes

into the oven, ideally straight from the refrigerator.
Frozen meat and poultry should be thawed
thoroughly before it is put in the oven.

4. We advise that warm food should never be placed

in the oven if there is to be a delay period. Stews
prepared by frying the meat and vegetables should
be cooked as soon as possible.

5. We  advise dishes containing left-over cooked

poultry or meat, for example
Shepherds Pie, should not be cooked automatically
if there is to be a delay period.

6. Stews and joints should be cooked by the long slow

method, so that the delay period is kept to a
minimum.

7. On warm days, to prevent harmful bacterial growth

in certain foods (i.e. poultry, joints, etc) the delayed
start should be kept to a minimum.

8. Wine or beer may ferment and cream may curdle

during the delay period, so it is best to add these
ingredients just before serving.

9. Foods which discolour should be protected by

coating in fat or tossing in water to which lemon
juice has been added, prior to placing food in the
oven.

10. Dishes containing liquid should not be filled too full

to prevent boiling over.

11. Foods should be well sealed (but not airtight) in a

container to prevent the loss of liquid during
cooking. Aluminium foil gives a good seal.

12. Ensure food is cooked thoroughly before serving.

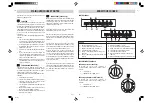
A
U
T
O

1 2

5

3 4

6

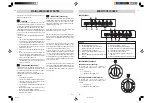
ELECTRONIC PROGRAMMER / CLOCK

The following functions can be carried out :

Set 24 hr clock

( using buttons 2 and 3 )

Set minute minder

( using button 1 )

 Set cooking time

( using button 2 )

Set end of cooking time

( using button 3 )

 Set manual operation

( using button 4 )

- /+

( using buttons 5 and 6 )

Note : Always use manual operation when not using
the programmer

Setting the time of day (from 0.01 to 24.00 = hh,mm)

After connecting the cooker to the mains supply or after
a power cut, AUTO and “0.00”  will both flash
simultaneously on the display.

Press buttons 2 and 3 simultaneously and set the current
time of day by pressing buttons 5 or 6. When the time
of day is set the AUTO symbol will be replaced by the

i       

symbol on the display, indicating that the timer is

set for manual operation.

Minute minder (from 0 hours 01 minute to
0 hours 59 minutes)

Press button 1 and select the cooking time with buttons
5 or 6. The          symbol will appear on the display. At the
end of the set time the           symbol will disappear from
the display and the buzzer will sound and continue for
7 minutes or until button 4 is pressed once.

15

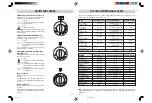
CONVENTIONAL GRILLING – TOP CAVITY

WARNING:- DURING USE THE APPLIANCE BECOMES
HOT.  CARE SHOULD BE TAKEN TO AVOID TOUCHING
HEATING ELEMENTS INSIDE THE OVEN.

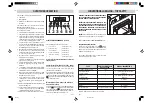
IMPORTANT! BEFORE GRILLING, ALWAYS FIT THE
PROTECTIVE HEAT SHIELD, AS SHOWN BELOW. THIS
WILL PREVENT DAMAGE TO THE CONTROLS AND
SURROUNDING FURNITURE. GRILLING SHOULD
NEVER BE UNDERTAKEN WITH THE GRILL/TOP OVEN
DOOR CLOSED

NEVER

 allow young children near the appliance when

the grill is in use as the surfaces get extremely hot.

DO NOT LINE THE GRILL PAN WITH ALUMINIUM FOIL.

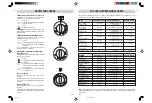
COOKING WITH GRILL (1800 W)

Turn the top oven control knob (2 ) to the       symbol.
The centre top element will come on and it radiate heat
directly onto the food.  Allow the grill to preheat for 1
minute before starting to cook.

The cooking chart below serves as a guide as to how
various food types may be cooked.

After use, always return controls to the off position

FOOD

Toasting of bread products

1 or 2

2 - 4 mins

Small cuts of meat

1

8 - 12 mins (Depends on size and

Sausages, bacon

thickness)

Chops, etc.

1

20 - 25 mins (Depends on size and

Gammon Steaks

 thickness)

Fish. Whole,Fillets

1

6 - 8 mins

Fish in breadcrumbs

1

10 - 15 mins

Pre-cooked potatoe

1

10 - 12 mins

Pizzas

1

10 - 12 mins

Browning of food

1

 (dish placed directly on shelf)

5 - 7 mins

SHELF POSITION FROM

BASE OF OVEN

APPROX. COOKING TIME

G93 Seg

9-05-2002, 10:50

10

Summary of Contents for 640SS

Page 1: ...ocal rate Before contacting a service agent please note the following details about your cooker Model Number Serial Number Date of Purchase In order to provide a complete service history for your Bell...

Page 2: ...es Timer flashing The electricity supply to the cooker has been interrupted The timer must be reset Timer bleeping Place your finger on the timer function touch pad to cancel Grill keeps turning This...

Page 3: ...D MAINTENANCE Oven Cavities The oven should be cleaned after each use to remove cooking residuals and grease which if burnt on when the oven is used again will form deposits or stains as well as unple...

Page 4: ...azard WARNING For your own safety always switch off your cooker at the mains supply and allow to cool before cleaning Never use excessive amounts of water to clean your cooker and remember that your c...

Page 5: ...ins 450g 20 25mins Beef 2 150 20 25mins 450g 20 25mins Pork leg 2 140 160 40 45mins 450g 40 50mins INSTRUCTIONS FOR THE INSTALLER ELECTRICAL CONNECTION WARNING THIS APPLIANCE MUST BE EARTHED Your cook...

Page 6: ...OOKERY NOTES Oven Positions fan oven Since the distribution of heat in the fan oven is very even most foods will cook satisfactorily on any shelf position but the shelves should be evenly spaced To en...

Page 7: ...en baking biscuits for example this additional economy saving feature saves on further time and money Baking temperatures are lower therefore the loss of nutrition value of the food is reduced as is a...

Page 8: ...3 0 20 0 1 5 0 1 0 0 160 C to 270 C 17 TOP OVEN TEMPERATURE CHARTS The charts on the following pages serve as a guide for positioning and temperature for cooking in the top oven Always preheat the ove...

Page 9: ...placed on the base of the oven The correct positioning of food is indicated in the temperature charts on page 17 These charts are a guide only giving approximate cooking temperatures and times To suit...

Page 10: ...3 Set minute minder using button 1 Set cooking time using button 2 Set end of cooking time using button 3 Set manual operation using button 4 using buttons 5 and 6 Note Always use manual operation wh...

Page 11: ...his error will be signalled immediately by the sound of the buzzer and theAUTO symbol flashing on the display A programming error can be corrected by changing the duration or end of the cooking time A...

Page 12: ...unattended during the heating or cooking period 4 Do not try to fry too much food at a time especially frozen food This only lowers the temperature of the oil or fat too much resulting in greasy food...

Page 13: ...unattended during the heating or cooking period 4 Do not try to fry too much food at a time especially frozen food This only lowers the temperature of the oil or fat too much resulting in greasy food...

Page 14: ...his error will be signalled immediately by the sound of the buzzer and theAUTO symbol flashing on the display A programming error can be corrected by changing the duration or end of the cooking time A...

Page 15: ...3 Set minute minder using button 1 Set cooking time using button 2 Set end of cooking time using button 3 Set manual operation using button 4 using buttons 5 and 6 Note Always use manual operation wh...

Page 16: ...placed on the base of the oven The correct positioning of food is indicated in the temperature charts on page 17 These charts are a guide only giving approximate cooking temperatures and times To suit...

Page 17: ...3 0 20 0 1 5 0 1 0 0 160 C to 270 C 17 TOP OVEN TEMPERATURE CHARTS The charts on the following pages serve as a guide for positioning and temperature for cooking in the top oven Always preheat the ove...

Page 18: ...en baking biscuits for example this additional economy saving feature saves on further time and money Baking temperatures are lower therefore the loss of nutrition value of the food is reduced as is a...

Page 19: ...OOKERY NOTES Oven Positions fan oven Since the distribution of heat in the fan oven is very even most foods will cook satisfactorily on any shelf position but the shelves should be evenly spaced To en...

Page 20: ...ins 450g 20 25mins Beef 2 150 20 25mins 450g 20 25mins Pork leg 2 140 160 40 45mins 450g 40 50mins INSTRUCTIONS FOR THE INSTALLER ELECTRICAL CONNECTION WARNING THIS APPLIANCE MUST BE EARTHED Your cook...

Page 21: ...azard WARNING For your own safety always switch off your cooker at the mains supply and allow to cool before cleaning Never use excessive amounts of water to clean your cooker and remember that your c...

Page 22: ...D MAINTENANCE Oven Cavities The oven should be cleaned after each use to remove cooking residuals and grease which if burnt on when the oven is used again will form deposits or stains as well as unple...

Page 23: ...es Timer flashing The electricity supply to the cooker has been interrupted The timer must be reset Timer bleeping Place your finger on the timer function touch pad to cancel Grill keeps turning This...

Page 24: ...ocal rate Before contacting a service agent please note the following details about your cooker Model Number Serial Number Date of Purchase In order to provide a complete service history for your Bell...

Reviews: