G93
G93
11
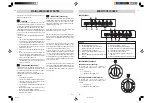
OVEN TIMER OPERATION
To set timer to switch OFF automatically
(with cooking duration from 0 hours 01
minute to 23 hours 59 minutes)
Set the main oven thermostat to the required cooking
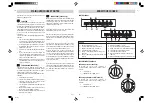
temperature. Set the cooking duration by pressing button
2 and setting the length of cooking time with buttons 5
or 6. The AUTO and symbols will appear on the
display. At the end of the cook duration the oven will
switch off, the symbol will disappear from the
display, AUTO symbol will flash and the buzzer will sound
and continue for 7 minutes or until button 4 is pressed
once. If cooking is complete, return the main oven
thermostat to the off position.
To set timer to switch OFF automatically (with end of
cooking time from 0 hours 01 minute to 23 hours 59
minutes)
Set the main oven thermostat to the required cooking
temperature. Set the cooking duration by pressing button
3 and setting the end of cooking time with push button6.
The AUTO and symbols will appear on the display.
At the end of cooking time the oven will switch off, the
i
symbol will disappear from the display and the
AUTO symbol will flash and the buzzer will sound and
continue for 7 minutes or until button 4 is pressed once.
If cooking is complete, return the main oven thermostat
to the off position.
To set timer to switch ON and OFF
automatically (with the start of cooking
time delayed from 0 hours 01 minutes to
10 hours 00 minutes)
Set the main oven thermostat to the required cooking
temperature. First programme the cooking time, by
pressing button 2 and setting the length of cooking time
with buttons 6. Both the AUTO and symbols will
appear on the display. Set the stop time by pressing
button 3 and setting the time with button 6.
The symbol will disappear from the display, and
the oven will switch off.
The symbol will reappear on the display again when
cooking in the oven starts. At the end of the cooking
time the oven will switch off, the symbol will disappear
from the display, the AUTO symbol will flash and the
buzzer will sound and continue for 7 minutes or until
button 4 is pressed once. If cooking is complete, return
the main oven thermostat to the off position.
Manual operation
Manual operation is possible only when the automatic
programming has finished or after having cancelled it
by pressing push button 4. The AUTO symbol disappears
from the display and the symbol appears on the
display.
Buzzer
The buzzer goes off at the end of a programme or at the
end of the minute minder function and lasts for 7
minutes. If you wish to stop it before press button 4.
There are three different buzzer tones: to select the one
you want, press push button 2 when the time of day is
displayed.
Correcting/canceling the programme set
There will be an automatic programming error if the
time shown on the clock is between the cooking start
time and the cooking end time. This error will be
signalled immediately by the sound of the buzzer and
the AUTO symbol flashing on the display. A programming
error can be corrected by changing the duration or end
of the cooking time. Any programme that has been set
can be corrected or adjusted at any time by pressing
the corresponding programming button and then button
5 or 6. To cancel a programme, correct the time set to
show “0.00” on the display. If the cooking time is
cancelled the end of cooking time is also cancelled and
vice versa. The oven turns off automatically and the
AUTO symbol flashes on the display.
Press button 4 to set the programmer to manual
operation.
The correct time of day cannot be corrected when the
automatic operation programme is working.
14
USING A CERAMIC HOB - GENERAL INFORMATION
WARNING: Extreme caution should be taken to avoid
steam burns and hot surfaces when cleaning up
spillage on the hot hob surface.
Always clean up any spillage immediately with a clean
cloth or a paper towel to avoid unnecessary damage to
the hob. Always ensure that the base of the utensil is
dry before placing on the ceramic hob.
When cooking food which contains sugar (most food)
or syrup, use a utensil which is large enough to prevent
boil over or spillage.
Sugar spillage will permanently
damage the hob and therefore should be cleaned
off with care immediately.
If sugar spillage has
occurred, remove it as long as it is still hot with a metal
handled razor-blade scraper commercially available.
This will avoid any damage.
NEVER LET IT COOL BEFORE REMOVING.
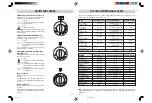
KNOB POSITION
TYPE OF FOOD
1
1 or 2
To melt butter, chocolate, etc.
1 or 2
3 or 4
To heat food, keep small amounts of water simmering, to heat sauces
containing egg yolk and butter. To simmer meat, fish, vegetables, fruit.
3
5 or 6
To heat solid and liquid foods, keep water boiling, defrost frozen foods, make
omelettes containing 2-3 eggs, various types of cooking.
4 or 5
7 or 8
To cook foods, jams, etc.
5 or 6
9 or 10
To seal meats and fry fish.
6
11 or 12
Frying potatoes, etc. bringing water too the boil.
This chart must only be treated as a guide - the performance of the appliance is dependant on the type of cookware
used and the quantity of food being cooked.
Hob Hot Indicator
The appliance features a hob hot warning system which illuminates when any element is used, and remains on
following use, until the cooking surface has cooled to a safe touchable temperature.
REMEMBER
1. Purchasing a new pan will not necessarily mean it
will have a flat base, always check before buying.
2. Using the correct pans and utensils will result in
maximum contact with the hob and maximum
efficiency as with any type of electric hob.
ELEMENT CONTROLS
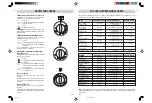
The elements are operated by turning the control knob (4)
in either direction until the point of the control knob is
adjacent to the desired setting -
0
for off, between
1
and
3
for low simmering, and between
3
and
6
for fast
simmering and boiling.
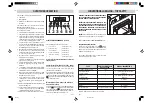
The cooking chart below serves as a guide as to what
kind of food each energy setting is suitable for.
G93 Seg
9-05-2002, 10:50
11

