background image

G93

G93

8

50°C  to

230°C

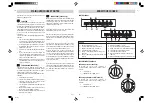
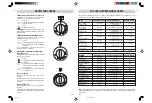
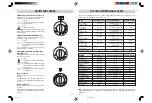
Thermostat/ Grill control knob for top oven  (2)

By turning the control knob clockwise different
temperature and grill settings can be selected:

0

= Oven off

= Oven temperature settings. Top and bottom

elements  operating.

= 280°C

= Grill element operating

Warning: 

When the top oven / grill is in use please note

that the elements will become extremely hot and  cause
injury if touched.

Thermostat control knob for bottom oven  (3)

By turning the control knob clockwise different
temperature settings can be selected:

0

= Oven off

= Oven temperature settings. The element on

the rear wall of the oven, plus circulating fan
will operate.

The oven light always remains on whenever the
thermostat is in the on position.

Thermostat control knob for bottom oven
with fan grill (7)

By turning the control knob clockwise different cooking
functions can be selected:

0

= Oven off

= Oven light on, which stays on for all functions

= Fan defrost

= Fan oven temperature settings. The element

on the rear wall of the oven, plus circulating
fan will operate

= Fan grill temperature settings. Grill heating

element and fan on

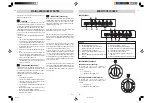
Top oven neon (5)

When this light is on the top oven elements are
operating.

This light switches on and off to indicate when the oven
has reached its set temperature and the elements are
cycling.

Main oven neon (6)

When this light is on the main oven elements are
operating.

This light switches on and off to indicate when the oven
has reached its set temperature and the elements are
cycling.

50°C  to

250°C

Max

KNOW YOUR COOKER

75°C  to

230°C

270

180

230

230

200

150

100

160°C  to

270°C

17

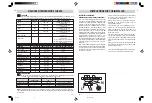
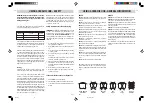
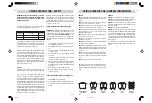
TOP OVEN TEMPERATURE CHARTS

The charts on the following pages serve as a guide for positioning and temperature for cooking in the top oven.
Always preheat the oveuntil the indicator neon (5) goes out.

MEAT

Temperature (ºC)

Time (approximate)

Position in Oven

Beef /  Lamb

170 / 180

35 mins per 450g (1 lb)

1 or base

(slow roasting)

+ 35 mins over

Beef / Lamb

190 / 200

35-40 mins per 450g (1 lb)

1 or base

(foil covered)

Pork

170 / 180

40 mins per 450g (1 lb)

1 or base

(slow roasting)

+ 40 mins over

Pork

190 / 200

40 mins per 450g (1 lb)

1 or base

(foil covered)

Veal

170 / 180

40-45 mins per 450g (1 lb)

1 or base

(slow roasting)

+ 40 mins over

Veal

190 / 200

40-45 mins per 450g (1 lb)

1 or base

(foil covered)

Poultry / Game

170 / 180

25-30 mins per 450g (1 lb)

1 or base

(slow roasting)

+ 25 mins over

Poultry / Game

190 / 200

25-30 mins per 450g (1 lb)

1 or base

(foil covered)

Casserole Cooking

150

2 - 21/2 hrs

1 or base

Scones

210 / 220

10 - 15

1

Small Cakes

170 / 180

20 - 25

1

Victoria Sandwich

160 / 170

20 - 30

Base

Sponge Sandwich

170 / 180

20 - 25

Base

(fatless)

Swiss Roll

200 / 210

10 - 15

1

Semi-rich fruit cakes

150 / 160

60 - 75 (7" tin)

Base

Rich Fruit Cakes

130 / 140

Time dependant on size

Base

Shortcrust Pastry

190 / 200

Time dependant on recipe

Base

Puff Pastry

200 / 210

Time dependant on recipe

1

Yorkshire Pudding

190 / 200

30 - 40

1

Individual Yorkshire

200 / 210

20 - 30

1

Puddings
Milk Pudding

130 / 140

90 - 120

Base

Baked Custard

140 / 150

40 - 50

1

Meringues

100

150 - 180

1

BAKING

Temperature (ºC)

Time (approximate) in mins Position in Oven

Note:

 If soft tub margarine is used for cake making, we would recommend using the all in one method and to

reduce the temperature by 10°C. Temperatures recommended in this chart refer to cakes made with block margarine
or butter only.

G93 Seg

9-05-2002, 10:50

8

Summary of Contents for 640SS

Page 1: ...ocal rate Before contacting a service agent please note the following details about your cooker Model Number Serial Number Date of Purchase In order to provide a complete service history for your Bell...

Page 2: ...es Timer flashing The electricity supply to the cooker has been interrupted The timer must be reset Timer bleeping Place your finger on the timer function touch pad to cancel Grill keeps turning This...

Page 3: ...D MAINTENANCE Oven Cavities The oven should be cleaned after each use to remove cooking residuals and grease which if burnt on when the oven is used again will form deposits or stains as well as unple...

Page 4: ...azard WARNING For your own safety always switch off your cooker at the mains supply and allow to cool before cleaning Never use excessive amounts of water to clean your cooker and remember that your c...

Page 5: ...ins 450g 20 25mins Beef 2 150 20 25mins 450g 20 25mins Pork leg 2 140 160 40 45mins 450g 40 50mins INSTRUCTIONS FOR THE INSTALLER ELECTRICAL CONNECTION WARNING THIS APPLIANCE MUST BE EARTHED Your cook...

Page 6: ...OOKERY NOTES Oven Positions fan oven Since the distribution of heat in the fan oven is very even most foods will cook satisfactorily on any shelf position but the shelves should be evenly spaced To en...

Page 7: ...en baking biscuits for example this additional economy saving feature saves on further time and money Baking temperatures are lower therefore the loss of nutrition value of the food is reduced as is a...

Page 8: ...3 0 20 0 1 5 0 1 0 0 160 C to 270 C 17 TOP OVEN TEMPERATURE CHARTS The charts on the following pages serve as a guide for positioning and temperature for cooking in the top oven Always preheat the ove...

Page 9: ...placed on the base of the oven The correct positioning of food is indicated in the temperature charts on page 17 These charts are a guide only giving approximate cooking temperatures and times To suit...

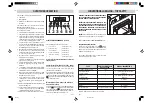
Page 10: ...3 Set minute minder using button 1 Set cooking time using button 2 Set end of cooking time using button 3 Set manual operation using button 4 using buttons 5 and 6 Note Always use manual operation wh...

Page 11: ...his error will be signalled immediately by the sound of the buzzer and theAUTO symbol flashing on the display A programming error can be corrected by changing the duration or end of the cooking time A...

Page 12: ...unattended during the heating or cooking period 4 Do not try to fry too much food at a time especially frozen food This only lowers the temperature of the oil or fat too much resulting in greasy food...

Page 13: ...unattended during the heating or cooking period 4 Do not try to fry too much food at a time especially frozen food This only lowers the temperature of the oil or fat too much resulting in greasy food...

Page 14: ...his error will be signalled immediately by the sound of the buzzer and theAUTO symbol flashing on the display A programming error can be corrected by changing the duration or end of the cooking time A...

Page 15: ...3 Set minute minder using button 1 Set cooking time using button 2 Set end of cooking time using button 3 Set manual operation using button 4 using buttons 5 and 6 Note Always use manual operation wh...

Page 16: ...placed on the base of the oven The correct positioning of food is indicated in the temperature charts on page 17 These charts are a guide only giving approximate cooking temperatures and times To suit...

Page 17: ...3 0 20 0 1 5 0 1 0 0 160 C to 270 C 17 TOP OVEN TEMPERATURE CHARTS The charts on the following pages serve as a guide for positioning and temperature for cooking in the top oven Always preheat the ove...

Page 18: ...en baking biscuits for example this additional economy saving feature saves on further time and money Baking temperatures are lower therefore the loss of nutrition value of the food is reduced as is a...

Page 19: ...OOKERY NOTES Oven Positions fan oven Since the distribution of heat in the fan oven is very even most foods will cook satisfactorily on any shelf position but the shelves should be evenly spaced To en...

Page 20: ...ins 450g 20 25mins Beef 2 150 20 25mins 450g 20 25mins Pork leg 2 140 160 40 45mins 450g 40 50mins INSTRUCTIONS FOR THE INSTALLER ELECTRICAL CONNECTION WARNING THIS APPLIANCE MUST BE EARTHED Your cook...

Page 21: ...azard WARNING For your own safety always switch off your cooker at the mains supply and allow to cool before cleaning Never use excessive amounts of water to clean your cooker and remember that your c...

Page 22: ...D MAINTENANCE Oven Cavities The oven should be cleaned after each use to remove cooking residuals and grease which if burnt on when the oven is used again will form deposits or stains as well as unple...

Page 23: ...es Timer flashing The electricity supply to the cooker has been interrupted The timer must be reset Timer bleeping Place your finger on the timer function touch pad to cancel Grill keeps turning This...

Page 24: ...ocal rate Before contacting a service agent please note the following details about your cooker Model Number Serial Number Date of Purchase In order to provide a complete service history for your Bell...

Reviews: