background image

G93

G93

3

INTRODUCTION

Your Belling Cooker

Thank you for purchasing a new Belling electric Cooker. Its stylish and practical design will enhance
your kitchen and make cooking a pleasure. Dependant on model, your cooker features a large fan
oven with a fan grill function (643SS only), a separate grill / top oven and a ceramic hob with one
halogen hotplate (643SS only).There is also a clock/timer which features a minute minder and an
automatic main oven switch on and off feature.

Even if you have used an electric cooker before, it is important that you read these instructions
thoroughly before starting to cook, as there may be many new features not featured on your previous
cooker. Pay particular attention to the installation and safety instructions.

Getting Help

If you have any problems with installation, operating or cooking with your Belling cooker please check
through these instructions thoroughly to make sure that you have not missed anything. If you still
need help, then please contact (including a daytime telephone number if possible):

Consumer Relations Department

Belling Appliances Ltd.,

Talbot Road,

Mexborough.

South Yorkshire.

S64 8AJ.

BELLING HELPLINE Tel: 01709 579902

Please quote the cooker model and serial number with your enquiries. This can be found on the rating
label, positioned on the rear of your cooker.

WARNING! For your own safety, make sure that these instructions on installation, use and
maintenance are followed.

We advise you to keep these instructions in a safe place for future reference.

If you sell or transfer ownership of this product, please pass on these instructions to the new owner.

22

CLEANING AND MAINTENANCE

Oven Cavities

The oven should be cleaned after each use to remove
cooking residuals and grease which, if burnt on when
the oven is used again, will form deposits or stains, as
well as unpleasant smells.

Do not leave vinegar, coffee, milk, salty water or the
juice of lemon or tomato on enamelled surfaces for any
length of time. Always wash the accessories used. The
rod shelves, heat deflector shield and grill can be cleaned
using household cream cleanser with a nylon pad or
sponge. Heavier soiling may require the use of a
proprietary oven cleaner or steel wool pad, but do not
allow these to contact the the door seals or plastic parts
of the cooker.

Only use oven cleaners which carry the Vitreous Enamel
Development Council’s Approvals symbol, and always
follow the manufacturers instructions for use. Do not
spray or wash the elements or thermostat bulb with
acid-based products (check the information label on the
product you are using).

The manufacturer cannot be held responsible for any
damages caused by incorrect cleaning.

Oven Door Seal

The oven door seal guarantees the correct functioning
of the oven. We recommend you:

clean it, avoiding abrasive  products.

check its condition from time to time.

CHANGING THE OVEN LAMP
- main oven only

WARNING : TURN OFF THE COOKER ELECTRICITY
SUPPLY BEFORE REPLACING LAMP.

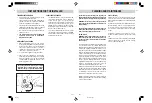
Open the oven door and remove the rod shelves. Do
use a thick cloth to grip the light glass dome (C) and
bulb, unscrew anti-ciockwise and lift out.

Reach into the aperture, and carefully unscrew the faulty
lamp (L) anti-clockwise. Fit replacement lamp (15W
300°C SES), and refit dome. If necessary clean dome in
warm soapy water before drying completely.

NOTE: 

Oven bulb replacement is not covered by your

guarantee, please telephone our Spares Department on
01709 579907 for a replacement.

L

C

P

M

G93 Seg

9-05-2002, 10:49

3

Summary of Contents for 640SS

Page 1: ...ocal rate Before contacting a service agent please note the following details about your cooker Model Number Serial Number Date of Purchase In order to provide a complete service history for your Bell...

Page 2: ...es Timer flashing The electricity supply to the cooker has been interrupted The timer must be reset Timer bleeping Place your finger on the timer function touch pad to cancel Grill keeps turning This...

Page 3: ...D MAINTENANCE Oven Cavities The oven should be cleaned after each use to remove cooking residuals and grease which if burnt on when the oven is used again will form deposits or stains as well as unple...

Page 4: ...azard WARNING For your own safety always switch off your cooker at the mains supply and allow to cool before cleaning Never use excessive amounts of water to clean your cooker and remember that your c...

Page 5: ...ins 450g 20 25mins Beef 2 150 20 25mins 450g 20 25mins Pork leg 2 140 160 40 45mins 450g 40 50mins INSTRUCTIONS FOR THE INSTALLER ELECTRICAL CONNECTION WARNING THIS APPLIANCE MUST BE EARTHED Your cook...

Page 6: ...OOKERY NOTES Oven Positions fan oven Since the distribution of heat in the fan oven is very even most foods will cook satisfactorily on any shelf position but the shelves should be evenly spaced To en...

Page 7: ...en baking biscuits for example this additional economy saving feature saves on further time and money Baking temperatures are lower therefore the loss of nutrition value of the food is reduced as is a...

Page 8: ...3 0 20 0 1 5 0 1 0 0 160 C to 270 C 17 TOP OVEN TEMPERATURE CHARTS The charts on the following pages serve as a guide for positioning and temperature for cooking in the top oven Always preheat the ove...

Page 9: ...placed on the base of the oven The correct positioning of food is indicated in the temperature charts on page 17 These charts are a guide only giving approximate cooking temperatures and times To suit...

Page 10: ...3 Set minute minder using button 1 Set cooking time using button 2 Set end of cooking time using button 3 Set manual operation using button 4 using buttons 5 and 6 Note Always use manual operation wh...

Page 11: ...his error will be signalled immediately by the sound of the buzzer and theAUTO symbol flashing on the display A programming error can be corrected by changing the duration or end of the cooking time A...

Page 12: ...unattended during the heating or cooking period 4 Do not try to fry too much food at a time especially frozen food This only lowers the temperature of the oil or fat too much resulting in greasy food...

Page 13: ...unattended during the heating or cooking period 4 Do not try to fry too much food at a time especially frozen food This only lowers the temperature of the oil or fat too much resulting in greasy food...

Page 14: ...his error will be signalled immediately by the sound of the buzzer and theAUTO symbol flashing on the display A programming error can be corrected by changing the duration or end of the cooking time A...

Page 15: ...3 Set minute minder using button 1 Set cooking time using button 2 Set end of cooking time using button 3 Set manual operation using button 4 using buttons 5 and 6 Note Always use manual operation wh...

Page 16: ...placed on the base of the oven The correct positioning of food is indicated in the temperature charts on page 17 These charts are a guide only giving approximate cooking temperatures and times To suit...

Page 17: ...3 0 20 0 1 5 0 1 0 0 160 C to 270 C 17 TOP OVEN TEMPERATURE CHARTS The charts on the following pages serve as a guide for positioning and temperature for cooking in the top oven Always preheat the ove...

Page 18: ...en baking biscuits for example this additional economy saving feature saves on further time and money Baking temperatures are lower therefore the loss of nutrition value of the food is reduced as is a...

Page 19: ...OOKERY NOTES Oven Positions fan oven Since the distribution of heat in the fan oven is very even most foods will cook satisfactorily on any shelf position but the shelves should be evenly spaced To en...

Page 20: ...ins 450g 20 25mins Beef 2 150 20 25mins 450g 20 25mins Pork leg 2 140 160 40 45mins 450g 40 50mins INSTRUCTIONS FOR THE INSTALLER ELECTRICAL CONNECTION WARNING THIS APPLIANCE MUST BE EARTHED Your cook...

Page 21: ...azard WARNING For your own safety always switch off your cooker at the mains supply and allow to cool before cleaning Never use excessive amounts of water to clean your cooker and remember that your c...

Page 22: ...D MAINTENANCE Oven Cavities The oven should be cleaned after each use to remove cooking residuals and grease which if burnt on when the oven is used again will form deposits or stains as well as unple...

Page 23: ...es Timer flashing The electricity supply to the cooker has been interrupted The timer must be reset Timer bleeping Place your finger on the timer function touch pad to cancel Grill keeps turning This...

Page 24: ...ocal rate Before contacting a service agent please note the following details about your cooker Model Number Serial Number Date of Purchase In order to provide a complete service history for your Bell...

Reviews: