34
35
Daily Cleaning
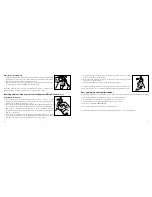
• Clean your instrument with a soft, dry cloth and the small brush. Do
this above a soft surface or table to avoid damage if the instrument
falls.
• Do not use water or fluids.
Cleaning the vent
Your hearing instrument may have a vent, a small canal through the entire
instrument. If so, clean it regularly.
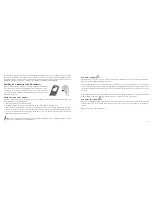
• Insert the vent-cleaning tool – plastic line with handle – into the vent.
Push the cleaning line completely through the vent.
• Wipe off any collected earwax.
• Pull the line out and wipe off again.
• Repeat this until all the earwax has been removed.
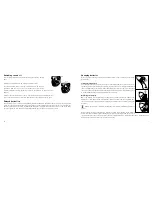
Wax guard
Your hearing instrument is usually equipped with a wax guard. The wax guards are available in a set,
containing red guards, blue guards, and a dedicated tool for changing them. Use red wax guards for right
instruments and blue guards for left instruments. For IIC and some custom products instruments, a white
wax guard is used for both left and right instruments.
For changing HF3 (red/blue) wax filters, the following steps are needed:
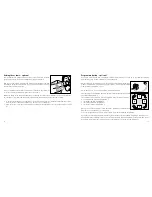
1. Brush the sound outlet area with the sound outlet pointed down.
2. Insert the threaded end of the wax filter tool into the used wax filter, and gently rotate clockwise.
3. Gently pull until the used filter is removed.
4. Discard the used filter in the slot located in the wax filter kit by pressing it into the center, sliding it to one
end of the slot, and pull until the filter is discarded.
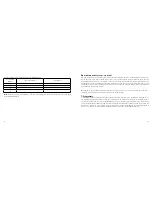
5. Flip the wax filter tool around, locate a new filter in the dial, and press the tip of the tool into the center
of the dial.
6. Gently pull the new filter out of the dial.
7. Align the new filter to the sound outlet.
8. Press the new filter into the opening, and simultaneously pull and rock back and forth until the new wax
filter is in place.
For changing Cerustop (white) wax filters, the following steps are needed:
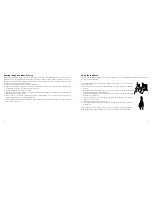
1. To remove the old wax guard, insert the removal side of the wax guard tool into the used wax guard so
that the shaft of the tool is touching the rim of the wax guard. Slowly pull the wax guard straight out.
2. To insert the new wax guard, gently press the replacement side of the wax guard tool straight into the
hole of the sound outlet until the outer ring lies flush with the outside of the receiver. Pull the tool straight
out -the new wax guard will remain in place.


