background image

12 

13


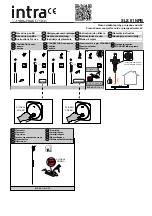
Place the catch plate on the toilet 
with the arrows pointing towards 
the toilet tank.


Align the bolts guides over the 
toilet bolt holes. 


Secure the catch plate to  
the toilet by hand tightening  
the bolts. 


Push it until you hear a “click.”


When the product is not installed 
well, it may cause leakage. 


Adjust as needed before 
tightening bolts. 

*Do not over tighten bolts

3.  Fix the catch plate onto  

the toilet. 

4. Push the main body 

towards the catch  

plate completely.

INSTALLATION

1.  Remove the seat from the 

existing toilet body.


Release the nuts, and then remove 
the seat and cover from it. 


Store the seat in a proper place 
for future use. 


Turn off the water and flush  
the toilet. 


Disconnect the existing  
water hose. 


Attach the T-valve to the bottom 
of the toilet. 


Ensure the rubber washer is 
properly seated and attach the 
original water hose to the T-valve. 

2.  Install the T-valve. 

Cone washer

Align

Summary of Contents for Bio Bidet LW-1000

Page 1: ...OWNER S MANUAL LW 1000 ...

Page 2: ...ant Safeguards Cautions 4 Cautions Before Installation 6 Main Unit Parts 8 Remote Control 10 Dimensions 11 PRODUCT INSTALLATION Installation 12 PRODUCT OPERATION Operation 16 Maintenance Cleaning 24 Settings 26 Specifications 29 WARRANTY Warranty 30 ...

Page 3: ...rtified electrician where extension cords are necessary DANGER To reduce the risk of electrocution Do not use while bathing Do not place or store product where it can fall or be pulled into a tub or sink Do not place in or drop into water or other liquid Do not reach for a product that has fallen into water Unplug immediately WARNING To reduce the risk of burns electrocution fire or injury to pers...

Page 4: ...cian or serviceman if the grounding instructions are not completely understood or if in doubt as to whether the product is properly grounded This product is for use on a nominal 120V circuit and has a grounding plug that looks like the plug illustrated in sketch A in Figure 1 A temporary adapter which looks like the adapter illustrated in sketches B and C may be used to connect this plug to a 2 po...

Page 5: ...S Top Mount Metal Bolt x2 T Valve 7 8 Top Mount Rubber Nut x2 Bidet Water Supply Hose Washer x2 Catch Plate Bracket Holder Side Control Panel Heated Seat Bidet Occupied Sensor Wash Turbo Lid Power Plug Dryer Night Light ...

Page 6: ...idet function 1 minute To stop any operations To run the wash function 1 minute Start Dry function 3 minutes To control water pressure To control dry temperatue To control water temperature off low mid high Yellow ECO 1 Green ECO 2 ON OFF Starts automatic nozzle cleaning 3 cycles Nozzle then extends for manual cleaning To control seat temperature off low mid high To control the nozzle position Chi...

Page 7: ... not over tighten bolts 3 Fix the catch plate onto the toilet 4 Push the main body towards the catch plate completely INSTALLATION 1 Remove the seat from the existing toilet body Release the nuts and then remove the seat and cover from it Store the seat in a proper place for future use Turn off the water and flush the toilet Disconnect the existing water hose Attach the T valve to the bottom of th...

Page 8: ...only recommended in areas with known hard water issues If a filter is used it must be replaced every 3 months This product is designed and intended for use exclusively with Bio Bidet DIB water filters The purchase or use of any other water filter is not the responsibility of BBC Innovation LLC As such any use of non DIB water filters is prohibited and will void the warranty for those Bio Bidet pro...

Page 9: ...again to stop oscillate function The specialized water spray in Turbo function helps relieve constipation 3 Dry Temperature Control 4 Pulse Dryer operates for 3 minutes Dryer temperature is adjustable by pressing or buttons 5 Levels Dryer effect will be improved if you wipe the moisture lightly before operating the drying function When pressing the Massage button during the operation of Wash Bidet...

Page 10: ... seat temperature Lower water temperature Nozzle position is adjustable 5 positions 7 Water Pressure Control 8 Stop All operations will stop When pressing the stop button for 3 seconds unit will turn off Press Stop Wash Bidet or Turbo to turn on Water pressure is adjustable 5 levels If the water or screen filters become blocked it may cause low water pressure Regularly check the water and screen f...

Page 11: ...justable 4 levels Off Low Middle High To reduce the chance of low temperature burns the seat has a safety feature that tuns to low temperature 35 C 95 F when seat is occupied for more than 15 minutes consecutively When selecting Nozzle Cleaning while not seated the nozzle cleans itself 3 times The nozzle extends and stops for manual cleaning process Clean the nozzle with a brush and press STOP but...

Page 12: ...conds If the seat sensor is deactivated the unit works without occupying the seat and select features cannot be controlled Features Night Light Silent mode Nozzle cleaning 15 Seat Sensor Bypass 16 Reset Press and hold the Stop button on the auxiliary panel for 5 seconds After 3 seconds the seat will power off Keep holding another 2 seconds and the seat will power back on This completes the factory...

Page 13: ... directly onto the surface Clean the body after removing the power plug from the outlet Be sure no water splashes onto the power plug or outlet Be careful of not dropping any chemical detergents or toilet cleaner on the main body or supply hose to avoid damage 3 Extended Non Use 4 Draining of Tank When the bidet seat is not being used for an extended period of time unplug the unit and drain the ta...

Page 14: ... and hold the Stop button for 5 seconds After 3 seconds the seat will power off Keep holding another 2 seconds and the seat will power back on This completes the factory reset process ON 6 Automatic tank draining and for longer than 3 seconds Automatic tank draining feature will be deactivated OFF Problem Check List Completely out of order Check if the power plug is not connected Check if the powe...

Page 15: ...re control Room temp 122 F Heater capacity 250W Safety device Thermal fuse Bi metal Feed water temp tolerance range 37 95 F recommended 54 95 F Usage room temp tolerance range 37 104 F recommended 50 95 F Dimension Elongated 18 6 470 x 20 8 528 x 7 0 178 Round 18 6 470 x 19 5 496 x 7 0 178 Weight Net weight Gross weight Elongated 17 4 lb 17 4 Round 17 1 lb 17 2 Please check the following table and...

Page 16: ...cumstances in accordance with the user guide during the warranty period Although it is within the warranty period we will charge the repair service fee etc repair parts travel expense if it falls under the following cases Voiding Warranty Defects occurred from the user s careless handling Defects occurred from usage with incorrect power voltage E g 220V was used to the 110V product Defects occurre...

Page 17: ...Thank You Technical Support Customer Service 7900 S Route 31 Crystal Lake IL 60014 T 847 458 2334 U S TOLL FREE 877 339 5214 support biobidet com www biobidet com ...

Reviews: