10
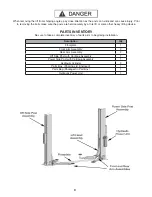
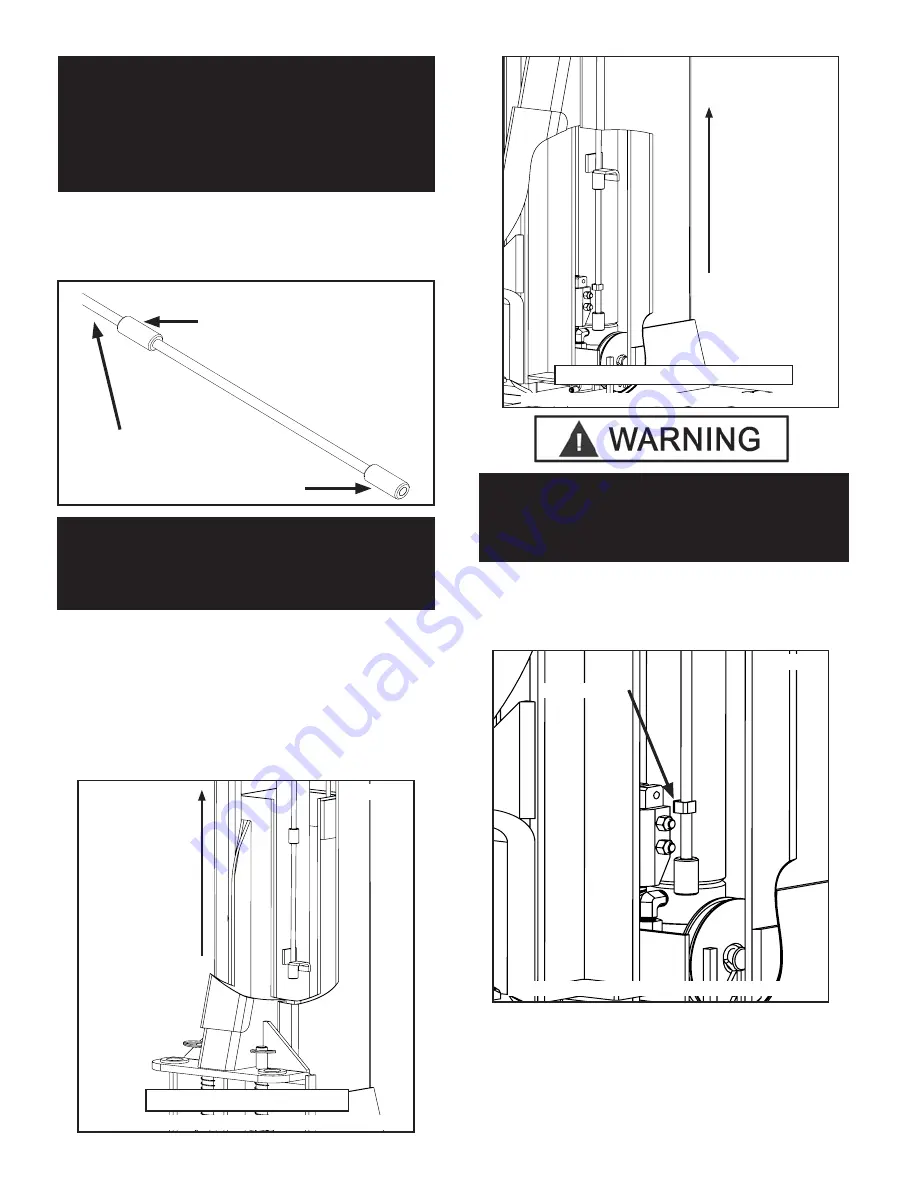
4. Identify the correct cable button on the end of each
equalizer cable that corresponds to your desired lift con-
fi guration. (See Fig 3.6) Secure the correct cable button at
the carriage lock plate located inside each carriage.
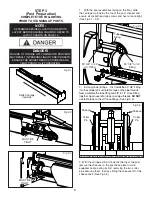
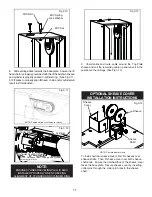
5. Route the correct button end of the equalizer cable
for your chosen lift layout through the cable retainer,
located inside the carriage on the front carriage tube wall,
up to where the Top Plate sheave would be, and coil the
remaining cable up and leave it in the post above the car-
riage. (See Fig 3.7-3.8)
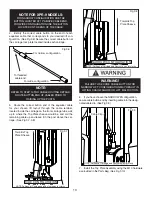
6. If you have chosen the NARROW lift confi guration,
secure cable button end by inserting cable into the desig-
nated cable clip. (See Fig 3.9)
7. Install the Top Plate Assembly using the M10 hardware
as provided in the Parts Bag. (See Fig 3.10)
NOTE FOR XPR-9 MODELS:
FOR NARROW CONFIGURATION USE THE
BUTTON LOCATED AT 12” ABOVE CABLE END.
FOR WIDE CONFIGURATION USE THE BUTTON
LOCATED ON THE END OF THE CABLE.
For narrow confi guration
For wide confi guration
To threaded
cable end
Fig 3.6
NOTE:
REFER TO STEP 10 FOR CABLE ROUTING DETAILS.
ROUTE BUTTON END OF CABLES PRIOR TO
RAISING UP THE POSTS.
WARNING!
FAILURE TO SECURE CABLE BUTTON FOR
NARROW LIFT CONFIGURATION MAY RESULT IN
LIFTING CHAIN FAILURE OR LIFT MALFUCTION.
Fig 3.9
Cable Clip
NOTE: Portions of Carriage and Post cut away for clarity
Fig 3.8
Towards Top
Plate Sheave
NARROW CONFIGURATION
NOTE: Portions of Carriage and Post cut away for clarity
Fig 3.7
Towards Top
Plate Sheave
WIDE CONFIGURATION
NOTE: Portions of Carriage and Post cut away for clarity


