13
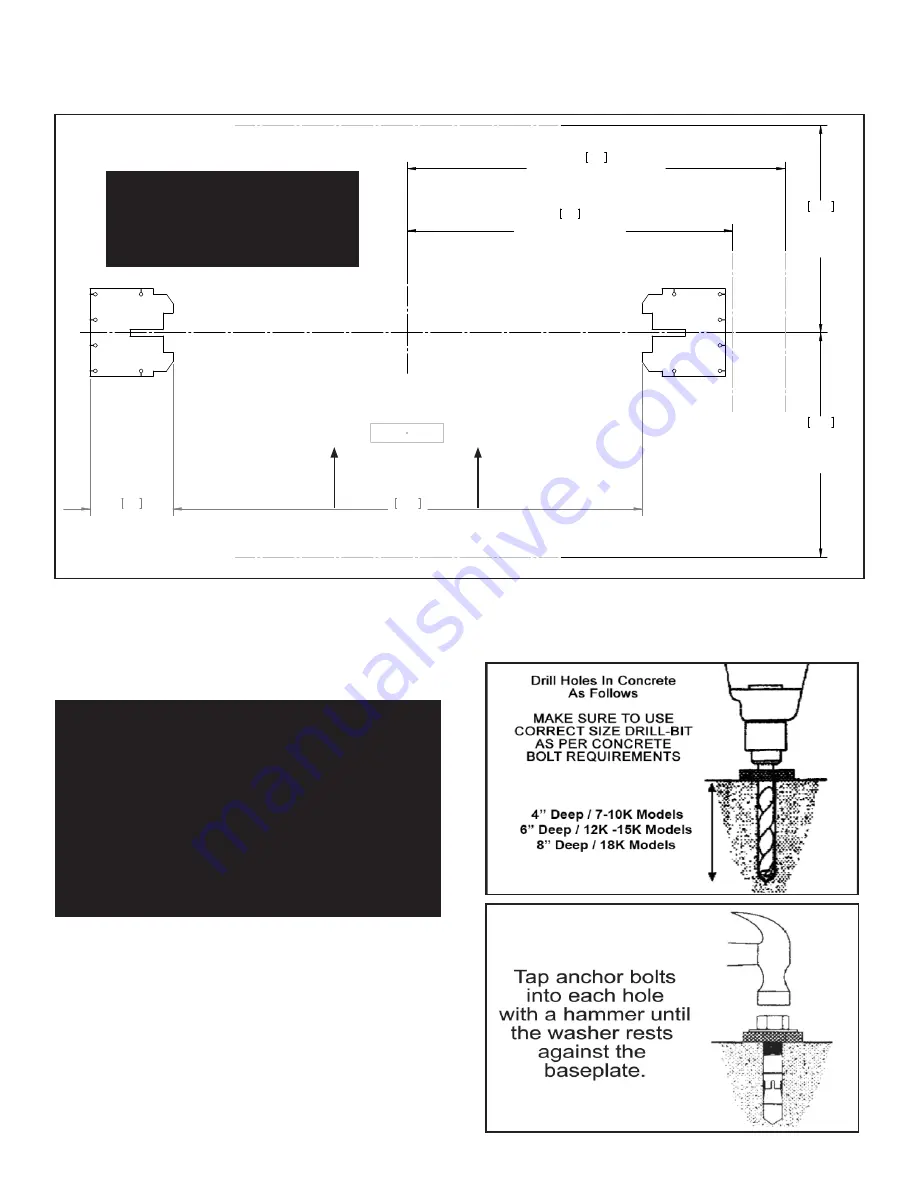
CLEARANCES
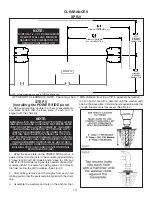
XPR-9
NOTE: Lift measurements shown in WIDE confi guration
LIFT HEIGHT CLEARNACE NOTE: There must be a 1” MIN distance from top of lift to nearest obstruction.
483
19"
2717
107"
1881
MINIMUM TO NEAREST
BAY OR OBSTRUCTION
74"
2185
MINIMUM TO NEAREST WALL
86"
3353
MINIMUM
TO NEAREST
OBSTRUCTION
132"
3963
MINIMUM
TO NEAREST
OBSTRUCTION
156"
APPROACH
NOTE:
SUBTRACT 6-1/2” FROM MINIMUM
NEAREST WALL AND MINIMUM
NEAREST BAY DIMENSION FOR
NARROW CONFIGURATION.
STEP 5
(Installing the POWER SIDE post)
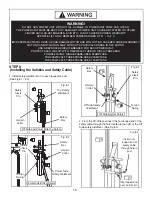
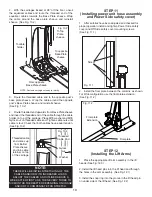
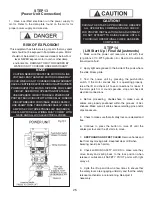
1. Before proceeding, double the check measurements
and make certain that the base plate of each post is
aligned with the chalk line.
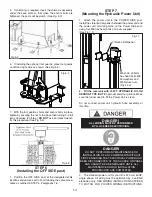
2. Using the base plate on the POWER SIDE post as a
guide, drill each anchor hole in the concrete (approximately
4” deep for 9K and 10K models and 6” deep for 12K and
15K; 8” for 18K models) using a rotary hammer drill and 3/4”
concrete drill-bit. To ensure full holding power, do not ream
the hole or allow the drill to wobble. (See Fig. 5.1)
3. After drilling, remove dust thoroughly from each hole
making certain that the posts remain aligned with the chalk
line.
4. Assemble the washers and nuts on the anchors then
tap into each hole with a hammer until the washer rests
against the base plate. If shimming is required be sure that
enough threads are left exposed. (See Fig. 5.2)
NOTE:
BENDPAK LIFTS ARE SUPPLIED WITH INSTALLATION
INSTRUCTIONS AND CONCRETE FASTENERS MEET-
ING THE CRITERIA AS PRESCRIBED BY THE AMERI-
CAN NATIONAL STANDARD "AUTOMOTIVE LIFTS
- SAFETY REQUIREMENTS FOR CONSTRUCTION,
TESTING, AND VALIDATION" ANSI/ALI ALCTV-2006.
LIFT BUYERS ARE RESPONSIBLE FOR ANY SPECIAL
REGIONAL STRUCTURAL AND/OR SEISMIC ANCHOR-
ING REQUIREMENTS SPECIFIED BY ANY OTHER
AGENCIES AND/OR CODES SUCH AS THE UNIFORM
BUILDING CODE (UBC) AND/OR INTERNATIONAL
BUILDING CODE (IBC).
Fig 5.1
Fig 5.2


