background image

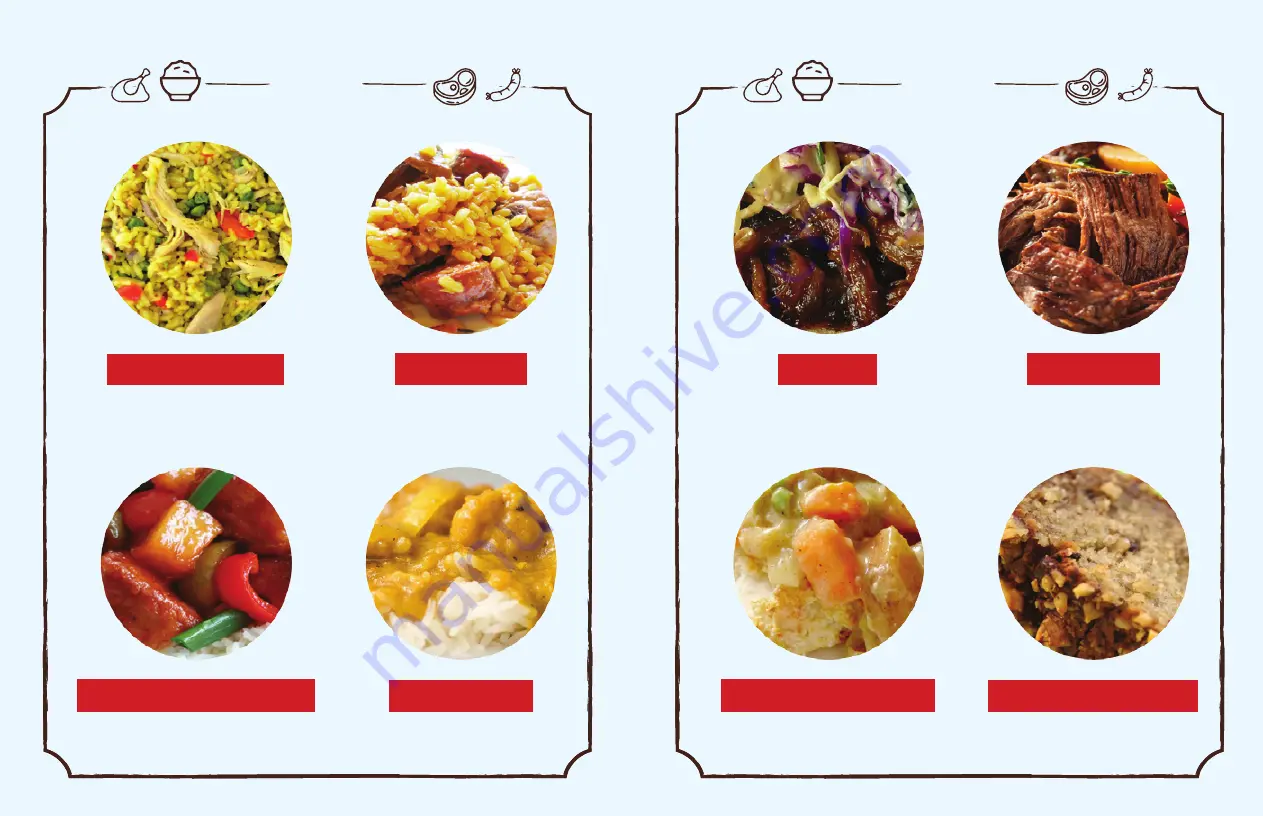
 TIME TO COOK

EVERYTHING!

prep time: 20 minutes

cooking time: 20 minutes

prep time: 18 minutes

cooking time: 13-15 minutes

prep time: 15 minutes
cooking time: 10 minutes

CHICKEN AND RICE

prep time: 18 minutes

cooking time: 10-12 minutes

CHICKEN CURRY

RICE AND PORK

SWEET AND SOUR CHICKEN

 TIME TO COOK

EVERYTHING!

prep time: 15 minutes

cooking time: 20 minutes

prep time: 10 minutes

cooking time: 8 hours

prep time: 20 minutes
cooking time: 6 hours

BBQ BEEF

prep time: 20 minutes

cooking time: 60 minutes

BANANA WALNUT CAKE

POT ROAST

CHICKEN POT PIE STEW

18

19

Summary of Contents for BC-99210

Page 1: ... Connect with us ClubBeneCasa www ClubBeneCasa com BC 99210 P R E S S U R E C O O K E R USER MANUAL AND RECIPE GUIDE FOR HOUSEHOLD USE ONLY SOLAMENTE PARA USO DOMESTICO Model BC 99210 Modelo BC 99210 8 LITER 8 LITROS 1300W 9 28 lb 5 92 Kg in 14 3 L x 13 3 W x 14 3 H cm 36 5 L x 34 W x 36 5 H Recyclable Carton ...

Page 2: ...intended use 11 Extreme caution must be used when moving a pressure cooker containing hot liquids 12 This appliance cooks under pressure Always ensure there is a minimum of 1 measuring cup of liquid for the cooker to pressurize Improper use may result in scalding injuries Make certain the unit is properly closed before operating 13 For all pressure cooking settings do not fill the unit over 2 3 fu...

Page 3: ...ing extended cord must be arranged so that it will not drape over a countertop or tabletop where it can be pulled on by children or tripped over accidentally This appliance has a polarized plug one blade is wider than the other As a safety feature to reduce the risk of electrical shock this plug is intended to fit in a polarized outlet only one way If the plug does not fit fully in the outlet reve...

Page 4: ...al locking the lid PRESSURE SAFETY VALVE Safety feature that allows excess pressure to escape if too much pressure builds up SELF LOCKING LID Safety lid that will not open until no pressure remains in the pot SEALING RING GASKET Silicone ring that creates an airtight seal that lets the pressure cooker come to pressure ANTI BLOCK SHIELD Metal shield covers the opening of the pressure release valve ...

Page 5: ...ng rack and the anti block shield is mounted properly on the pressure release valve A properly seated sealing ring can be shifted with a bit of effort clockwise or counterclockwise inside the sealing ring rack After use remove any food debris from the sealing ring and anti block shield Condensation collector cup should be cleaned with warm spay water after each use Keep the sealing ring clean to a...

Page 6: ... complete or press Keep Warm Cancel to terminate the program 2 Release pressure by one of the following approaches Quick Release Turn the pressure release valve to the Steam position to let out steam until all the pressure is released Caution Please keep hands and face away from the opening on the top of the pressure release valve when using Quick Release The escaping steam is hot and can cause sc...

Page 7: ...sure cooker will beep at the end of the cooking time 6 When cooking is finished let the pressure drop on its own also called the natural release feature or release immediately by turning the pressure regulator valve towards STEAM in short bursts also called the quick release method until the pressure is reduced CAUTION When turning the knob to release pressure hot steam liquid will be ejected Do n...

Page 8: ...pad must be cleaned after each use Wipe with a soft damp cloth and be sure to dry thoroughly 9 Never use abrasive cleaners or scouring pads to clean any of the parts NOTE Store the pressure cooker with the lid resting upside down on the removable cooking pot This will protect the valves knobs and pressure regulator on the top of the lid If the pressure cooker is stored with the lid sealed stale od...

Page 9: ...cone ring 5 Float valve unable to rise inner pot Add water according to the recipe Float valve obstructed by the lid locking pin Close the lid completely see 6 Steam comes out from exhaust valve non stop Pressure release handle not Turn the release handle to Pressure control fails Contact support online 7 Display remains blank power cord power Inspect the power cord to check that the power outlet ...

Page 10: ... AND RICE prep time 18 minutes cooking time 10 12 minutes CHICKEN CURRY RICE AND PORK SWEET AND SOUR CHICKEN TIME TO COOK EVERYTHING prep time 15 minutes cooking time 20 minutes prep time 10 minutes cooking time 8 hours prep time 20 minutes cooking time 6 hours BBQ BEEF prep time 20 minutes cooking time 60 minutes BANANA WALNUT CAKE POT ROAST CHICKEN POT PIE STEW 18 19 ...

Page 11: ...oked 2 cups chicken broth 2 cups diced tomatoes 6 oz can tomato paste cup chopped onion salt pepper to taste Serving 6 8 Prep Time 18 minutes Cooking Time 13 15 minutes under pressure DIRECTIONS Heat 1 tbsp of vegetable oil in the pressure cooker using BROWN setting Add onions green and red bell peppers and brown for 2 minutes Add chicken and soy sauce cook for 3 minutes Add sweet and sour sauce v...

Page 12: ...before opening the lid serve and enjoy INGREDIENTS 300 gms mashed ripe bananas 160 gms brown sugar 4 Grade B eggs whipped 100 gms butter 50ml milk 300 gms sifted self rising flour tsp soda bicarbonate 120g walnuts toasted diced Serving 6 Prep Time 15 minutes Cooking Time 20 minutes under pressure DIRECTIONS Mix cream of mushroom soup dry onion soup mix and water Place pot roast in slow cooker and ...

Page 13: ...spuma de leva obstruyen el dispositivo de liberación de presión salida de vapor 14 Compruebe siempre que los dispositivos de liberación de presión la manija de salida de vapor no estén obstruidos antes de usarla 15 No cubra el aparato ni las válvulas de presión ya que podría producirse una explosión 16 No lo utilice cerca de materiales inflamables incluidas cortinas y cortinas cuando esté en funci...

Page 14: ...recauciones importantes Instrucciones especiales para el juego de cables Descripción del aparato Antes de usar por primera vez Apertura segura de la tapa Preparación de la comida Solución de problemas 24 26 28 30 32 33 38 Este artefacto tiene un enchufe polarizado una clavija es más ancha que la otra Como medida de seguridad para reducir el riesgo de descarga eléctrica este enchufe está diseñado p...

Page 15: ...abrir la tapa hasta que la presión haya bajado a cero EMPAQUE DE GOMA Crea un sello apretado de aire que se necesita para que la olla funcione ESCUDO ANTI BLOQUE Tire hacia arriba para liberar el regulador de presión para limpieza EMBALSE DE CONDENSACIÓN Colecta el exceso de condensación durante la cocción FUNCIONES DE LA OLLA A PRESIÓN 29 28 Liberación de presión Manija fresca del tacto Mango de ...

Page 16: ...entado en el soporte y que el escudo anti bloqueo esté montado correctamente en el tubo de salida de vapor Un Empaque correctamente sentado se puede mover con un poco de esfuerzo hacia la derecha o hacia la izquierda en el interior del soporte Después de su uso retire cualquier objeto extraño del Empaque y del escudo anti bloqueo Mantenga el empaque limpio para evitar olores Lave el Empaque en agu...

Page 17: ...vantar la tapa Precaución No abra la tapa hasta que la presión dentro de la olla esté completa mente liberada Como medida de seguridad hasta que la válvula de flotador caiga hacia abajo la tapa está bloqueada y no se puede abrir APERTURA SEGURA DE LA TAPA 2 Compruebe que todas las piezas de la tapa están montadas correctamente Revise la válvula de flotador y la válvula de escape para obstrucciones...

Page 18: ...a válvula de flotador se elevará cuando la presión sea alcanzada La olla de presión sonará al final del tiempo de cocción 6 Cuando la cocción termine deje que la presión caiga por sí misma también llamada la función de liberación natural o libere la presión de inmediato girando la perilla del regulador de presión hacia STEAM en explosiones cortas también conocido como método de liberación rápida h...

Page 19: ...ón se encuentren en buen estado de funcionamiento antes de cada uso 1 Cuando la unidad se haya enfriado retire la tapa 2 Presione y gire la perilla del regulador de presión hacia la izquierda más allá de la posición VAPOR y quitar con cuidado 3 Gire la tapa y colóquela sobre una mesa Saque la envoltura contra cerradura Usando un cepillo identifique y elimine cualquier alimento o partículas extraña...

Page 20: ...empaque de la válvula del flotador El empaque de la válvula de flotador está desgas tado Remplace el empaque de la válvula de flotador 5 La válvula de flotador no se levanta Muy poca agua o ali mentos dentro de la olla Agregue agua de acuerdo a la receta Válvula de flotador está obstruida por el pasador de bloqueo de la tapa Cierre la tapa completamente y vaya a la sección de Preparación de la comida 6...

Reviews: