


33
13) PROGRAMMIERUNG
Die Programmierung der verschiedenen Funktionen der Zentrale erfolgt über das LCD Display an Bord der Zentrale indem die gewünschten Werte im Programmie-
rungsmenü, wie nachstehend beschrieben eingerichtet werden. Das Menü Parameter ermöglicht es einer Funktion einen numerischen Wert zuzuordnen, wie es bei
einem Trimmer der Fall ist. Das Menü der Logik ermöglicht es eine Funktion zu aktivieren oder deaktivieren, ähnlich wie bei der Einstellung eines Dip-Schalters. In
den Menüs Parameter und Logik können zudem noch andere Sonderfunktionen eingestellt werden, die je nach Modell oder Software-Version unterschiedlich sind.
13.1) GEBRAUCH DER PROGRAMMIERUNGSTASTEN
1 - Die Taste <PG> drücken, das Display blendet das erste Menü Installierung „INST“ ein.
2 - Mit der Taste <+> oder <-> das gewünschte Menü auswählen.
3 – Die Taste <PG> drücken, am Display wird die erste Funktion des Menüs sichtbar.
4 – Mit der Taste <+> oder <-> die gewünschte Funktion selektieren.
5 – Die Taste <PG> drücken, am Display wird der derzeitig für die selektierte Funktion eingestellte Wert sichtbar.
6 – Mit der Taste <+> oder <-> den für die Funktion gewünschten Wert selektieren.
7 – Die Taste <PG> drücken, am Display wird das Signal “PRG” sichtbar, welches die erfolgte Programmierung anzeigt.
13.2) BEMERKUNGEN
Durch gleichzeitiges Drücken von <+> und <->, innerhalb eines Funktionen-Menüs, wird zum vorherigen Menü zurückgekehrt, ohne Änderungen durchzuführen.
Durch gedrückt halten der Taste <+> oder der Taste <-> wird das zunehmende oder abnehmende Ablaufen der Werte beschleunigt.
Nach einer Wartezeit von 120s verlässt die Steuerzentrale den Programmiermodus und das Display schaltet sich aus.
Das Drücken der Taste <-> bei ausgeschaltetem Display entspricht einer Schritt-Schritt Steuerung.
Beim Einschalten der Karte wird ca. 5 s lang die Softwareversion angezeigt.
Die im Werk vorkonfigurierten Parameter und Logiken sehen eine typische Installierung vor.
14) PARAMETER, LOGIKEN UND SONDERFUNKTIONEN
In den nachstehenden Tabellen sind die einzelnen Funktionen der Steuerung beschrieben.
14.1) INSTALLIERUNG (
INST
)
MENU
FUNKTION
MIN-MAX-(Default)
MEMO
BOOM
Die an der Schranke installierte Baumlänge auswählen.
Wert in Meter, von 3 bis 5 m (für alle LADY/LADY 5-Modelle) oder 7 bis 8 m (für andere Modelle)
einstellbar.
Die Einstellung der optimalen Geschwindigkeitswerte richtet sich nach der ausgewählten Baumlänge.
3/5 -7/8 (7-8*)
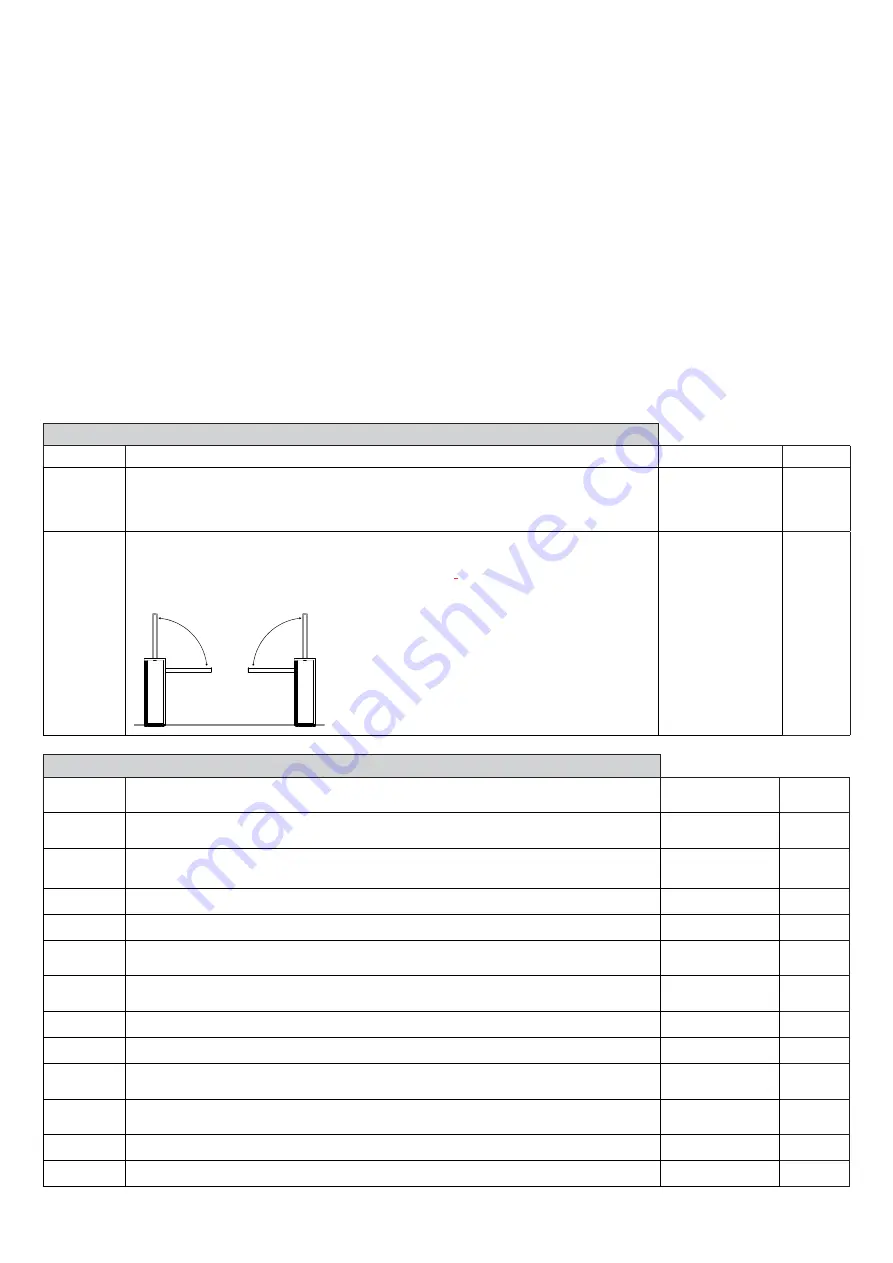
Pos
Die Richtung der Schrankenöffnung einstellen (siehe Abb. 2).
Das Zeichen
0---
zeigt die Schranke RECHTS (DX/RIGHT) DEFAULT-WERT an.
Das Zeichen
---0
zeigt die Schranke LINKS (SX/RIGHT) an
.
Stets die Richtung der Schrankenöffnung überprüfen; bei Bedarf die Richtung ändern. Jede
Änderung in diesem Menü schaltet automatisch eine AUTOSET-Prozedur ein.
RIGHT
(STANDARD)
LEFT
0---
= RIGHT
---0
= LEFT
( RIGHT )
14.2) PARAMETER (
PAR
)
MENU
FUNKTION
MIN-MAX-
(Default)
MEMO
TCA
Zeit für automatisches Schließen. Aktiv nur mit Logik „TCA“=ON.
Wenn die eingestellte Zeit abgelaufen ist, aktiviert die Steuerung einen Schließvorgang.
1-240-(20 s)
FSTS
Regelt die Öffnungs- und Schließgeschwindigkeit der Schranke (Standardgeschwindigkeit, vor
der Verlangsamung).
50-99-(99)
sldo
Regelt die Schrankengeschwindigkeit in der verlangsamten Phase des Öffnens* (Abb. 11 -slow Open).
20-70-(50)
sldc
Regelt die Schrankengeschwindigkeitin der verlangsamten Phase des Schließens* (Abb. 12 -slow Close).
20-70-(50)
tsmo
Stellt den Startpunkt in der verlangsamten Phase des Öffnens ein (Abb. 11-Start slow Open). Der
Wert ist auf Sekunden ausgedrückt.
1-99-(20)
tsmc
Stellt den Startpunkt in der verlangsamten Phase des Schließens ein (Abb. 12-Start slow Close).
Der Wert ist auf Sekunden ausgedrückt.
1-99-(20)
PMO
Regelt das Motordrehmoment, das beim Öffnen auf die Schranke einwirkt.*
1-99-(20)
PMC
Regelt das Motordrehmoment, das beim Schließen auf die Schranke einwirkt.*
1-99-(20)
PSO
Regelt das Motordrehmoment, das beim verlangsamten Öffnen auf die Schranke einwirkt* (Abb.
10 - Slow Open).
1-99-(20)
PSC
Regelt das Motordrehmoment, das beim verlangsamten Schließen auf die Schranke einwirkt* (Abb.
11 - Slow Close).
1-99-(20)
SeaU
Nicht benutzt
SEAR
Nicht benutzt
Summary of Contents for LADY 5
Page 5: ...5 8 G F G F D T 7 ...


