background image


11


PM096B00

PM096B00

PM096B00

PM096B00    

Secure  each  module  to  the  structure  using  four  M6  (¼”)

M6  (¼”)

M6  (¼”)

M6  (¼”)  stainless  steel  bolts,  with  nuts, 

washers, and lock washers per module. Only the mounting holes that are 322mm (12.6772 

inches) from the short end of the module can be used for the module to meet 5400 Pa design 

strength. 


3.2 Mounting with Clamps 


Clips and clamps are not provided by BenQ Solar. 


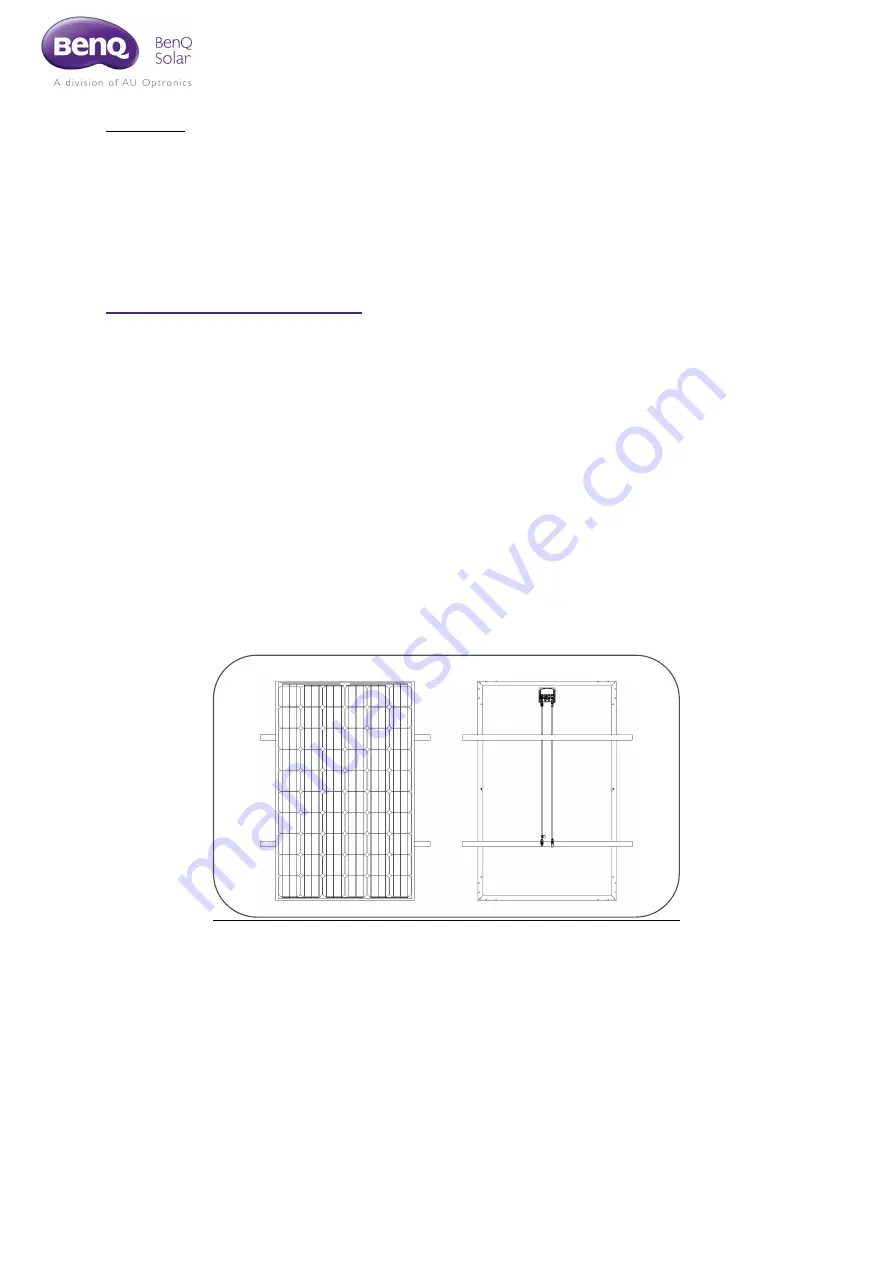
The clamping clips on the side frame must be in parallel – equidistant from the closest 

module frame corner (see Figure 1). 


Ensure the clamps are of sufficient design strength to allow for the maximum design 

pressure of the module.   


Measurements of D1, D2, D3, and D4 below describe the centerline of the mounting 

clamp to the closest corner of the module frame. 


There are two clamping methods available (see Clamp Location Details below for 

specific measurements): 

o


Clamp on the long side of the frame (see Figure 2, measurements below) 

o


Clamp on the short side of the frame (see Figure 3, measurements below) 


Figure 

Figure 

Figure 

Figure 1

11

1 Top view and back view of module installed on a parallel mounting structure 


Summary of Contents for Back contact 96 cells Series

Page 1: ...s 60 cells series 60 cells series PM250M01 PM250M01 PM250M01 PM250M01 PM060M02 PM060M02 PM060M02 PM060M02 Mo Mo Mo Mono no no no 60 cells with light weight series 60 cells with light weight series 60...

Page 2: ...1 Series 8 2 7 PM072P00 Series 8 2 8 PM060P00 Series 9 2 9 PM096B00 Series 9 Chapter 3 Mounting Guidelines Chapter 3 Mounting Guidelines Chapter 3 Mounting Guidelines Chapter 3 Mounting Guidelines 10...

Page 3: ...Certifications See BenQ Solar Limited Warranty document for full product warranty details and limitations Product Warranty version is based on warranty note in effect at the time of product manufactur...

Page 4: ...I LIFTING AND HANDLING NG AND HANDLING NG AND HANDLING NG AND HANDLING Do not lift the module or carry module by junction box or PV cables Do not drill holes in the frame This will void warranty and m...

Page 5: ...in order to prevent untrained persons from disconnecting the modules once installed There are no serviceable parts within the module Do not attempt to change or repair any part of the module Damaged m...

Page 6: ...ing the modules do not allow the anodized profiles frames to come into contact with contaminants such as cement or mortar which will cause damage to the anodic oxide coatings A A A Always contact your...

Page 7: ...ductor capacities fuse sizes and size of controls connected to PV output An additional 1 25 multiplier may be required by the NEC for sizing fuses and conductors as described in the NEC section 690 8...

Page 8: ...Weight Module Weight Module Weight 18 5 kg 41 1 lbs Power 240W 245W 250W 255W 260W Efficiency 14 9 15 2 15 5 15 8 16 1 Vmp V 29 9 30 3 30 6 30 8 31 2 Imp A 8 03 8 09 8 17 8 28 8 34 Voc V 37 0 37 2 37...

Page 9: ...L x W x H s L x W x H s L x W x H 1639 x 983 x 35 mm 64 52 x 38 7 x 1 38 in Module Weight Module Weight Module Weight Module Weight 10 5 kg 23 3 lbs Power 265W 270W 275W 280W 285W 290W Efficiency 16...

Page 10: ...39 8 44 Voc V 37 4 37 7 37 7 37 9 38 1 Isc A 8 69 8 76 8 83 8 87 8 93 Maximum Tolerance of Power 0 3 2 9 PM096B00 Series Module Dimensions L x W x H Module Dimensions L x W x H Module Dimensions L x...

Page 11: ...AND OR PRODUCT WARR AND OR PRODUCT WARR AND OR PRODUCT WARRANTY ANTY ANTY ANTY 3 1 Mounting with Screws Secure the module to the structure using only the factory drilled mounting holes Do not drill an...

Page 12: ...idistant from the closest module frame corner see Figure 1 Ensure the clamps are of sufficient design strength to allow for the maximum design pressure of the module Measurements of D1 D2 D3 and D4 be...

Page 13: ...12 Figure Figure Figure Figure 2 2 2 2 Long rail mounting clamp zone D1 and D2 Figure Figure Figure Figure 3 3 3 3 Short rail mounting clamp zone D3 and D4...

Page 14: ...298 mm 298 mm 11 73 in 11 73 in 11 73 in 11 73 in PM250M01 PM250M01 PM250M01 PM250M01 228 228 228 228 mm mm mm mm 8 98 8 98 8 98 8 98 in in in in 428 428 428 428 mm mm mm mm 16 85 16 85 16 85 16 85 in...

Page 15: ...cation Details Module Clamp Location Details Module Clamp Location Details Module Clamp Location Details Long rail Long rail Long rail Long rail clamping for 5400 Pa design strength clamp between D1 D...

Page 16: ...ing radius of r 4x static steady r 5x dynamic cable diameter must be maintained The cable must be routed in a way that tensile stress on the conductor or connection s is avoided Figure Figure Figure F...

Page 17: ...f the nominal voltage BenQ Solar PV modules are supplied with or without cables according to where they are ordered If supplied without cables it is recommended that cables with cross sections between...

Page 18: ...nd contact The grounding screw and bolt are usually sold separately from the mounting equipment Please make sure the grounding screw breaks the anodized surface of the module frame around the holes An...

Page 19: ...ugh use of clamps that penetrate the anodization in conjunction with grounding of the mounting system or through direct grounding of the frames by attaching a copper wire to a grounding hole of each m...

Page 20: ...odules guarantees their insulation up to a DC voltage of The IEC 61730 certificate of these modules guarantees their insulation up to a DC voltage of The IEC 61730 certificate of these modules guarant...

Page 21: ...odule configurations for 1000V inverter Maximum series 1000V Product Voc 1 25 safety factor Example The Voc of PM200M00_200 is 30 4V then the maximum series parallel module configurations for 1000V in...

Page 22: ...roppings collecting on the module surface Thin layers of dust normal soiling that reduce the sun s intensity evenly are not dangerous and the power reduction is not as significant as other debris Clea...

Page 23: ...anodic oxide coatings is generally every six months When cleaning be sure not to damage or scratch this coating Dirt on the frame can generally be cleaned off using warm mildly soapy water and a fiber...

Page 24: ...duct meets or exceeds the requirements set forth by UL1703 for PV Modules This UL1703 Standard covers flat plate PV modules intended for installation on buildings and those intended to be freestanding...

Reviews: