Setting up the display
11
Setting up the display
Mounting the display
You can install the display on a vertical surface with a suitable wall mounting bracket or
on a horizontal surface with the optional desktop stands. Please pay attention to the
following notes during installation:
• This display should be installed by at least two adult persons. Attempting to install this
display by only one person may result in danger and injuries.
• Refer the installation to qualified technicians. Improper installation may cause the
display to fall or malfunction.
• The portrait function is for CP6501K only. To use the portrait function, the display
should be used with TTY21 trolley or TMY21 wall mount which should be purchased
separately. Read
for more information.
Installing the display on a wall
1. Place a clean, dry and lint-free cloth on a flat, horizontal and object-free surface.
Make sure that the size of the cloth is larger than the display.
2. Gently lay the display on the cloth with the LCD screen facing down.
3. Remove the desktop stands from the display if installed.
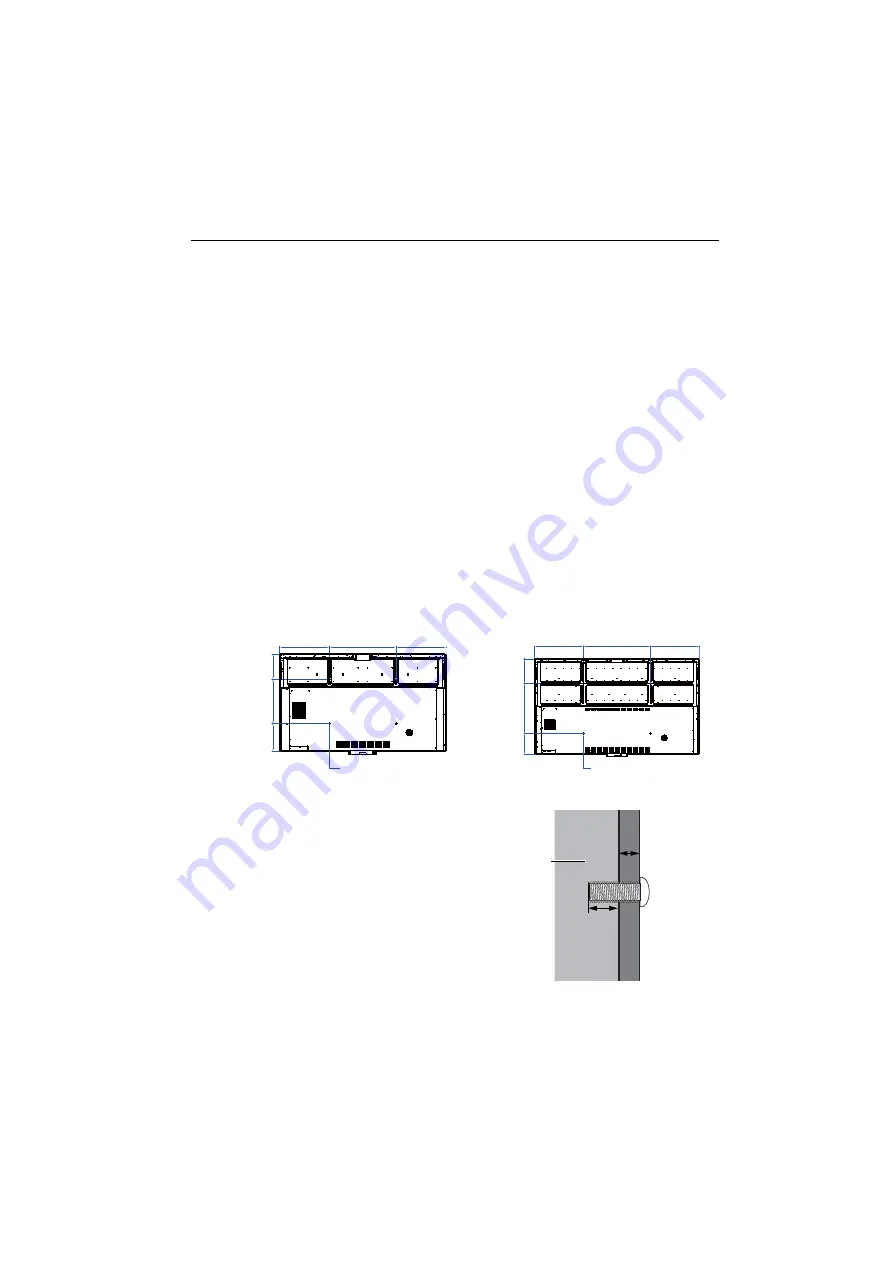
4. Identify the wall mounting screw holes on the back of the display as shown in the
illustration.
5. Install the wall mounting bracket on
the display and attach the display to
the wall according to the mounting
bracket’s instructions. The length of
the screw should exceed the
thickness of the wall mounting
bracket by at least 25 mm. Make sure
that all screws are tightened and
secured properly. (Recommended
torque: 470 - 635N•cm). The
mounting means should be strong
enough to bear the weight of the
display.
:$//028176&5(:7+5($'
'(37+0/
CP6501K
*Screw type: M8*25L
:$//028176&5(:7+5($'
'(37+0/
CP8601K
*Screw type: M8*25L
Thickness of
the wall
mounting
bracket
25 mm
(0.39")
LCD display
Summary of Contents for CP6501K
Page 1: ...CP6501K CP8601K Interactive Flat Panel User Manual ...
Page 16: ...Setting up the display 16 3 Tap to log out the AMS account ...
Page 41: ...Basic operations 41 3 Fill in the following fields and click Submit to create a new account ...
Page 62: ...Menu operations 62 Enter the proxy host name ...
Page 63: ...Menu operations 63 Enter the using channel ...
Page 95: ...Working with Android OS 95 3 Select the external source or switch source ...
Page 96: ...Apps 96 4 You can capture the current screen image and import the image to EZWrite 5 0 ...
Page 97: ...Working with Android OS 97 5 You can also save the current screen image as an image file ...
Page 102: ...Apps 102 6 Tap to stop the DuoMode Whiteboard ...
Page 103: ...Working with Android OS 103 7 Tap to unpair the IFPs Remote link 1 Open DuoBoards from APPs ...
Page 104: ...Apps 104 2 Select Remote Link 3 Select the IFP to be linked ...


