Basic operations
37
Initial setup
After you have connected the display to the power, you are ready to power on the
display. The first time you power on the display, you will be guided through a series of
setup screens. Follow the on-screen instructions or the steps below to start up your
display and complete the initial setup.
1. Turn on the display. Wait for the display to boot up with the BenQ screen. This may
take a moment.
2. Tap
Next
on the screen to begin. Follow the on-screen instructions to set up the
language, date and time, and network. Or your can skip some of these steps and
complete the setup later.
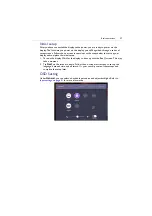
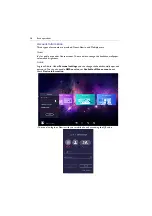
OSD Setting
Under
General
, you can select a desired input source and adjust backlight. Refer to
Summary of Contents for CP6501K
Page 1: ...CP6501K CP8601K Interactive Flat Panel User Manual ...
Page 16: ...Setting up the display 16 3 Tap to log out the AMS account ...
Page 41: ...Basic operations 41 3 Fill in the following fields and click Submit to create a new account ...
Page 62: ...Menu operations 62 Enter the proxy host name ...
Page 63: ...Menu operations 63 Enter the using channel ...
Page 95: ...Working with Android OS 95 3 Select the external source or switch source ...
Page 96: ...Apps 96 4 You can capture the current screen image and import the image to EZWrite 5 0 ...
Page 97: ...Working with Android OS 97 5 You can also save the current screen image as an image file ...
Page 102: ...Apps 102 6 Tap to stop the DuoMode Whiteboard ...
Page 103: ...Working with Android OS 103 7 Tap to unpair the IFPs Remote link 1 Open DuoBoards from APPs ...
Page 104: ...Apps 104 2 Select Remote Link 3 Select the IFP to be linked ...


