Recovering Your System
42
Recovering Your System
Should your system become unstable and you wish to restore it to its original state
or make a backup, you can do so following either of the methods below:
1. The Windows System Restore tool
2. The Quick Recovery function of your Joybook
3. The supplied Recovery CDs
It is recommended that you try the Windows System Restore tool before attempt-
ing the other 2 options.
System recovery is a data destructive process. You should backup all data and
applications prior to restoring. Please make sure your system is connected to AC
Power before continuing.
Using the Windows System Restore Tool
1. Start your Joybook to Windows.
2. Insert Recovery CD Disc 1 into the optical drive.
3. The Windows System Recovery tool will appear on the screen automatically.
Follow the on-screen instructions to proceed.
Using the Quick Recovery Function
Your Joybook provides you with a Quick Recovery method from its hard drive.
To recover using the quick recovery method:
1. Restart your Joybook.
2. During the restart process, press the F10 key when you see "F10 to Recover" on
the upper left part of the screen. A language selection menu will appear. Click to
select the language you prefer.
3. The following options will then appear on the screen. Use the touch pad or Tab
key to make your selection and then press the Enter key to confirm.
This process will ERASE ALL data in your system drive (C:) and restore the sys-
tem to default factory configuration: restores the system disk (C:) of your Joybook
to its original, factory preload state.
If this option is selected, all programs you installed or data you saved on drive C:
will be erased. However, data on drive D: will not be affected.
To backup all data in your system drive (C:) to drive (D:), please click "Next".
Please make sure your system is connected to AC Power before continuing: back
up all data on drive C: to drive D:. Click Next and the following options will
appear:
Start creating backup files. First please check your drive D: for sufficient free space
and the disk format must be FAT32. If you already have an old backup file on
drive D:, then the backup file will be replaced: start backing up all data on drive C:
to drive D:.
• Old backup data will be overwritten by a new one.
• Before you select this option, make sure that there is enough space on drive D: for
storing the backup data and the disk format of drive D: is FAT32. For example, to
back up 6GB data on drive C: to drive D:, you need at least 3GB free space on
drive D:. You can follow the steps below to check the used or available space and
disk format of drive C: and D:.
1. Click the Start button and then select My Computer.
2. Right-click on the C: or D: drive icon and then select Properties from the menu
that appears.
• Do not delete the file Mysystem.pqi in the MyBackup folder in drive D:. Otherwise
the backup data will be deleted.
Restore all data to system drive (C:) from the backup data in drive (D:): restore
drive C: using the backup data from drive D:.
• The default partitioning of your Joybook’s hard disk is as follows: 60% of the total
space for the C: disk, 2 GB for the hidden partition and the rest to the D: disk.
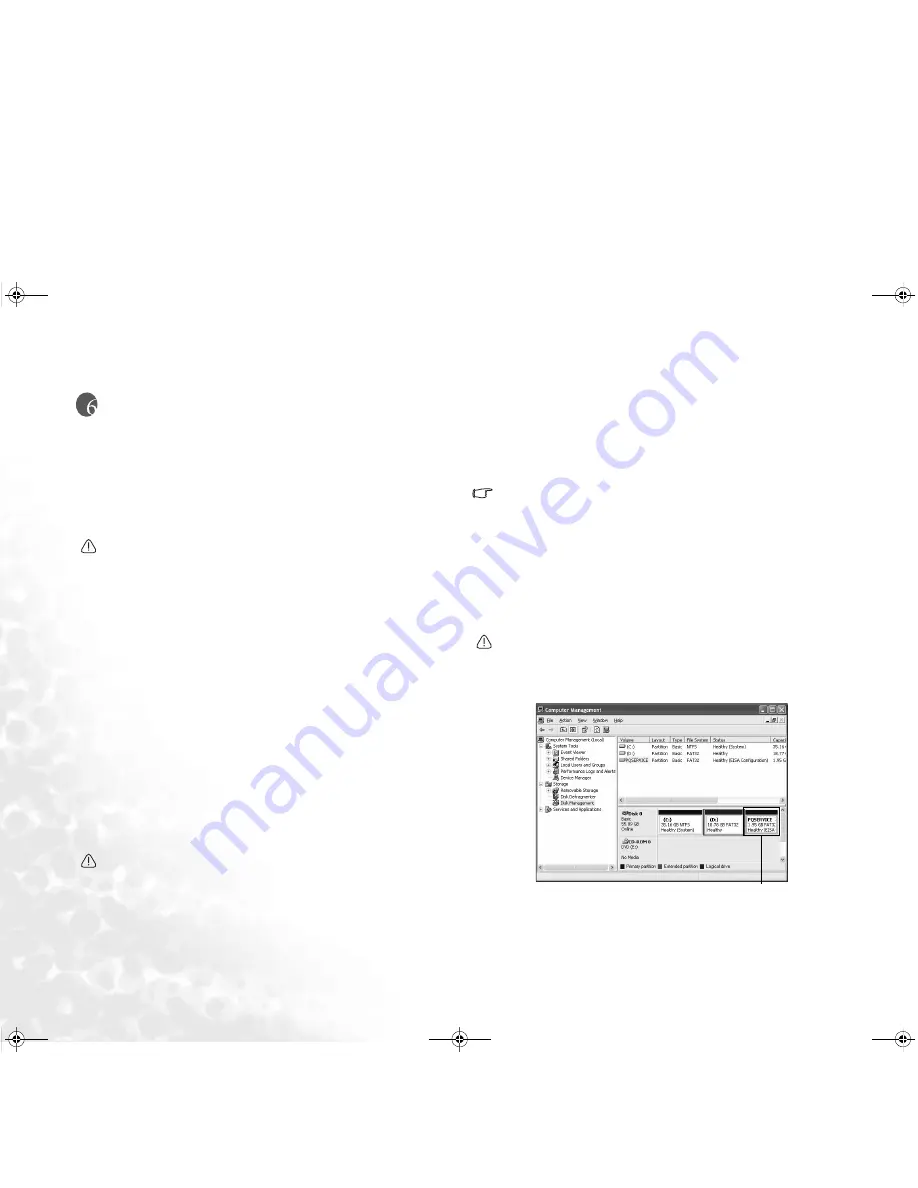
• The Quick Recovery data is stored in the PQSERVICE partition on the hard disk
drive. Do not delete this partition, or the Quick Recovery function will become
unavailable. If this happens, please contact your local BenQ service center for
help.
Do not delete this partition
JB R53.book Page 42 Tuesday, July 19, 2005 1:18 PM


